D.I.Y. Fairy Garden
Hello my Creative Friends,
I hope you are all well. In Today’s Tutorial I will show you how I made a Fairy Garden. I hope it provides you with some ideas so you can make your very own Fairy Garden. You can make an Indoor Fairy Garden or an Outdoor Fairy Garden. It is up to you and your preferences. My Fairy Garden will be for Indoor Home Decor.
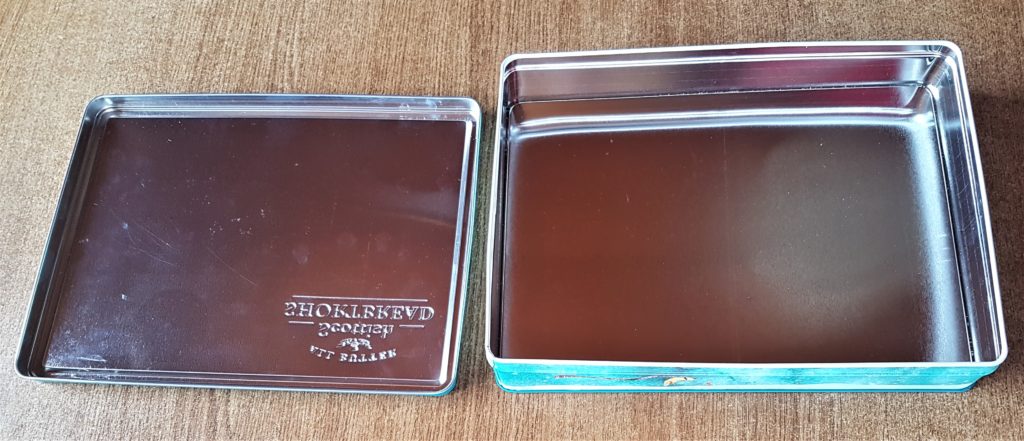
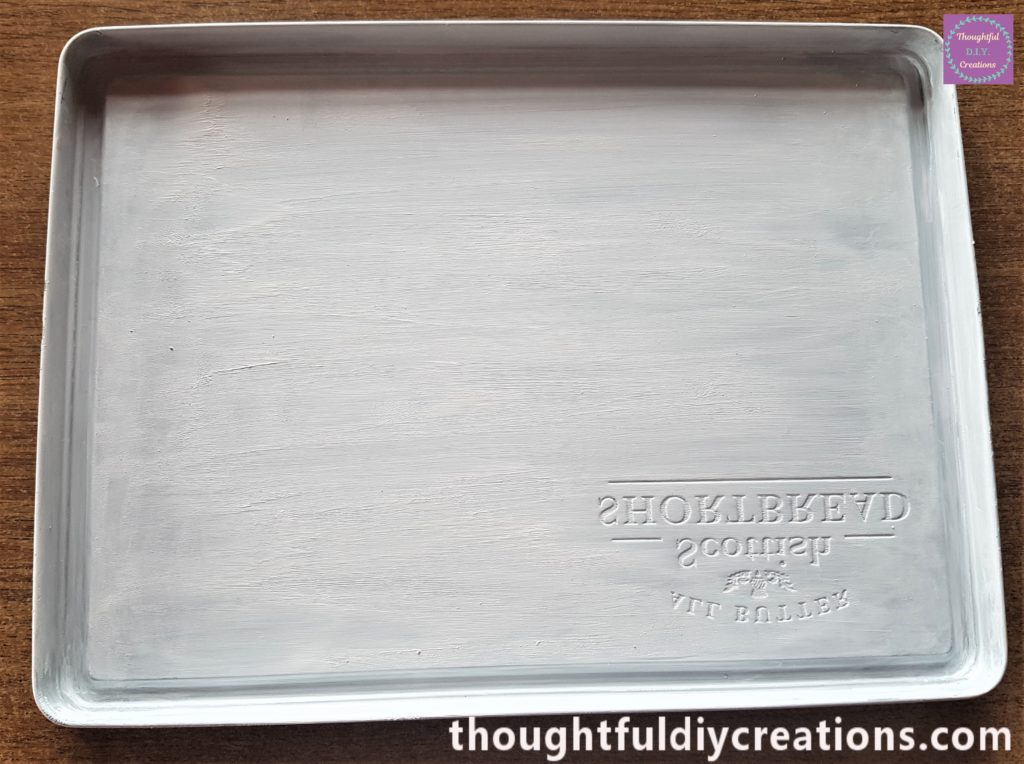
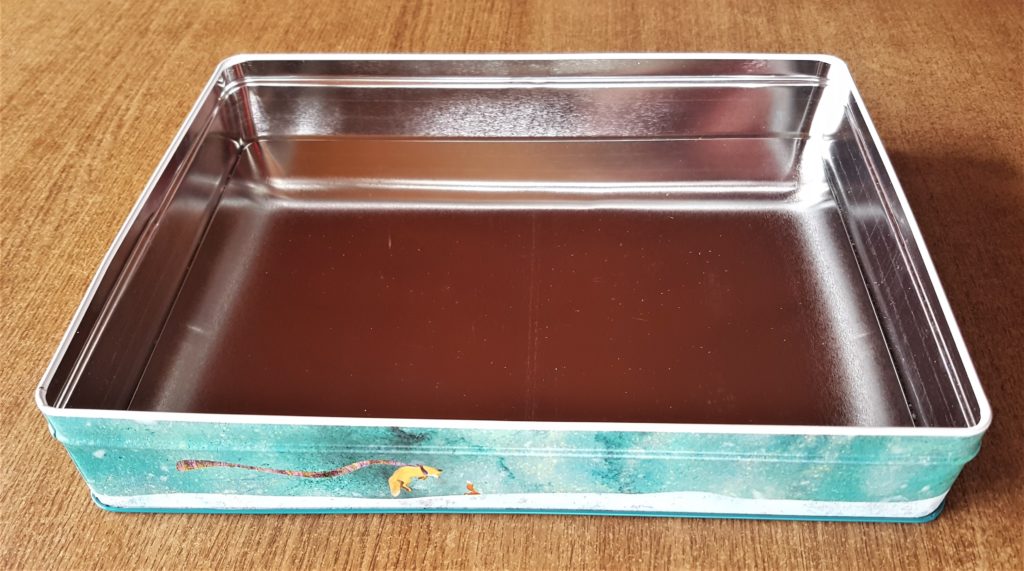
Biscuit Tin before Crafting
I had a Biscuit Tin in my Craft Stash. I thought it would be the perfect base for the Fairy Garden as it’s not too big and not too small.
This is the Lid taken off the Biscuit Tin and the view of the inside before it was turned into a Fairy Garden.
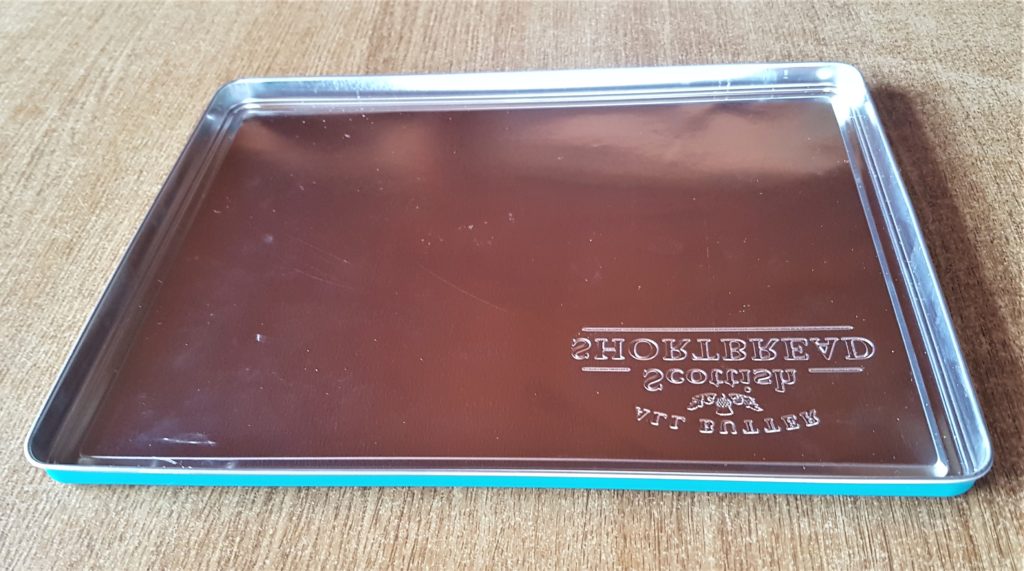
Here is the Lid before being Painted.
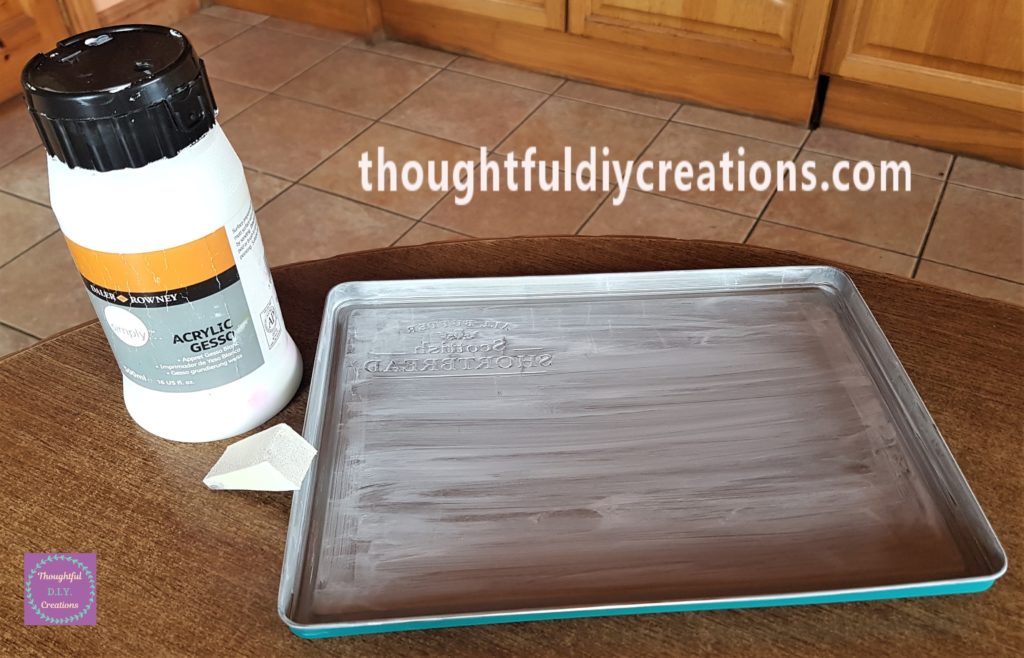
Priming the Lid
I put a Layer of ‘Acrylic Gesso’ on the Lid with a Make-Up Sponge. This Primes the surface and gets it ready for Paint. Gesso Primer.
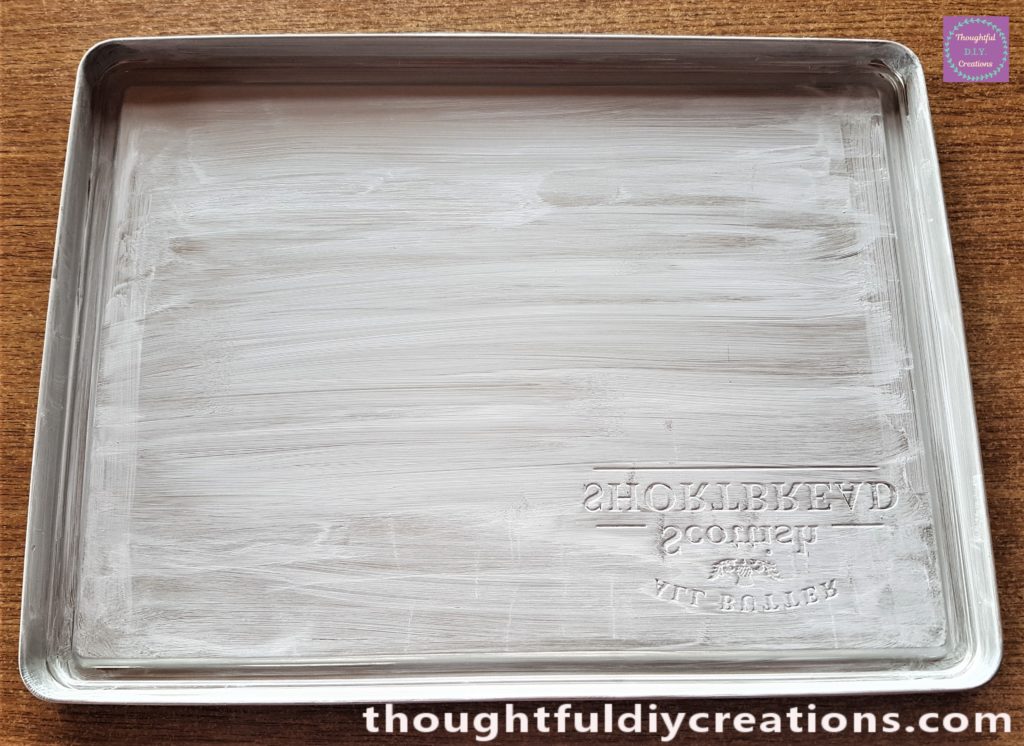
This is a close-up of the Lid after the first layer of Gesso.
It dried quickly so I added the second layer of Gesso after about 15 minutes. Gesso Primer.

The third and final layer was applied after another 15 minutes.
Painting the Lid
I thought Blue would be the perfect colour to add to the lid to make it look like the Sky. I used the same Blue and White Acrylic Paint that I mixed for the ‘Spring Canvas’ Craft that I created last week. I painted a layer of the blue paint onto the lid using a Flat Paintbrush. I didn’t apply paint to the right-hand corner as I knew I would be covering that part up later. ACRYLIC PAINT.
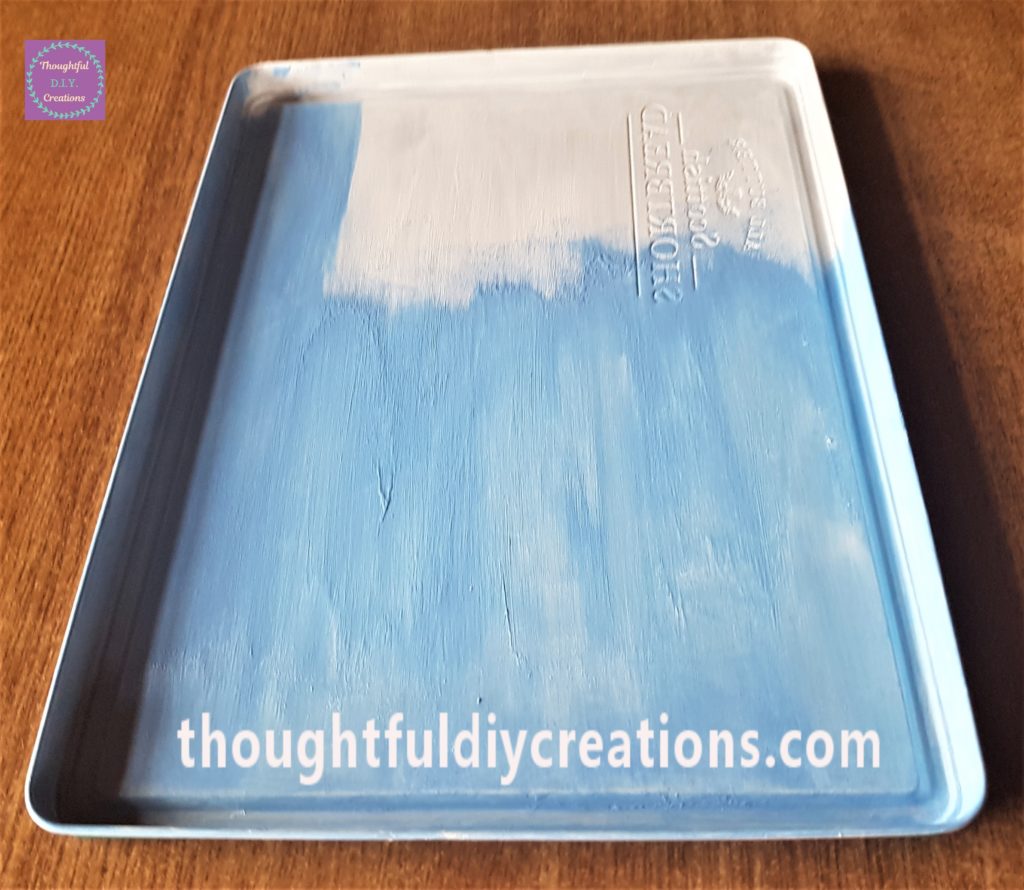
I applied the second layer of Paint after about 30 minutes.
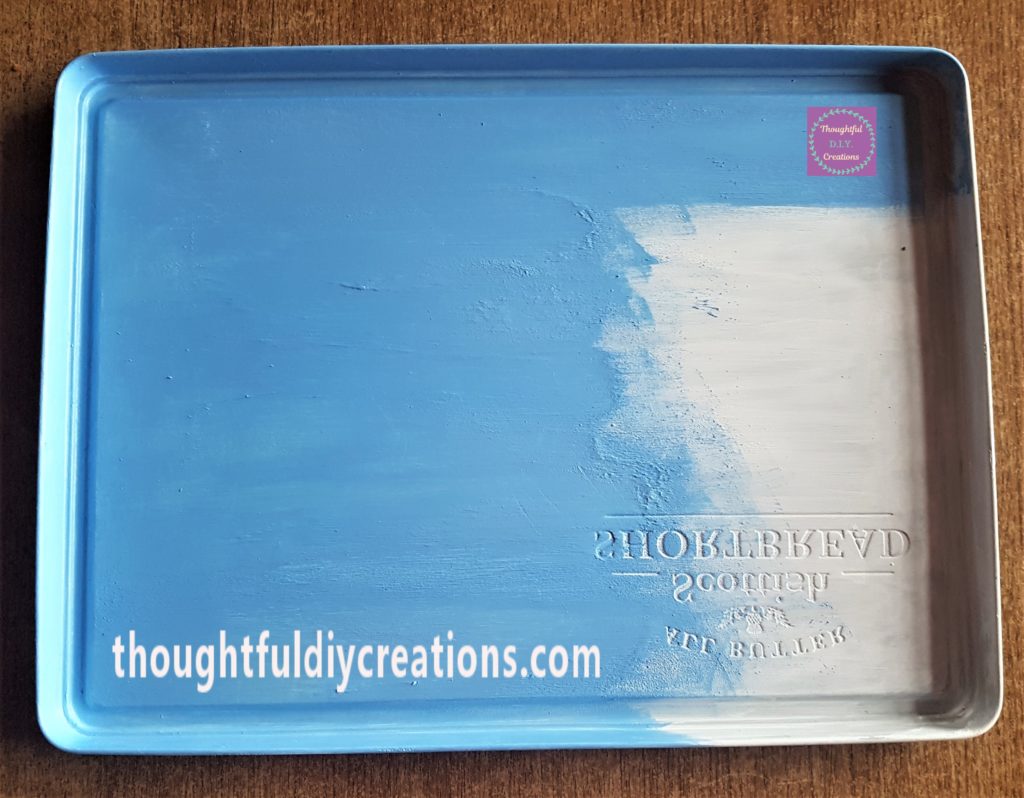
The final layer was added after another half an hour. ACRYLIC PAINT.

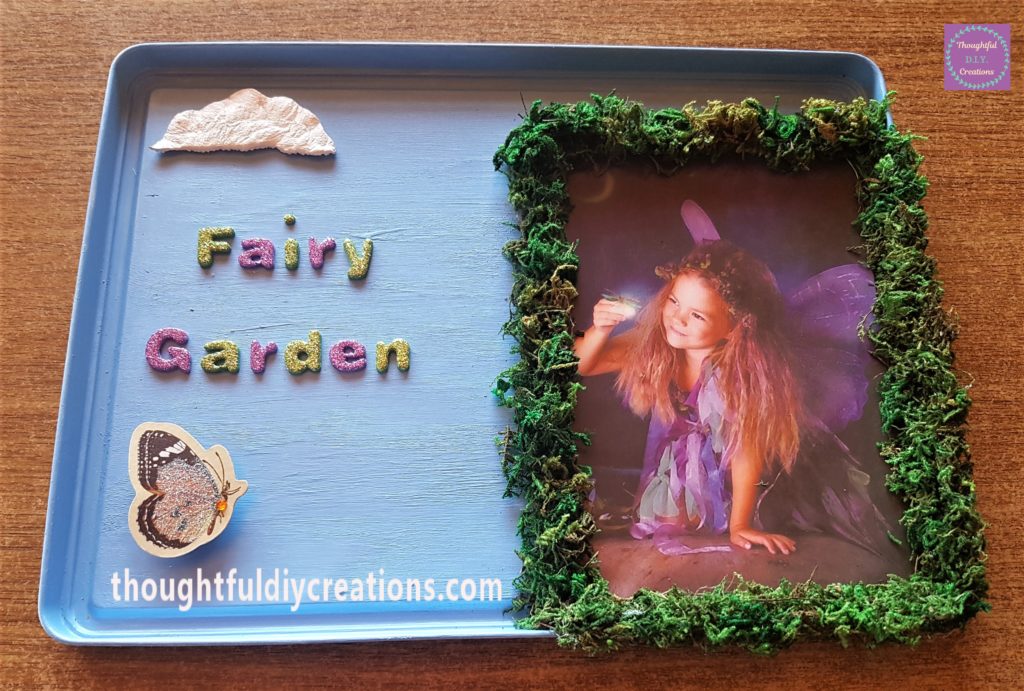
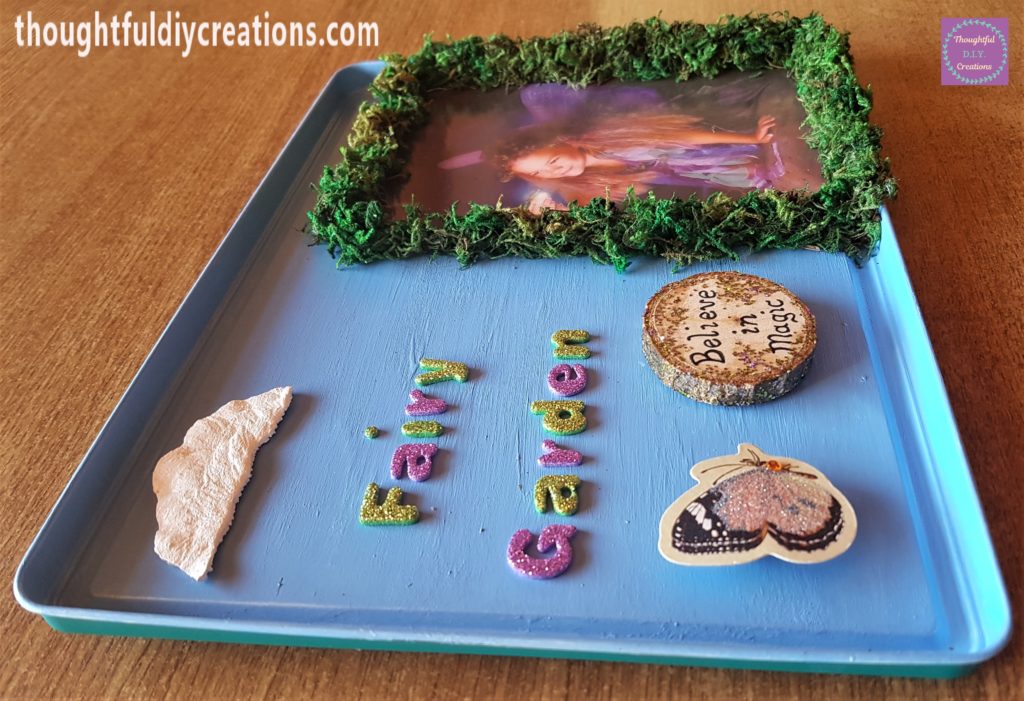
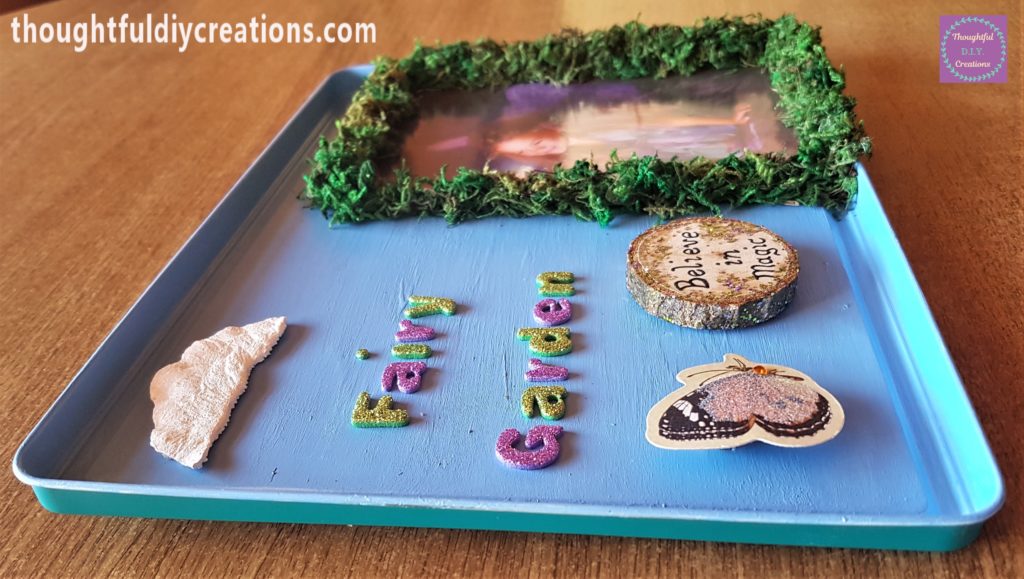
Decorating the Fairy Garden Lid
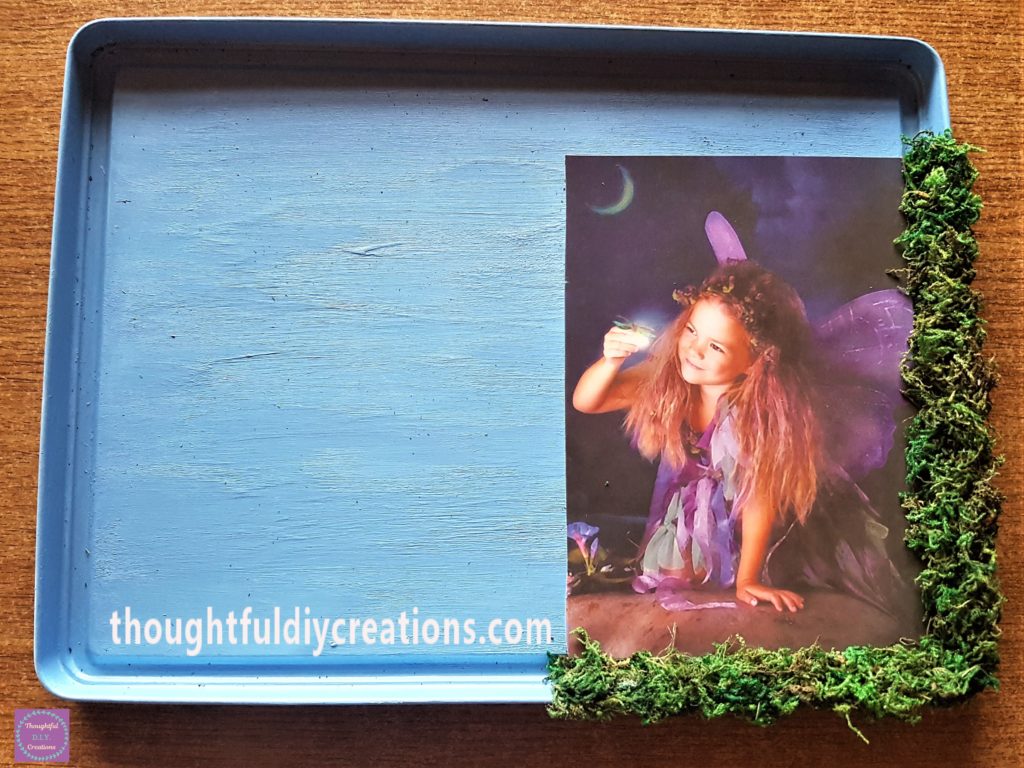
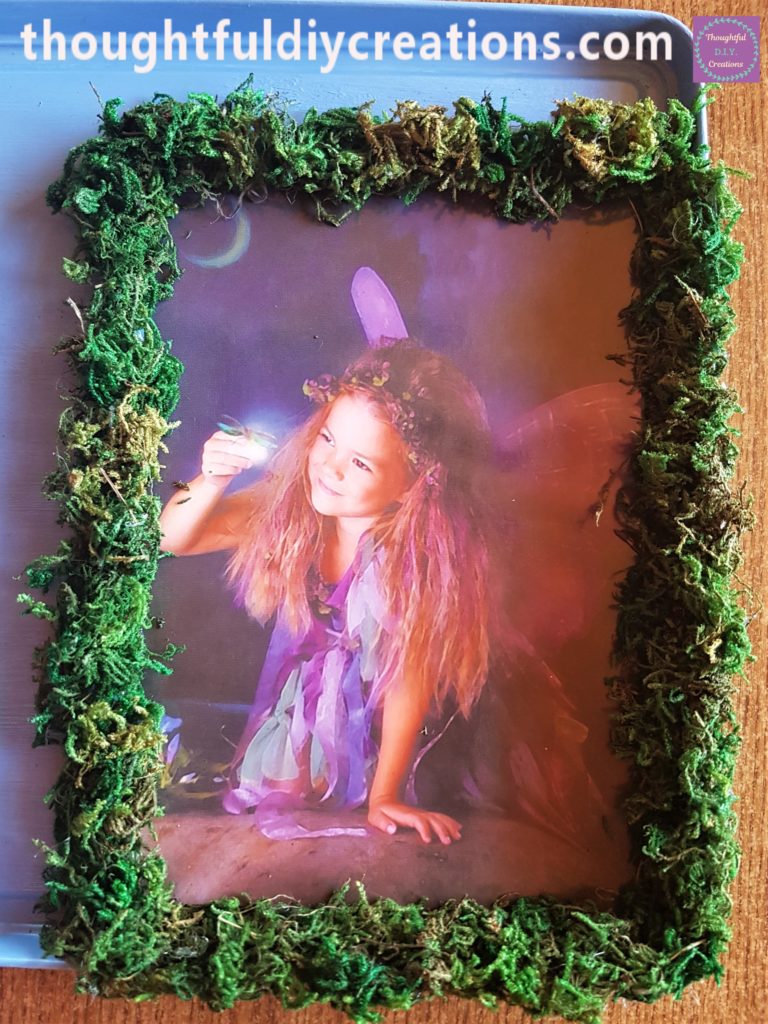
I had a box of Fairy Cards that I’ve had for years, I love this Fairy Image and decided to use it for this craft. Fairyland Set.
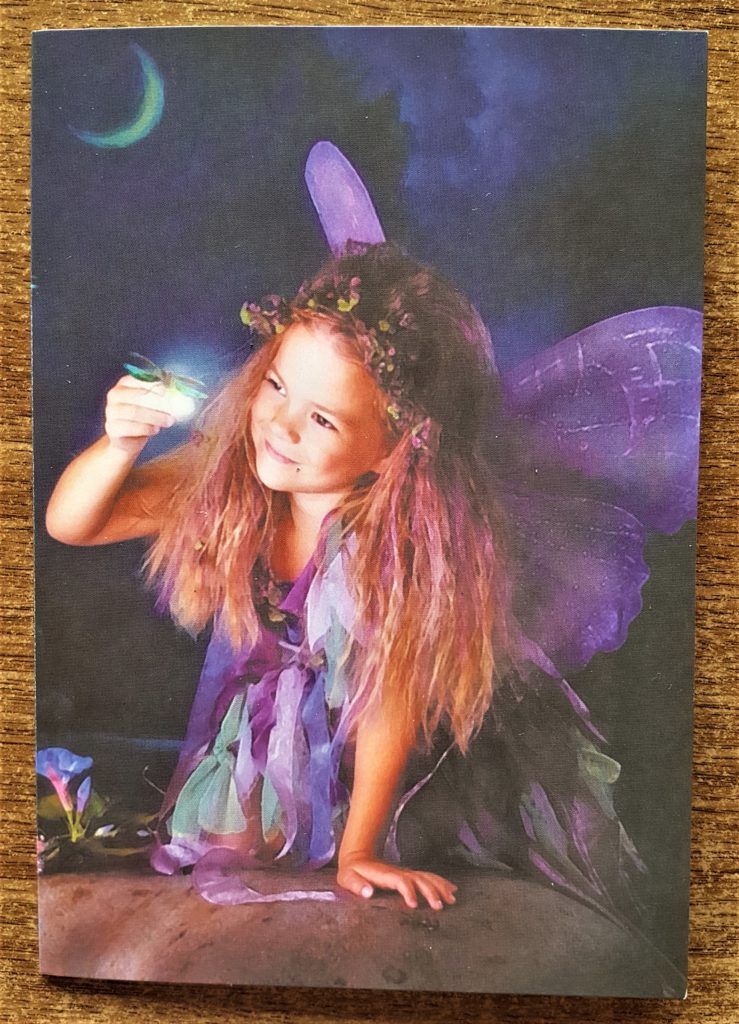
I cut the back from the Card and attached the Fairy Image to the Lid using a mixture of Pritt Stick and Tacky Glue. Fairyland Set.
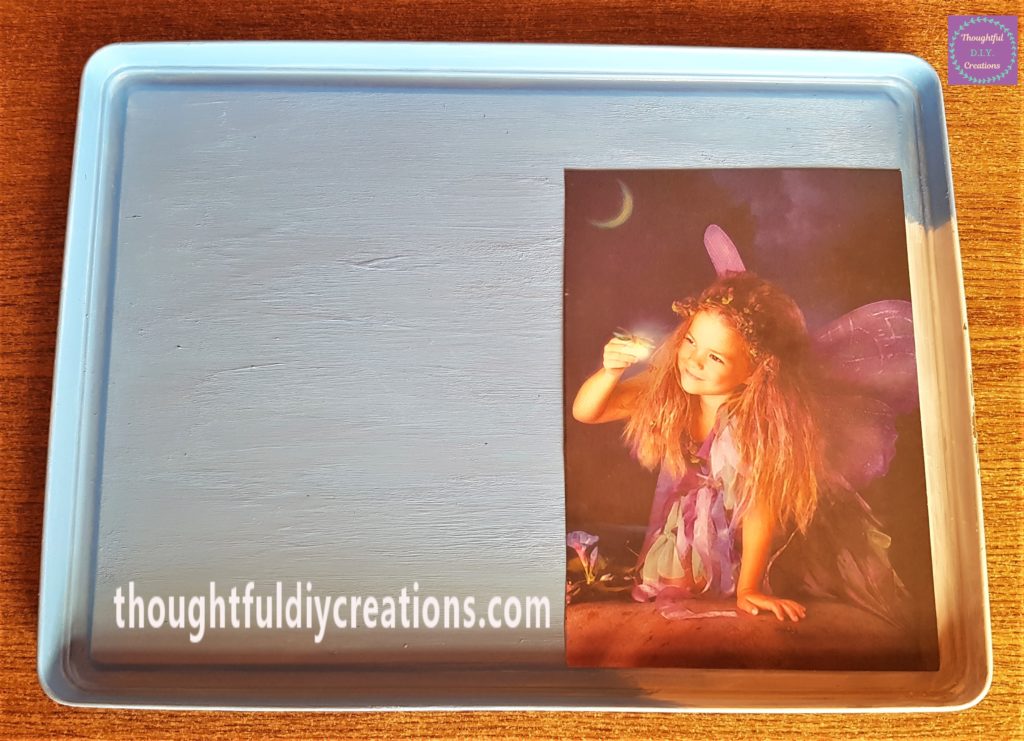
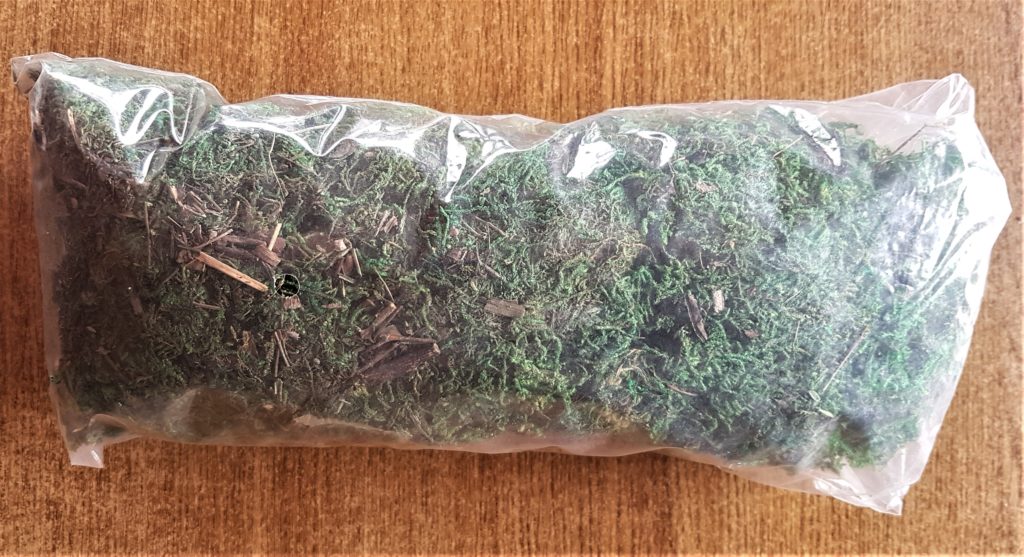
I liked how the Fairy Image was at night time and the blue paint represents the day time. I decided to frame the Fairy Image to make it stand out more from the blue sky. I had a bag of Dried Moss that I’ve made a few Crafts with already. Dried Moss.
I plugged in my Hot Glue Gun and let it heat up for 5 minutes. I separated some dried moss into sections. I put hot glue onto the side of the lid and attached a section of moss on top. Hot Glue Gun.
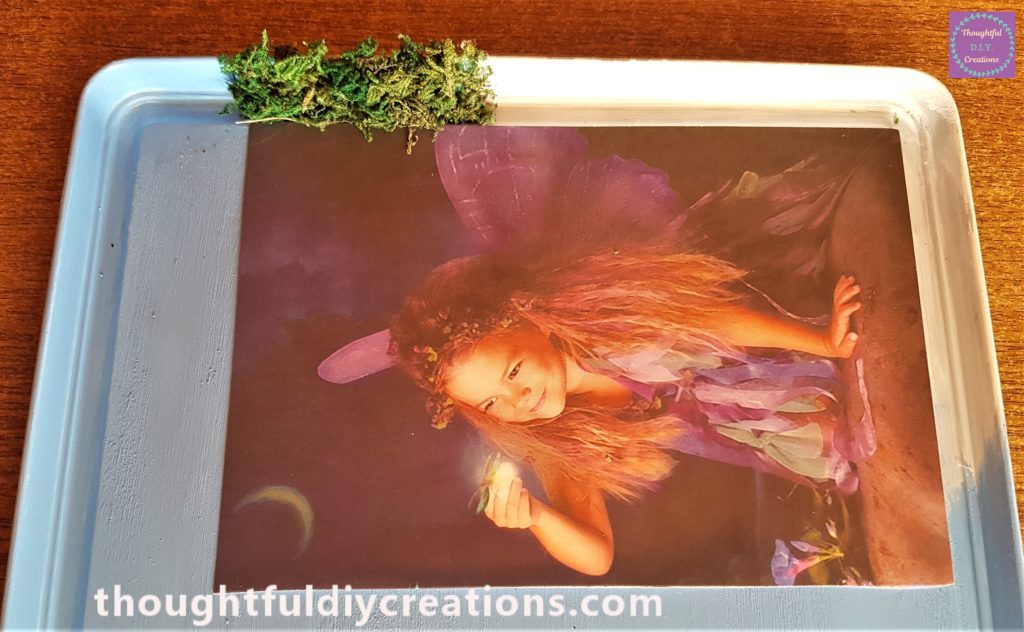
I continued adding more hot glue and moss until I had one section of the frame completed. Be careful with the hot glue, you can use the end of a pen to hold the moss into the glue to prevent getting burned.
I then moved on to the bottom section and filled that with moss in the same way. Dried Moss.
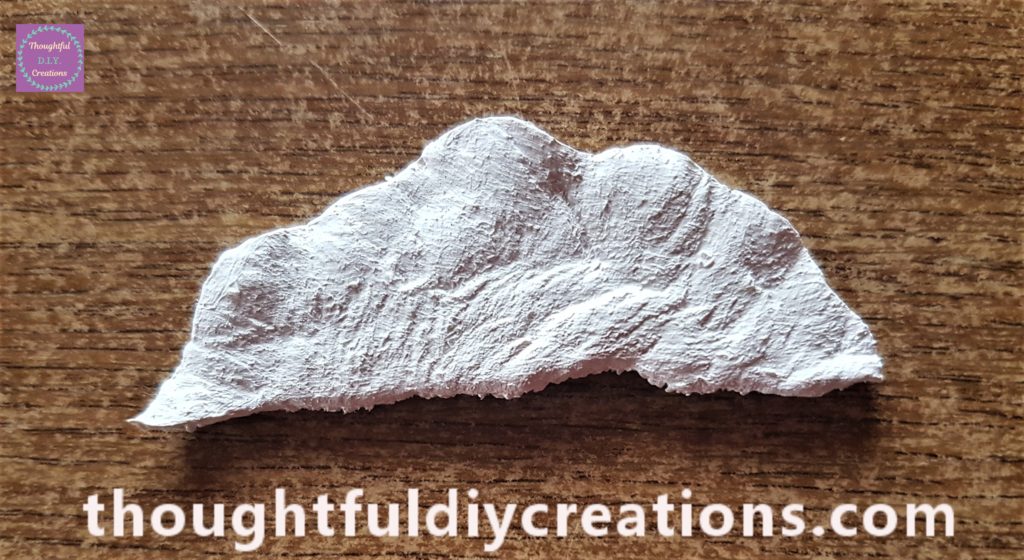
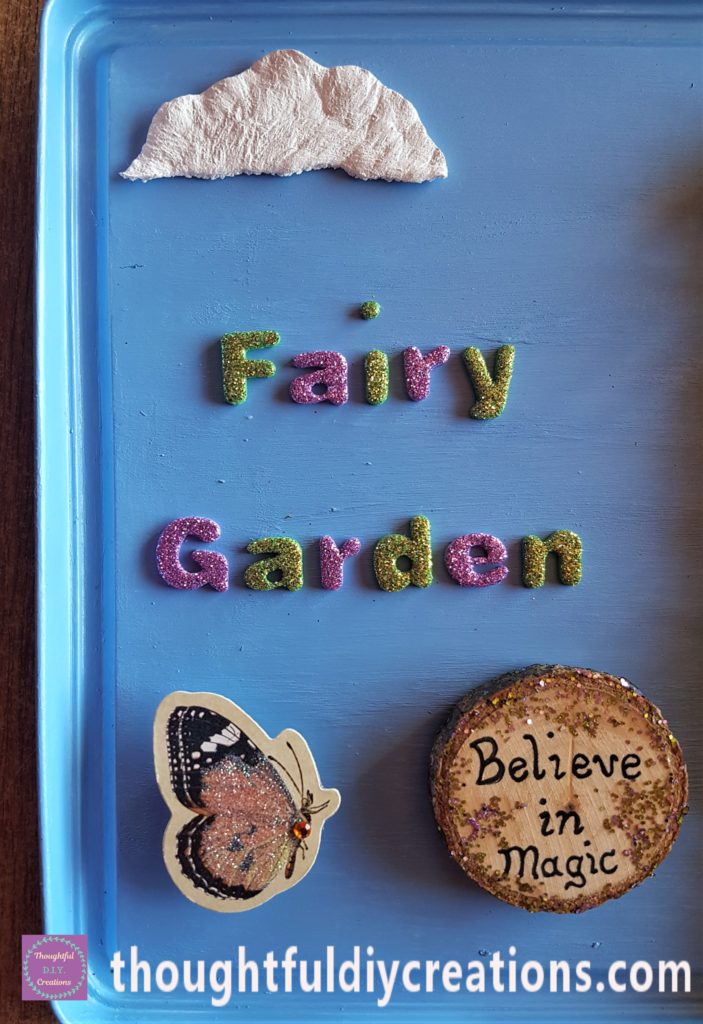
Making a Cloud for the Sky
I had some clouds that I made about a year ago. I don’t have any photos of the process as I hadn’t started my blog yet. I will explain the process though.
I got a fluffy bed sock that I had in my box of fabric supplies. I cut it into a rectangle shape. I put a few coats of acrylic gesso on both sides of it to remove the colour from the sock. I then painted a few coats of white acrylic paint onto the sock. The next day I cut the white painted sock into different size and shape Clouds. Gesso Primer.
This is the Cloud that I will use for the Fairy Garden.
I put hot glue on the back of the Cloud and held it to the top of the lid for a few seconds. Hot Glue Gun.
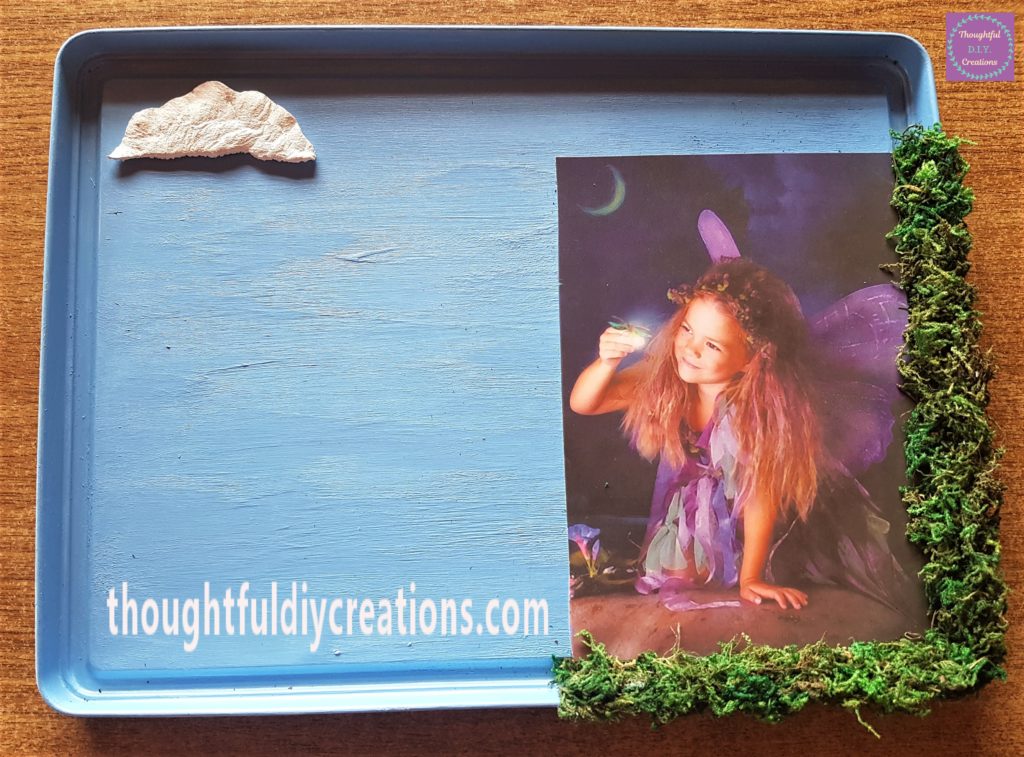
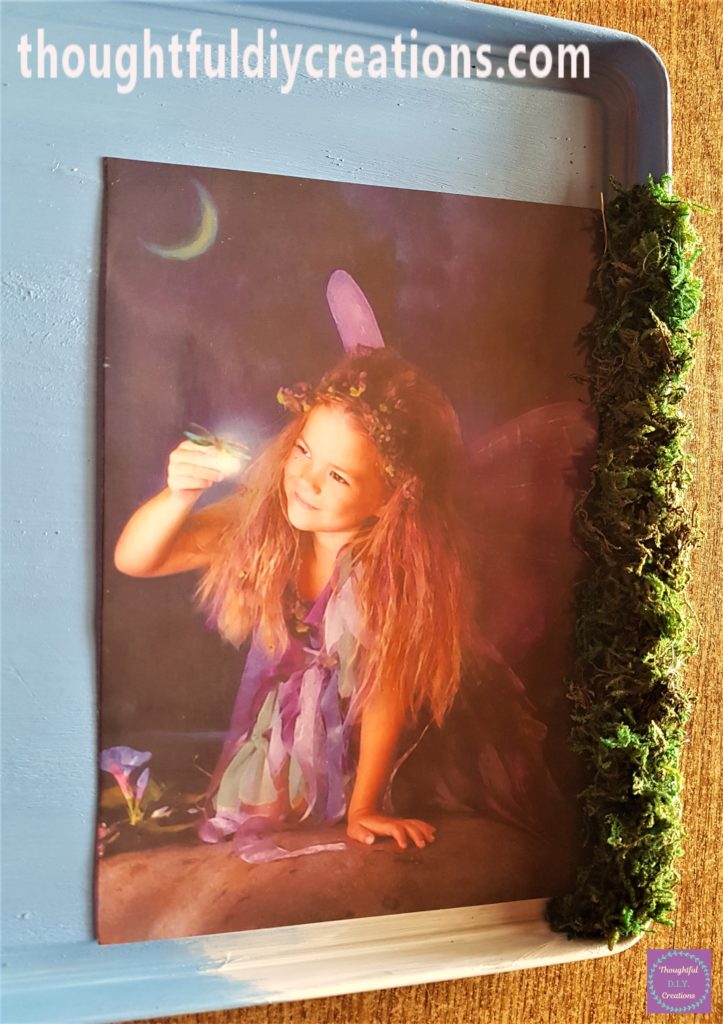
I added more hot glue and moss to the top of the Fairy Image.
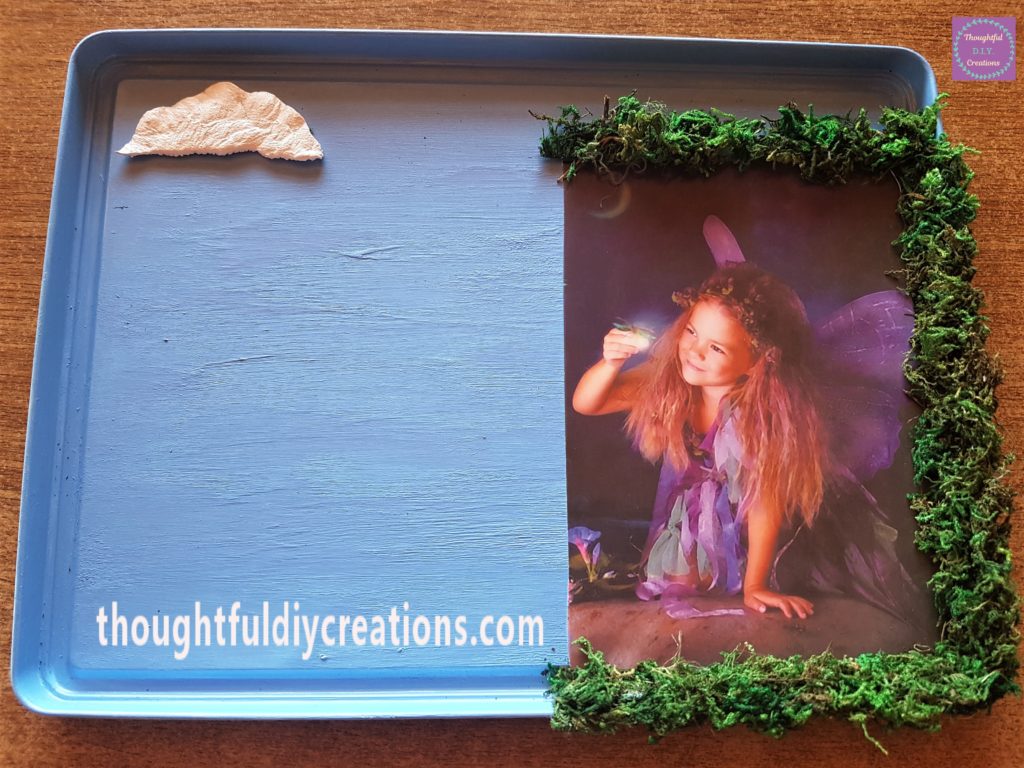
I finished the moss frame by adding more dried moss to the last section of the Fairy. Dried Moss.
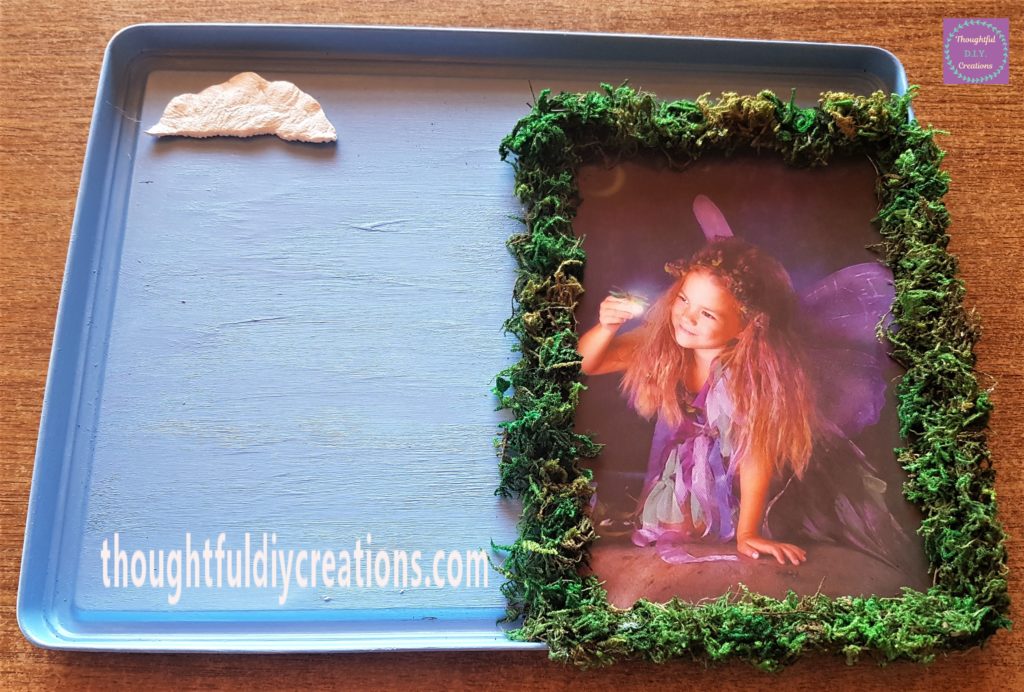
I loved how it turned out, it’s like the Fairy is in an Enchanted Forest. I think it makes the Fairy image look even more magical. This is a side angle of the frame.
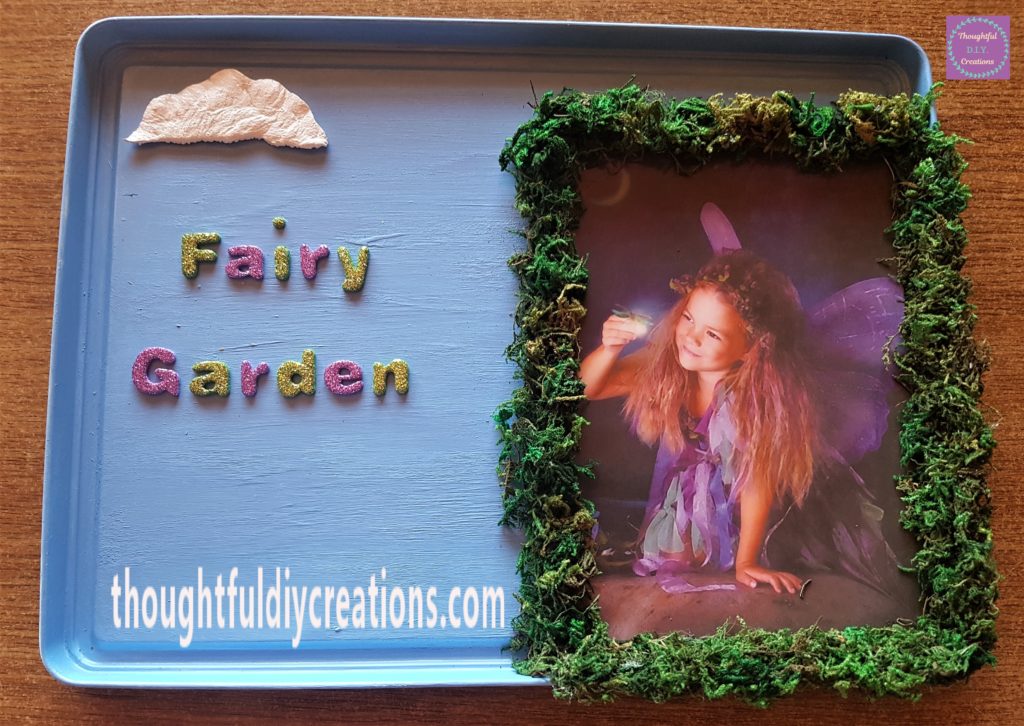
Adding Stickers to the Fairy Garden Lid
I had a multi-colour set of Glitter Alphabet Stickers. I chose the Green and Purple colours to complement the Fairy’s dress. Glitter Foam Letter Stickers.
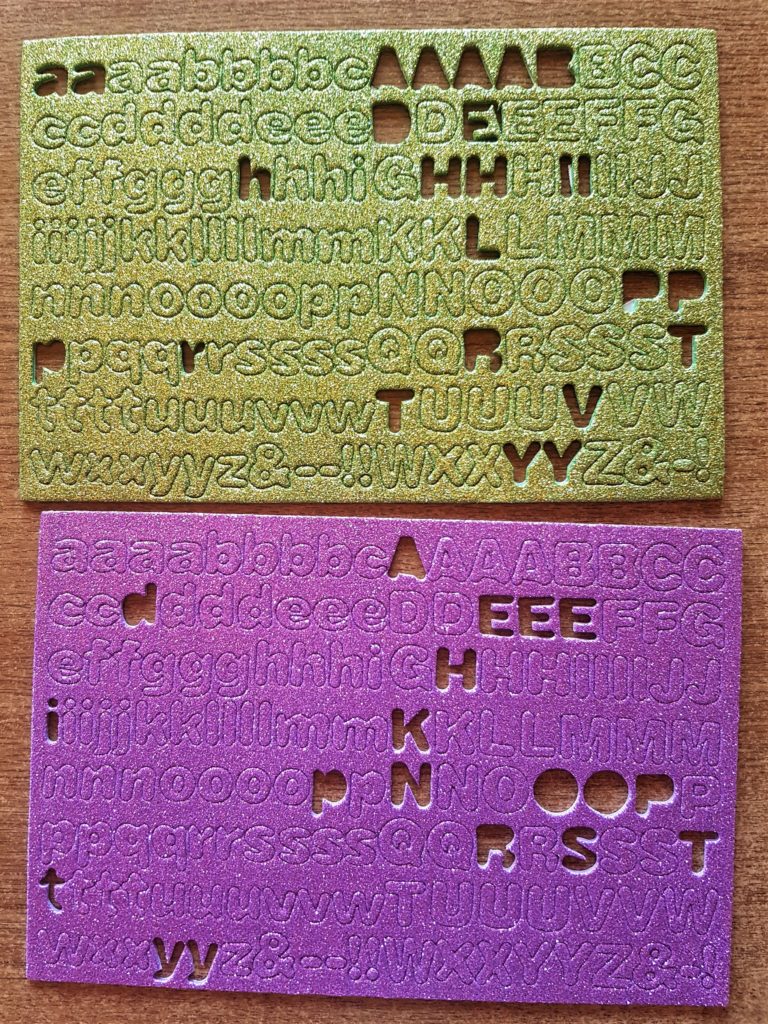
I spelled out the words ‘Fairy Garden’ out of the stickers and attached them to the lid. Glitter Foam Letter Stickers.
I had a Pack of Decorative Stickers in my craft supplies. Butterflies Craft Stickers.
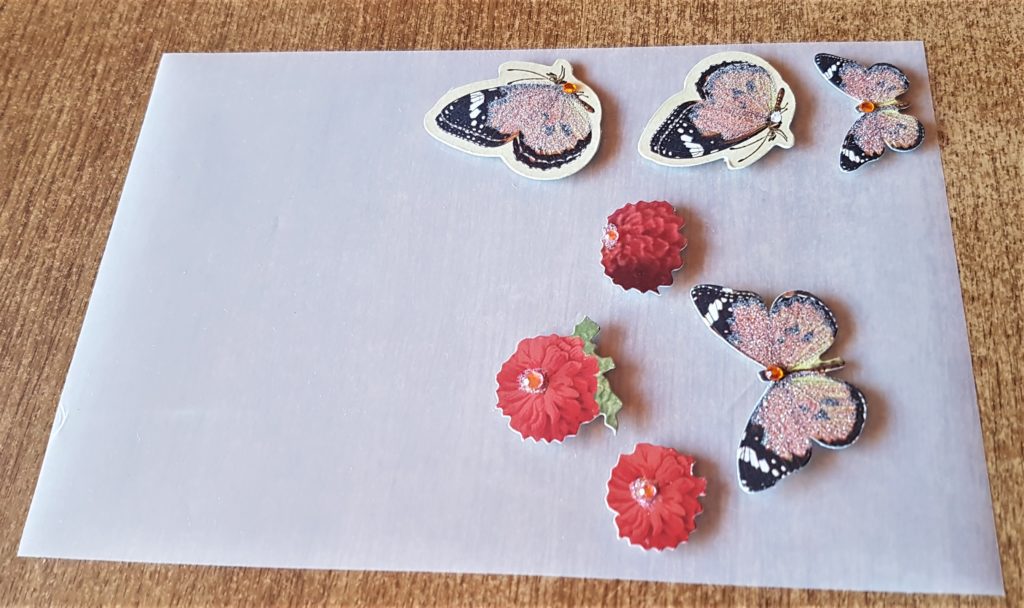
I picked a butterfly to use for this craft. I cut a few squares of cardboard and hot glued them to the back of the butterfly for extra height and dimension.
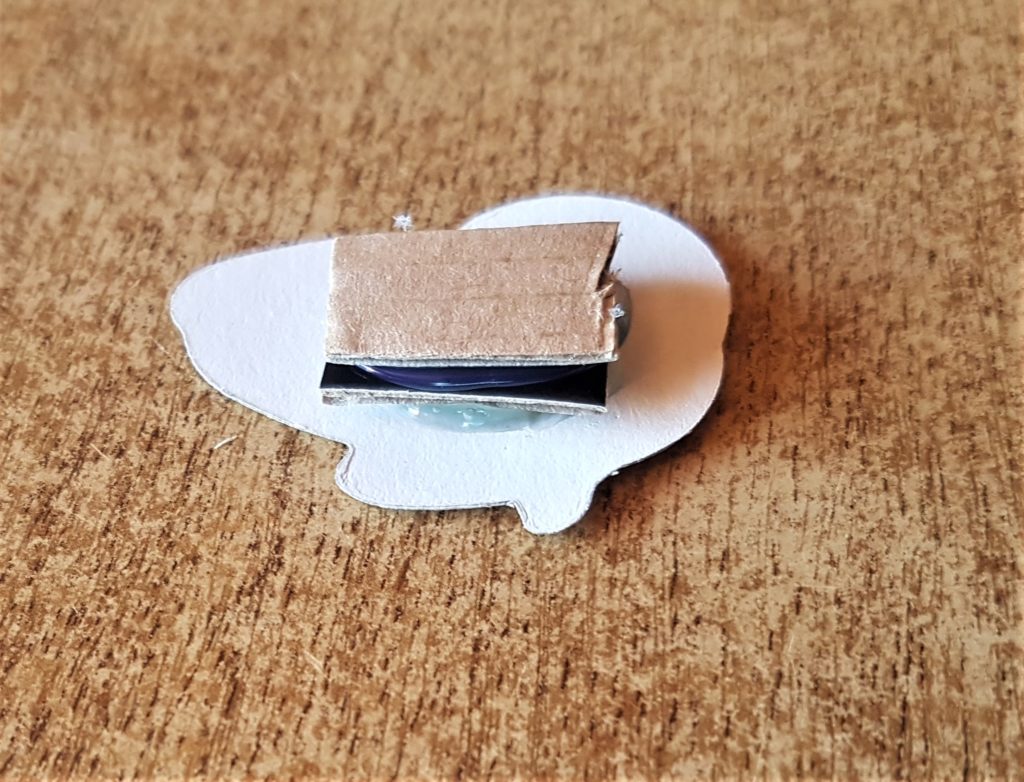
I put hot glue on the back of the last square and attached the butterfly to the Fairy Garden lid. Butterflies Craft Stickers.
Decorating a Wood Slice for the Garden
I got a Wood Slice from the Packet. I wrote ‘Believe in Magic’ on the wood slice with a ‘uni POSCA Paint Pen in Black 0.7mm’. Uni Posca Black Paint Pen.

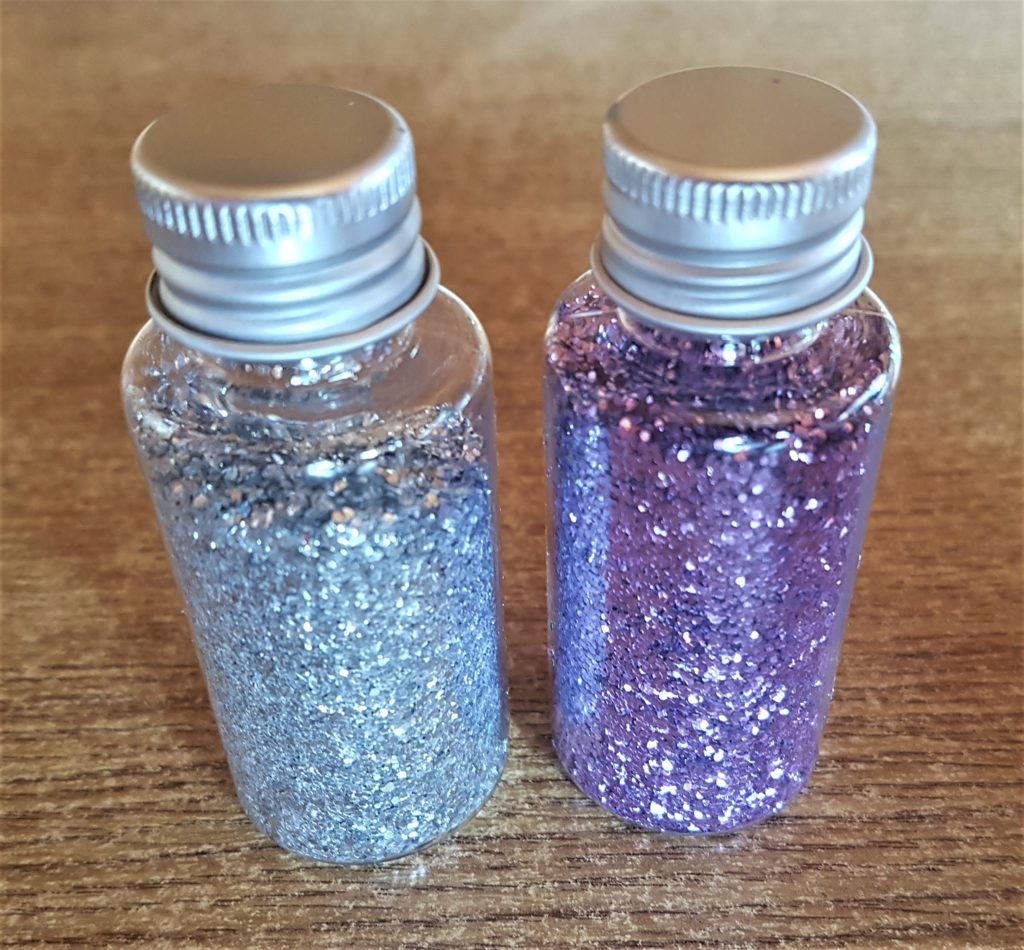
I have a set of Glitter Jars. I chose Purple and Green to go with the ‘Fairy Garden’ stickers. Glitter Shakers Set.
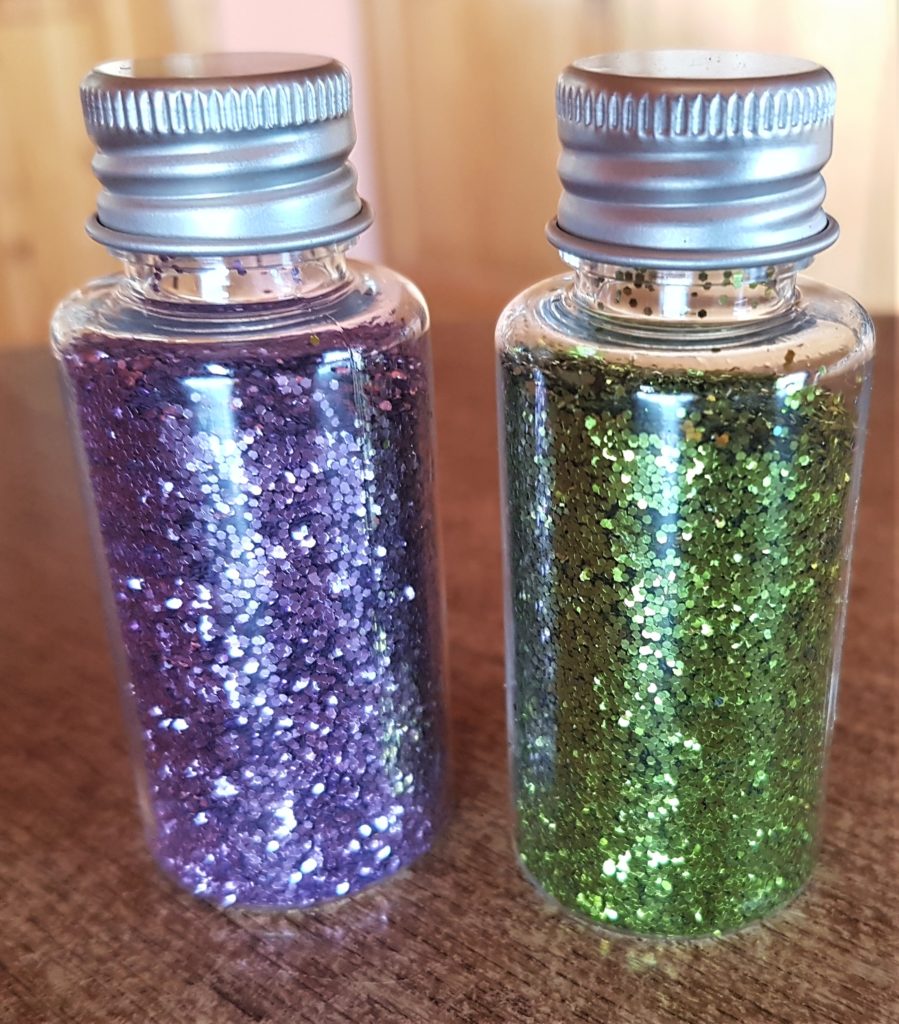
I poured a small amount of the purple and green glitter into a small glass container. Glitter Shakers Set.
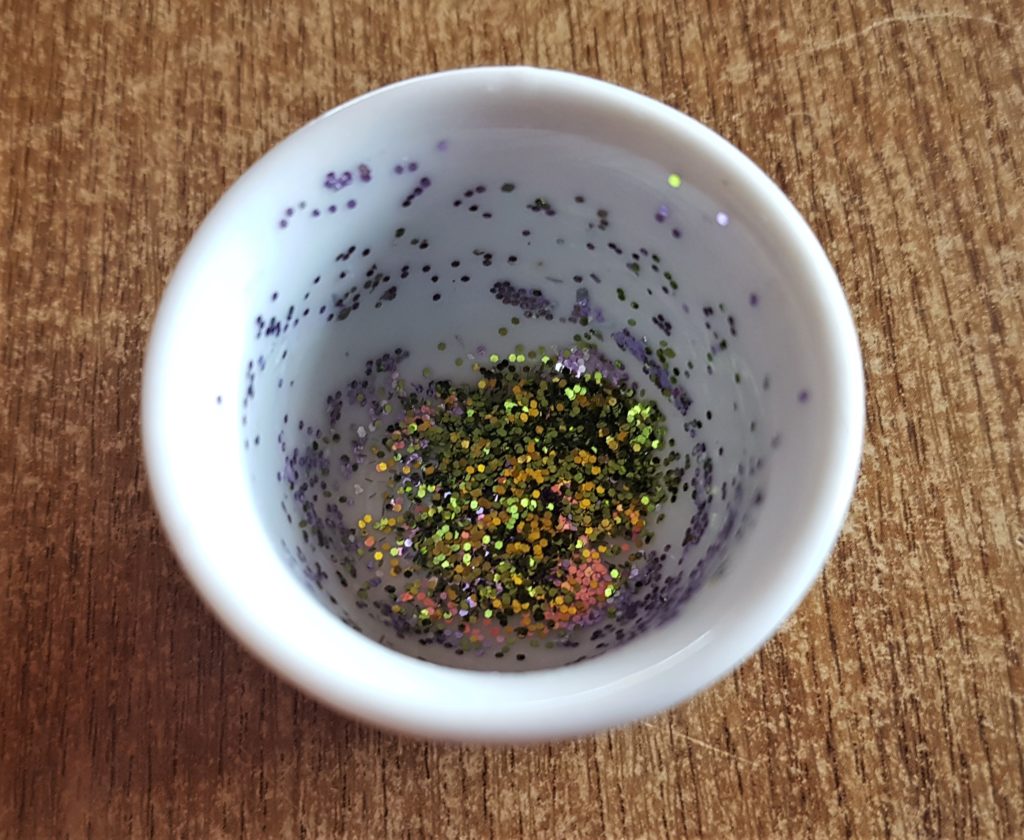
I added some PVA Glue to the glitter and mixed it all together with a small paintbrush. I then added the glitter glue mixture around the sides and top of the wood slice with the paintbrush. PVA Glue.

I put hot glue all around the mid-section on the back of the wood slice and attached it to the Fairy Garden Lid. Hot Glue Gun.
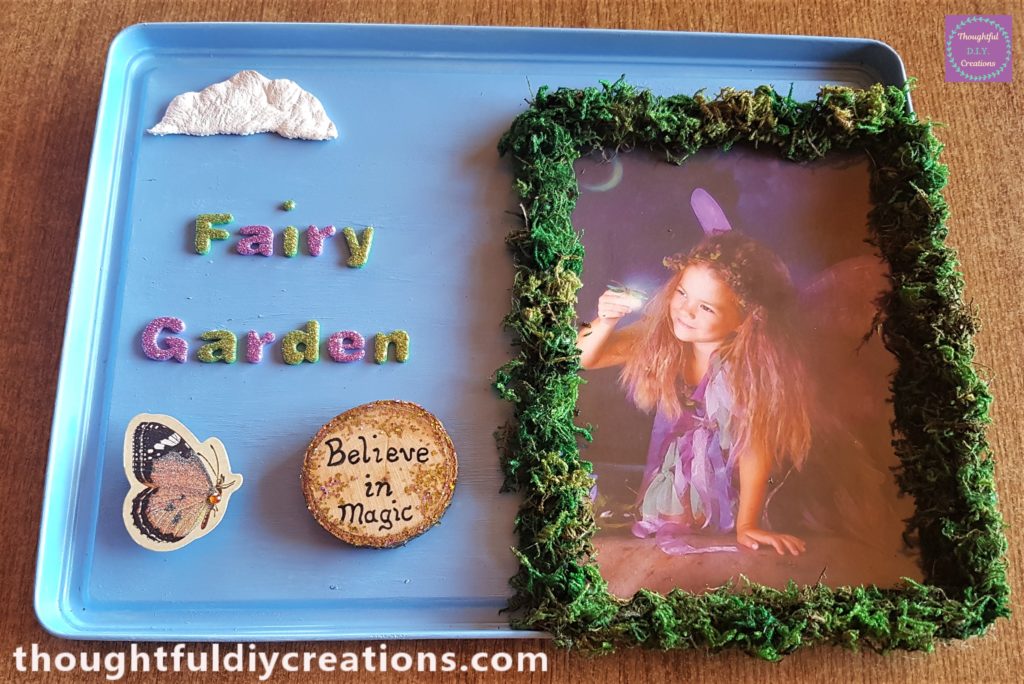
This is a side angle view of the transformed lid.
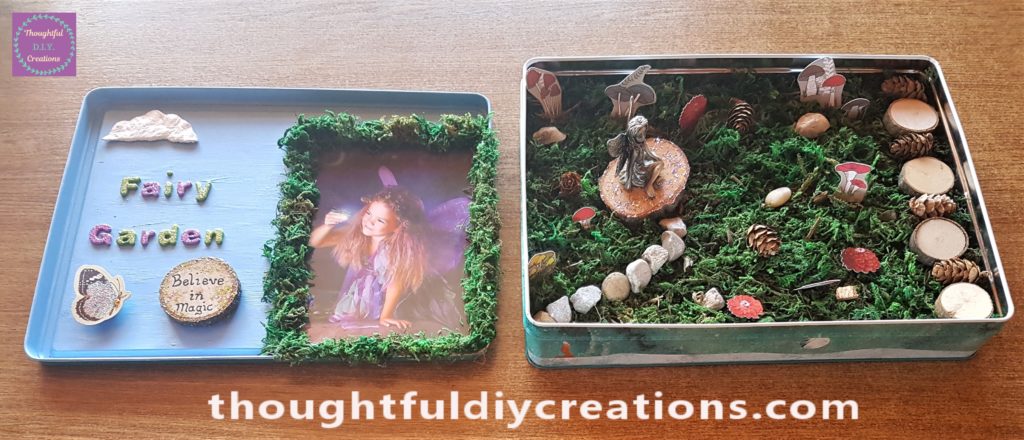
This completed the first part of the Fairy Garden.
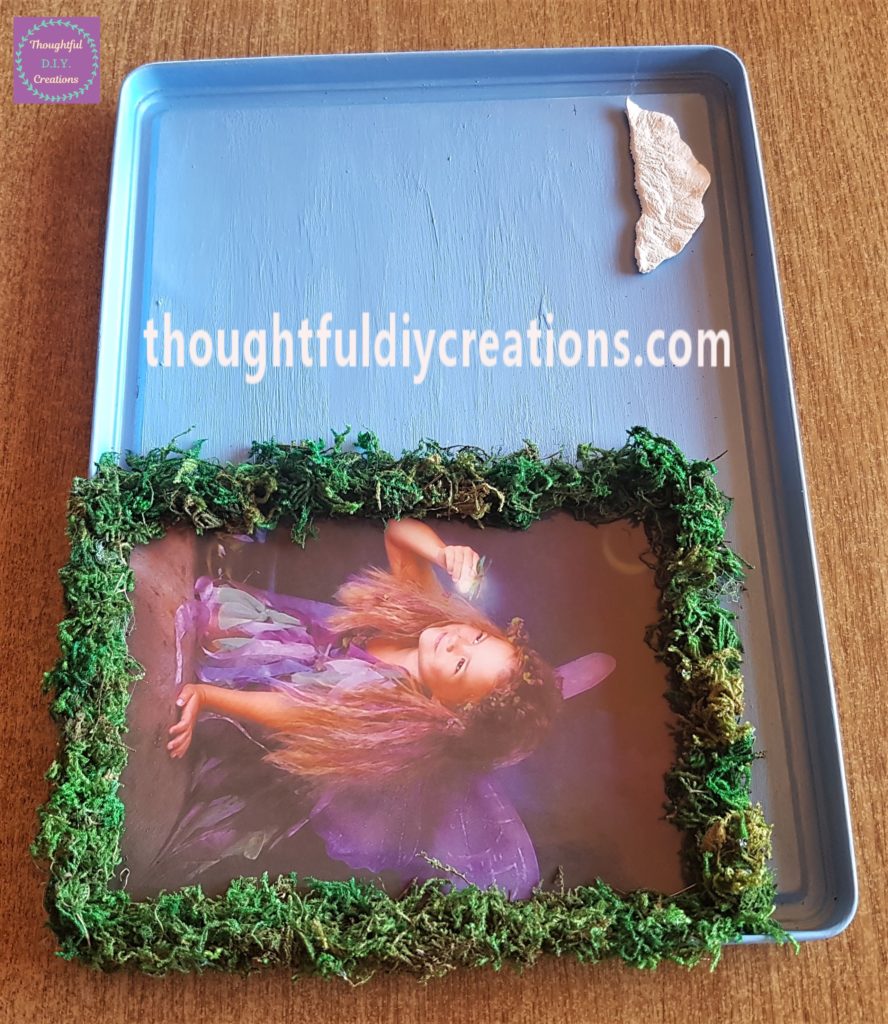
Below is the first half of the fairy garden lid.
Here is the second half of the fairy garden lid.
Preparing the Biscuit Tin
This is the inside of the biscuit tin before being up-cycled.
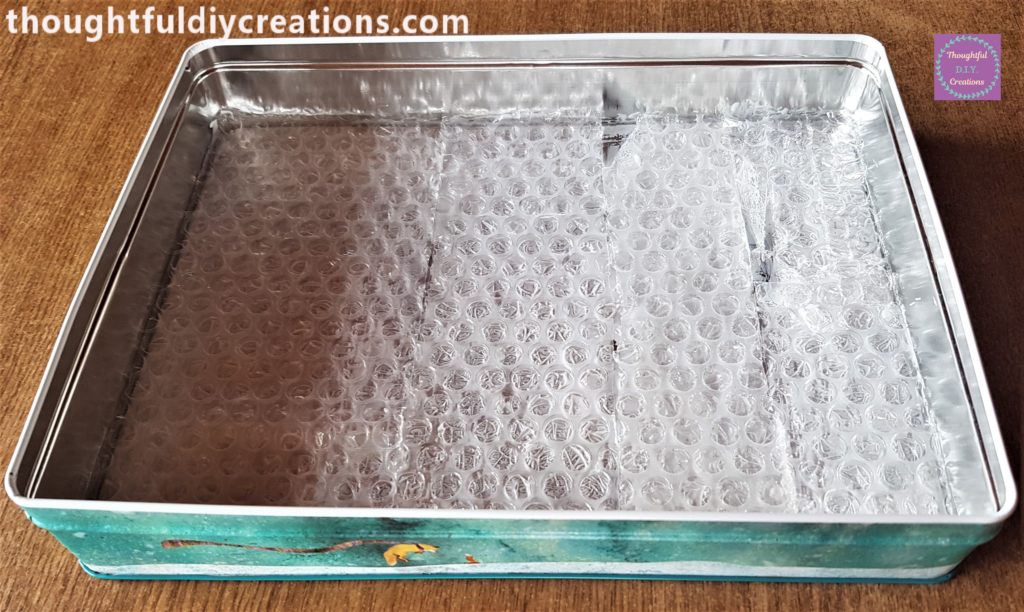
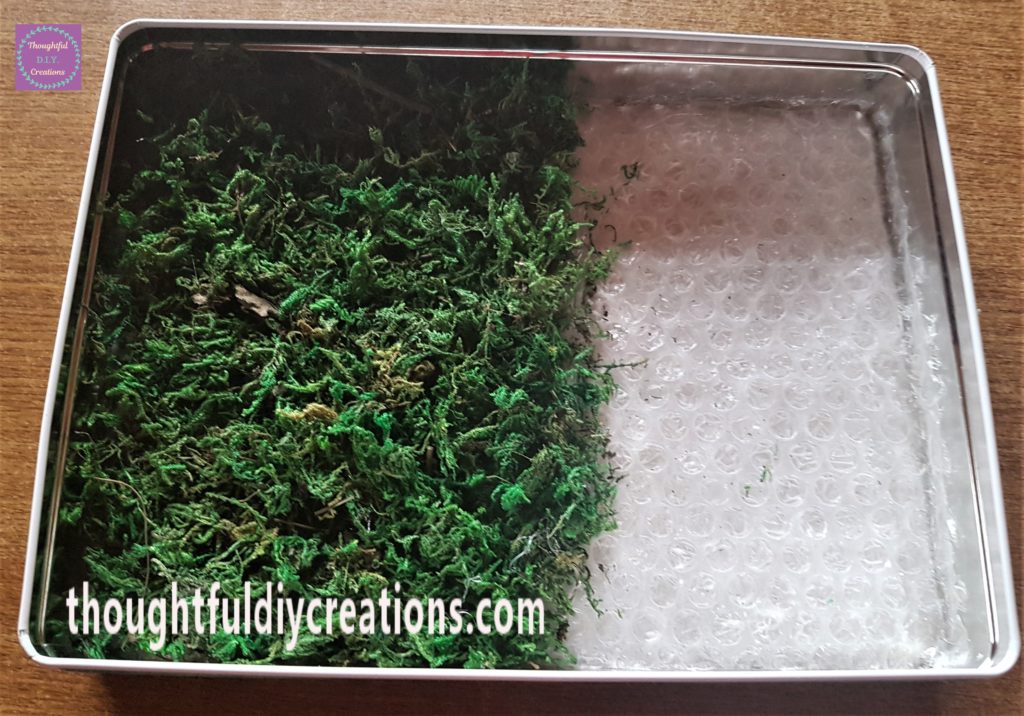
I decided to use a few sheets of bubble wrap inside the tin to fill it up a bit before adding the moss. You can use whatever you have; paper, cardboard or newspaper could all work. I used some leftover bubble wrap pieces I had in my supplies. I had enough for 3 layers.
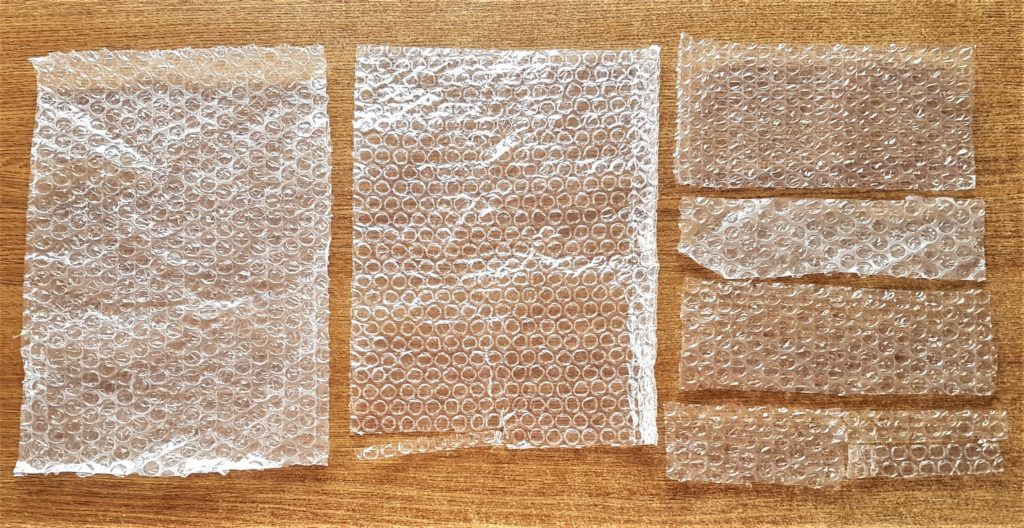
I spread some PVA Glue on the inside of the biscuit tin with a paintbrush. I added the smaller sections of bubble wrap for the first layer. I pressed the bubble wrap into the glue and then applied more glue to the next section and added the next section of bubble wrap until the first layer was filled. PVA Glue.
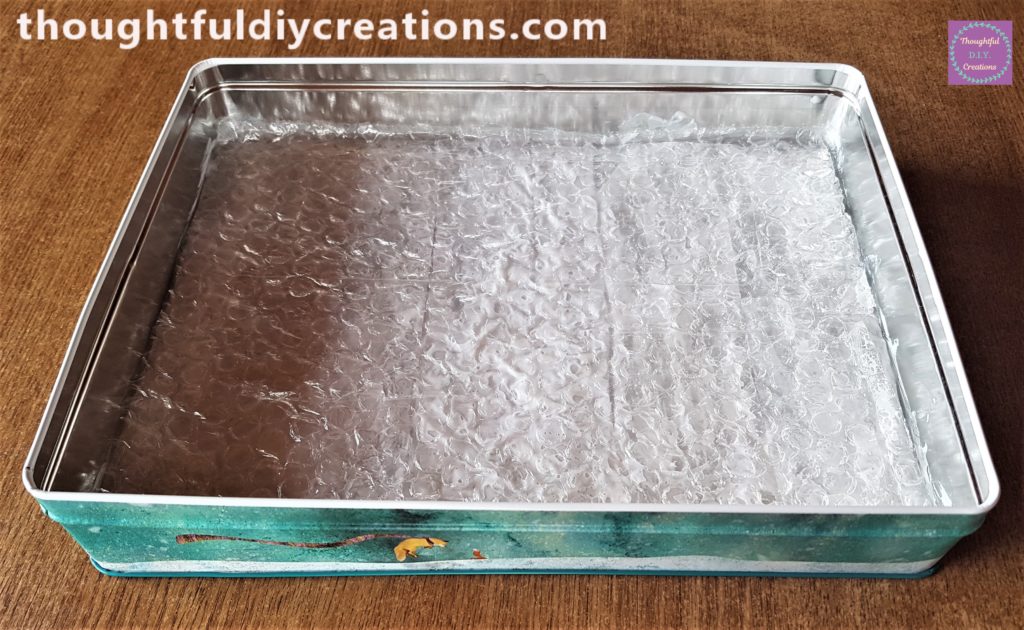
I added the second sheet of bubble wrap to the biscuit tin by putting more PVA Glue on top of the first layer of bubble wrap and attaching the second bubble wrap sheet to the glue.
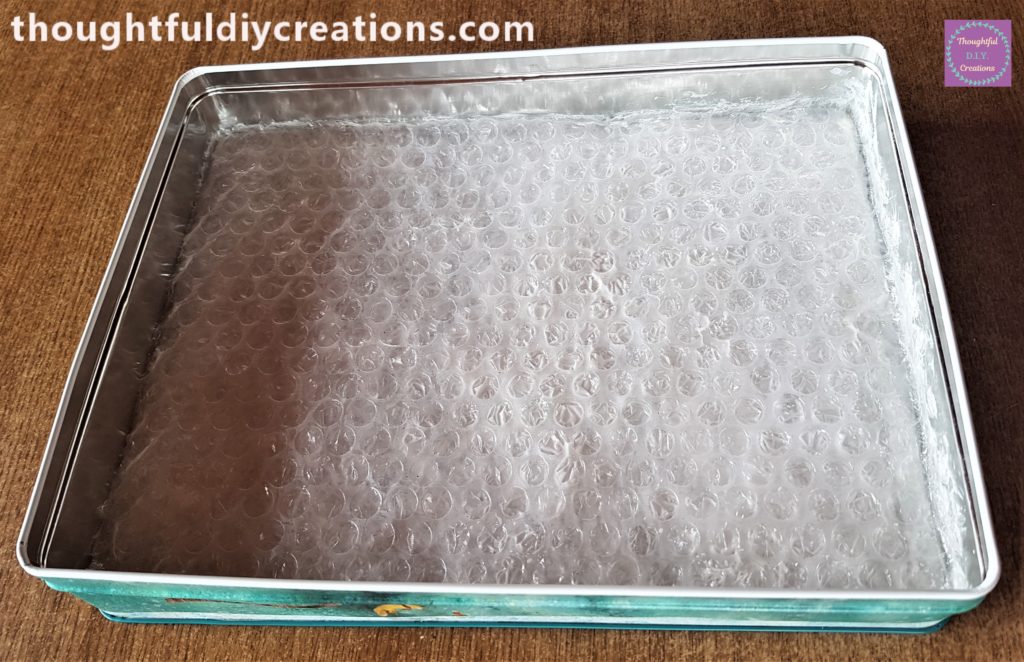
I added the third layer of bubble wrap in the same way. PVA Glue.
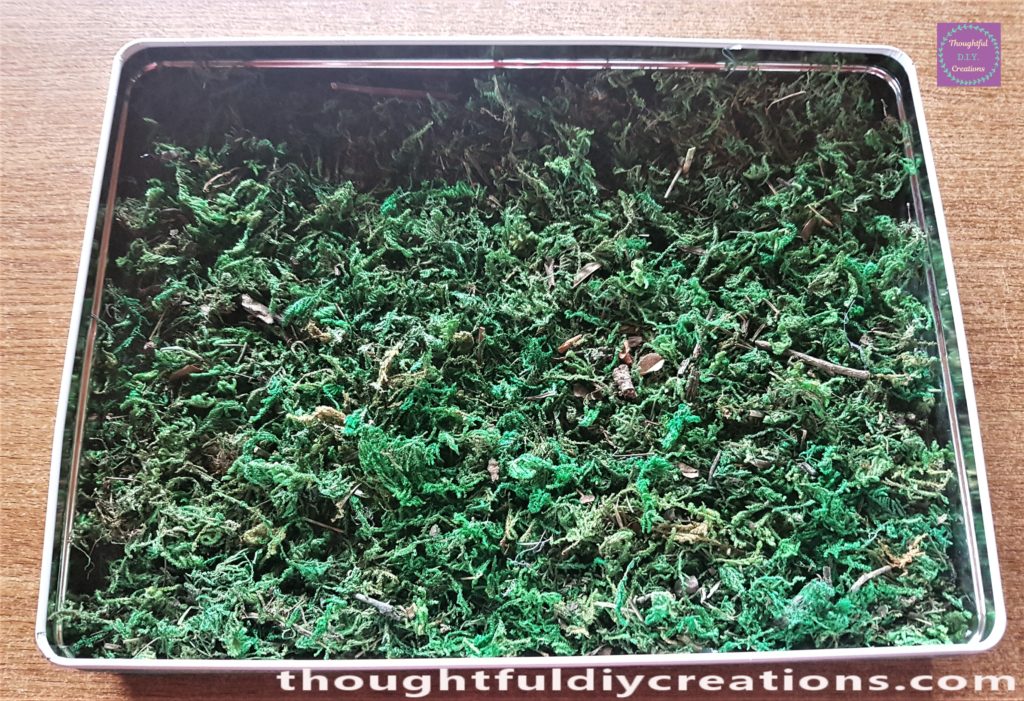
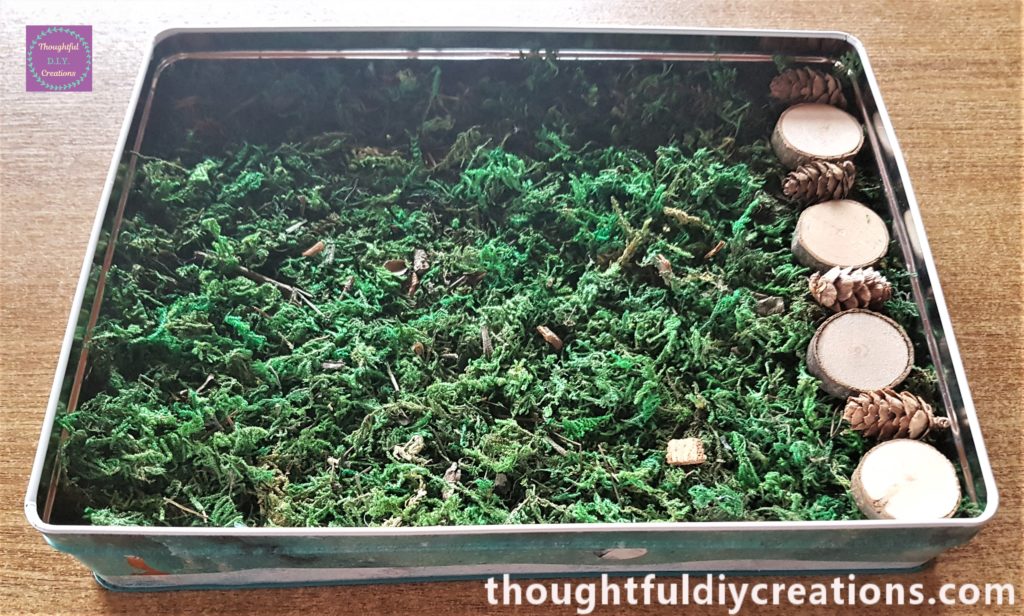
Adding Moss to the Fairy Garden
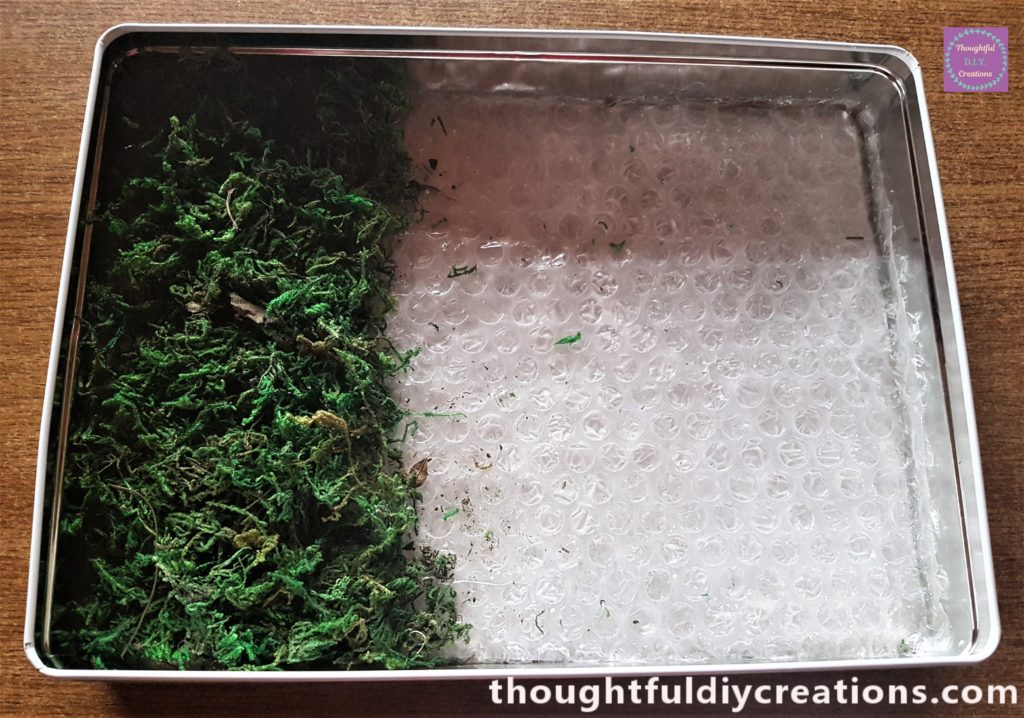
I allowed an hour for the glue to dry before moving on to the next step. I then put some hot glue on the top layer of bubble wrap and added a section of dried moss into the glue. Hot Glue Gun.

I filled in the next section with more hot glue and moss. Dried Moss.
I put hot glue on the bubble wrap and added more moss. I added more moss in any gaps but I only put hot glue on the bottom layer to keep it in place.
I continued with this process until the biscuit tin was filled with moss. Dried Moss.
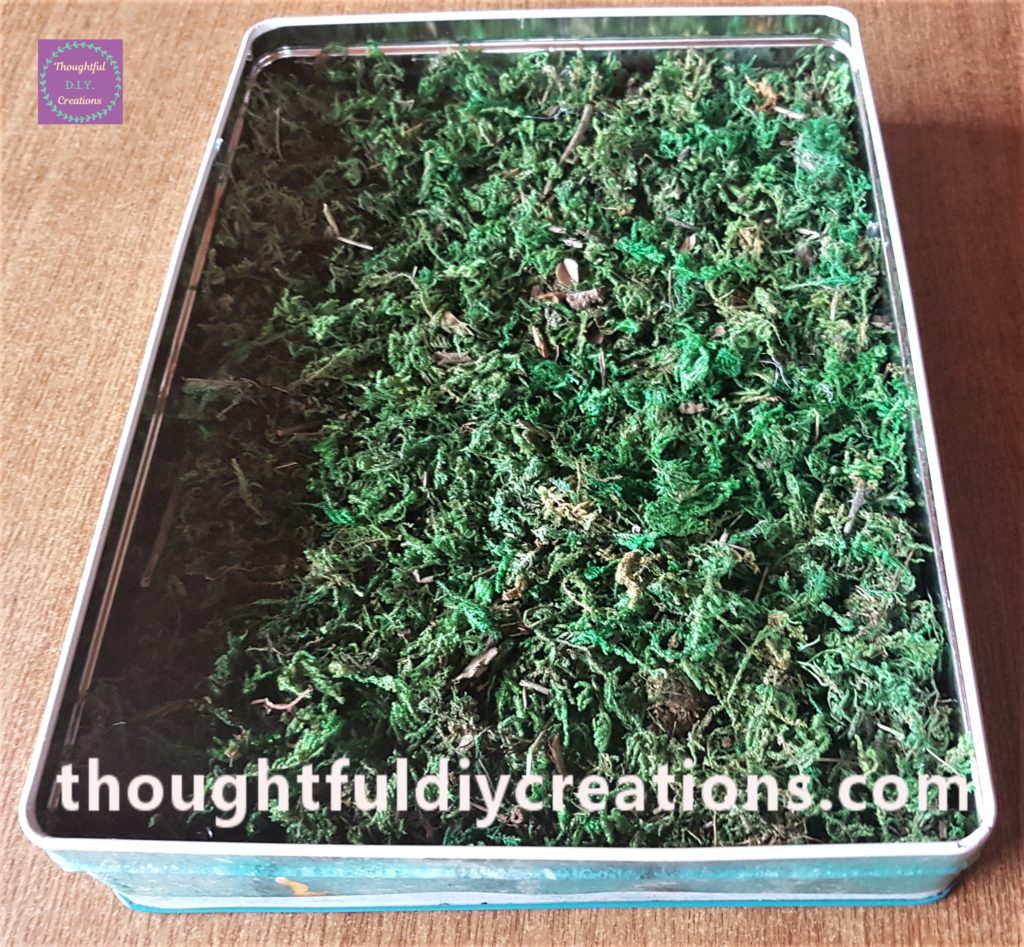
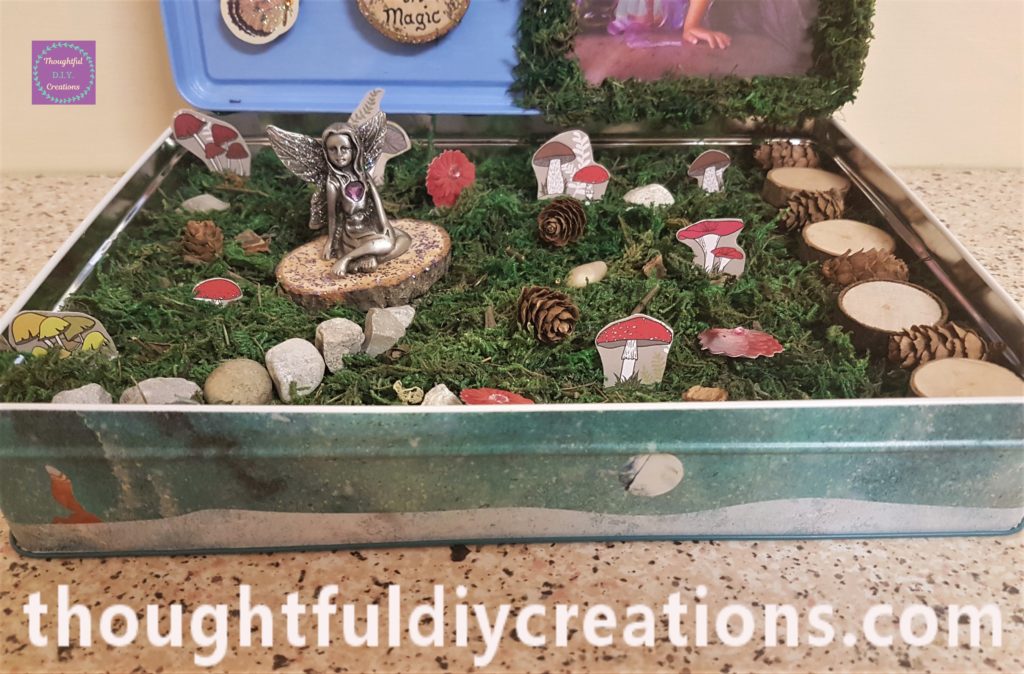
Here is a side angle of the tin covered with moss.
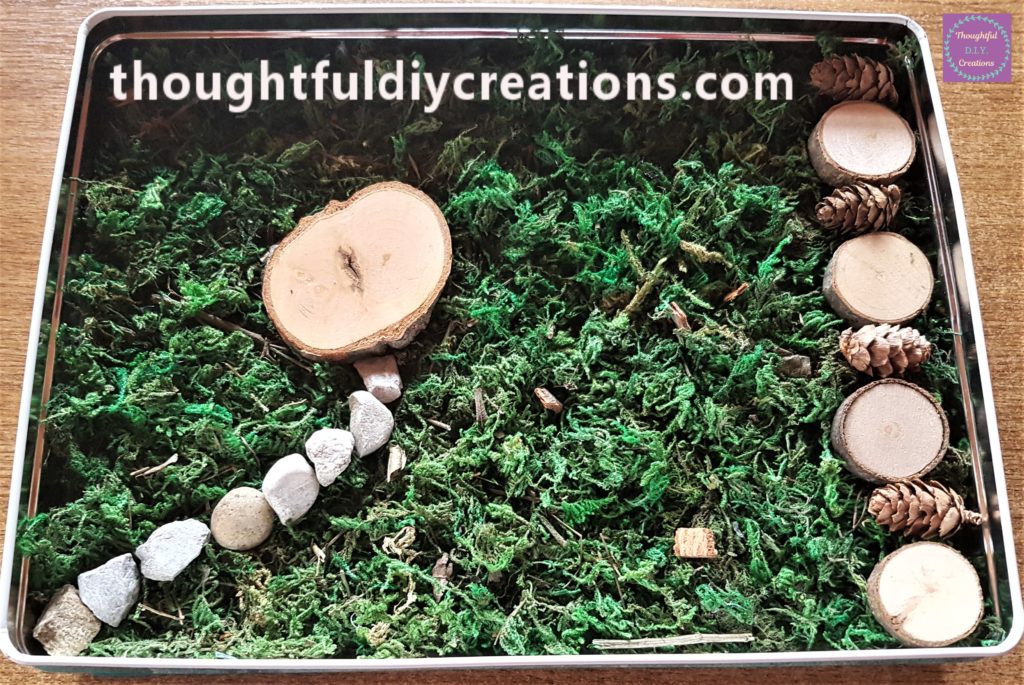
Making a Path for the Garden
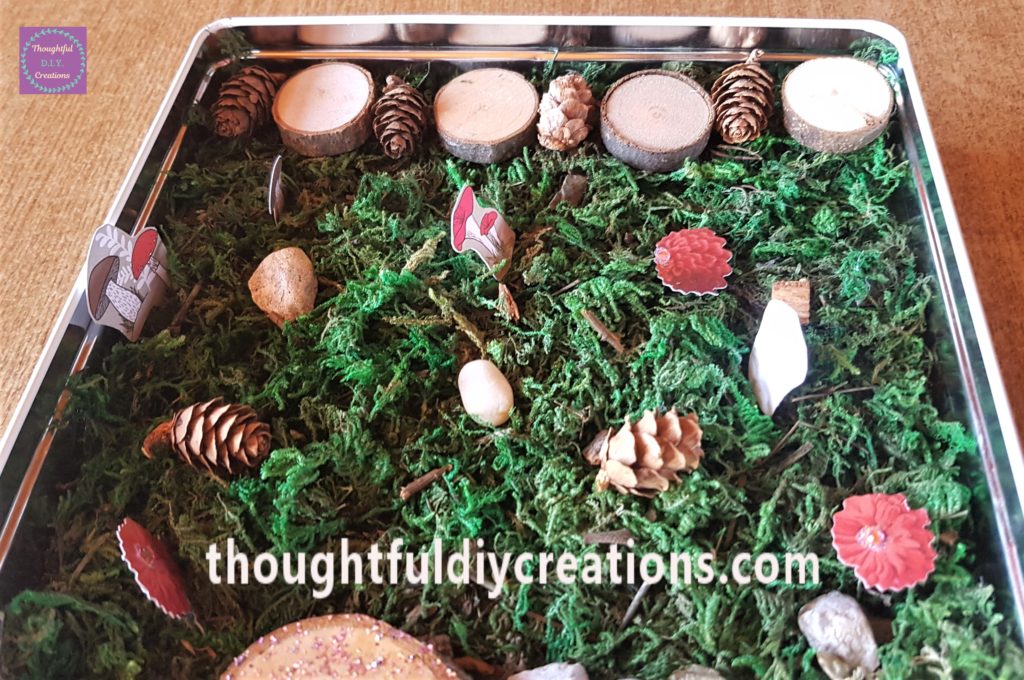
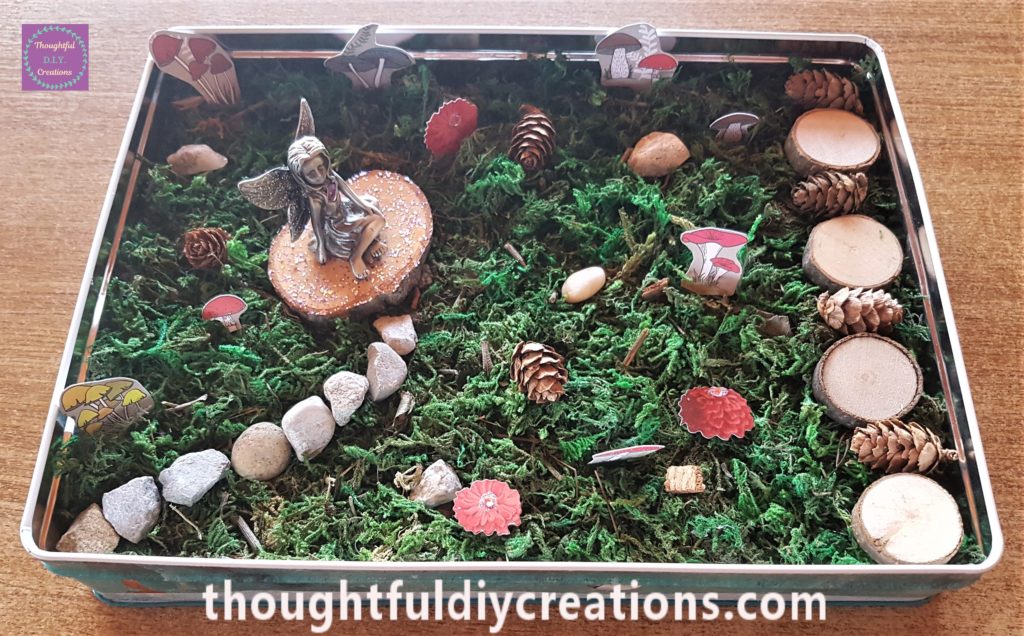
I got some wood slices and mini pine cones from my craft supplies. Wood Slices.
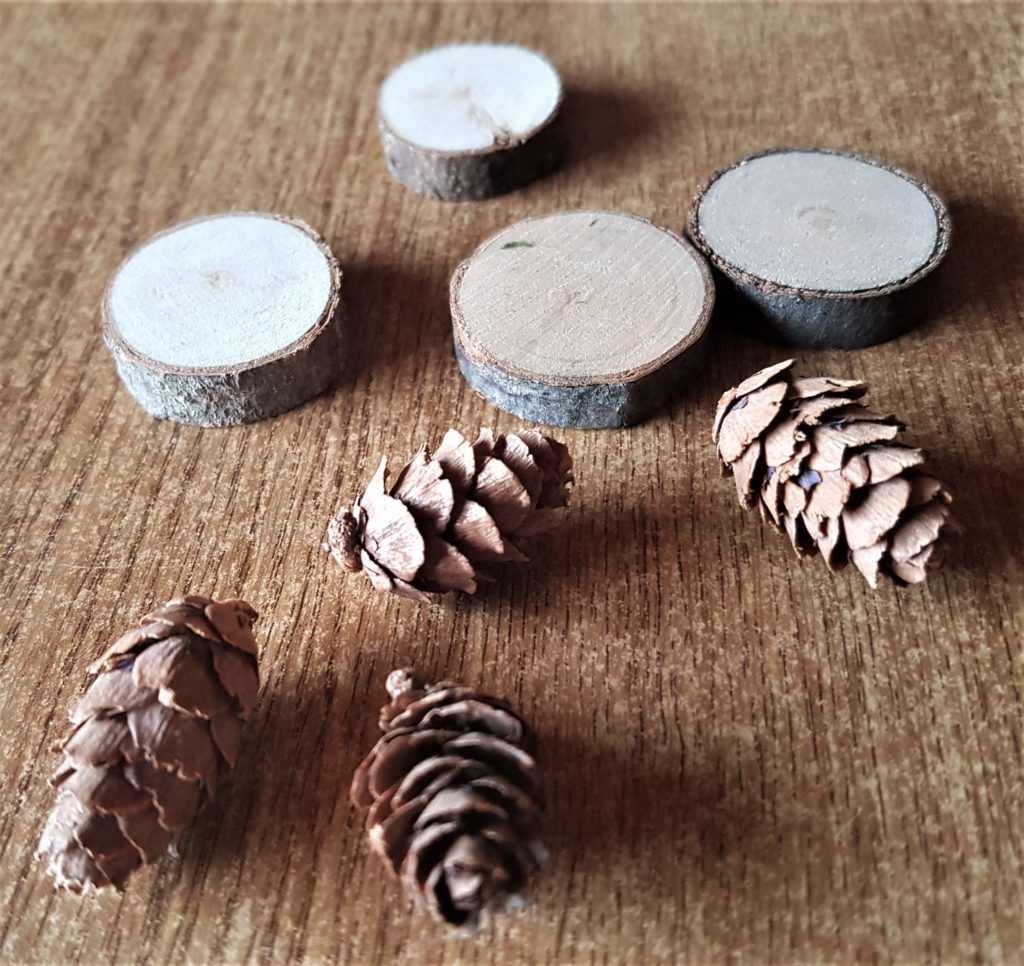
I made a Pathway out of the wood slices and mini pine cones. I placed a pine cone down onto the moss, then a wood slice, and then another pine cone until the path was formed. I didn’t use glue, they were all placed on top of the moss. Mini Pine Cones.
Making a Stone Path for the Fairy
I got a large wood slice from the pack, this will be used as a seat for the fairy. Wood Slices.

I had some stones in my collection which I had found on walks in nature.
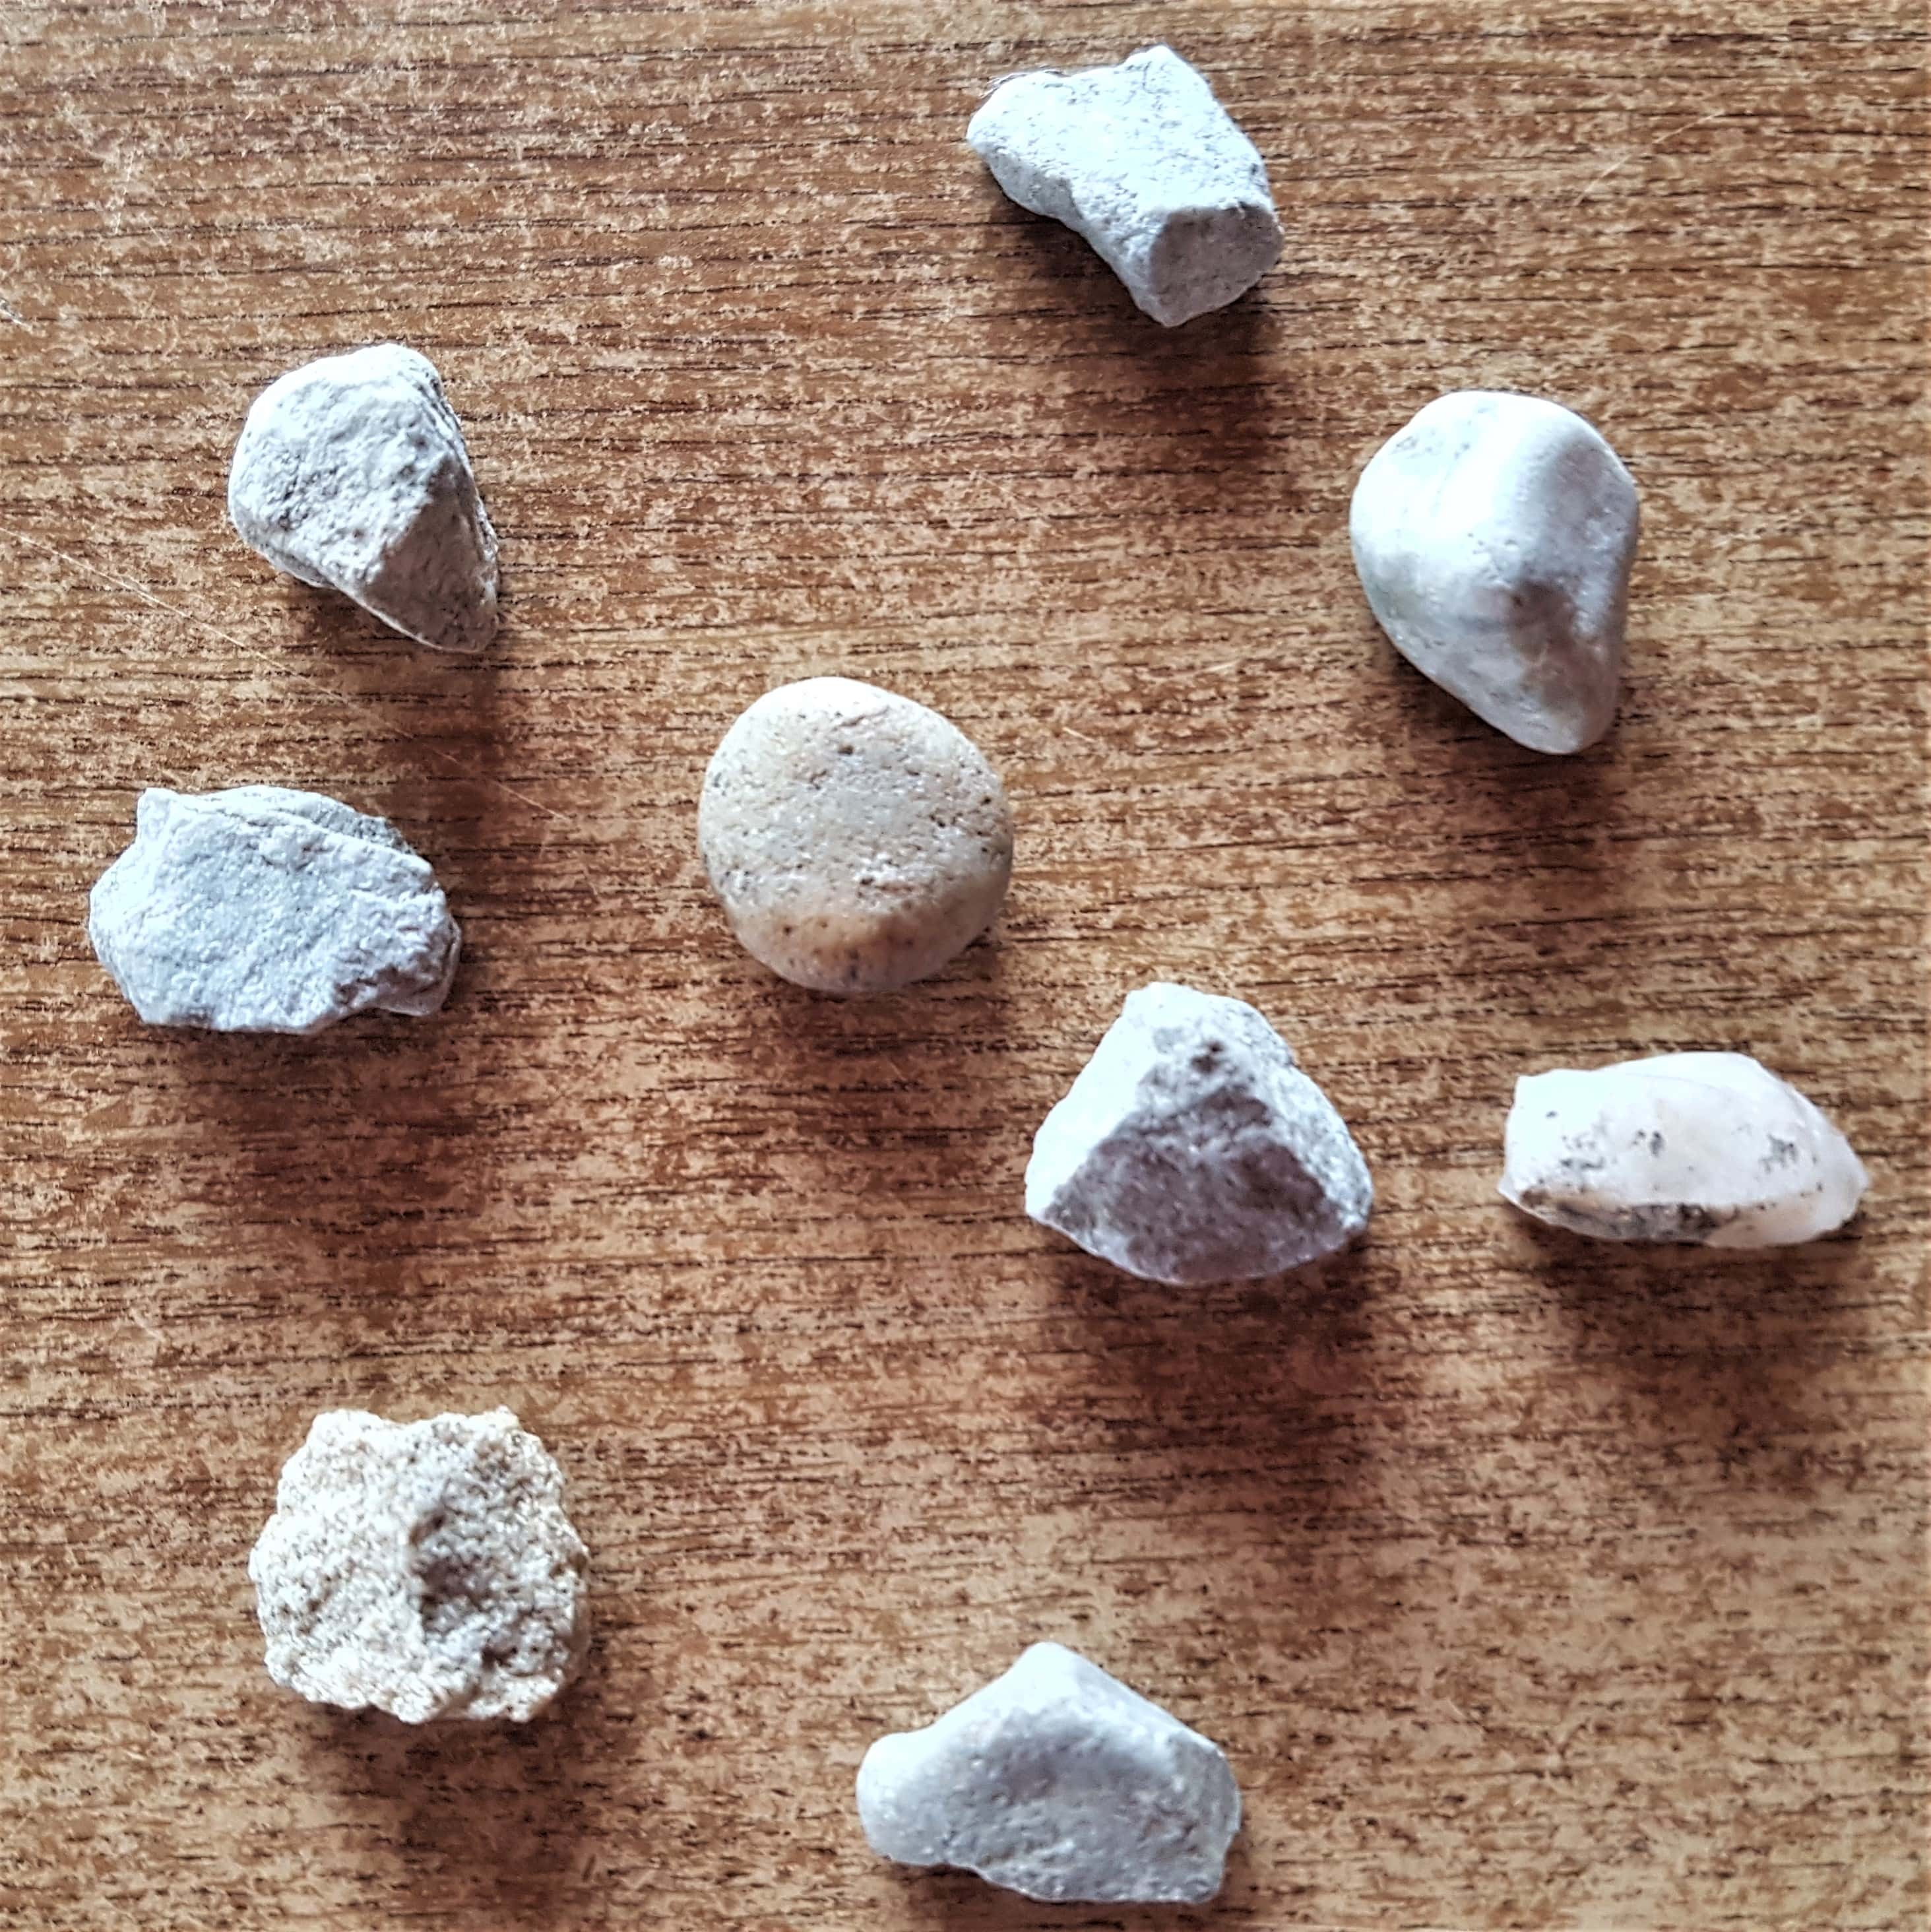
I made the stones into a slight curved path leading to the Fairy Seat. I again didn’t glue anything down as I didn’t feel the need. The objects are sturdy and this garden will be used for indoor decor.
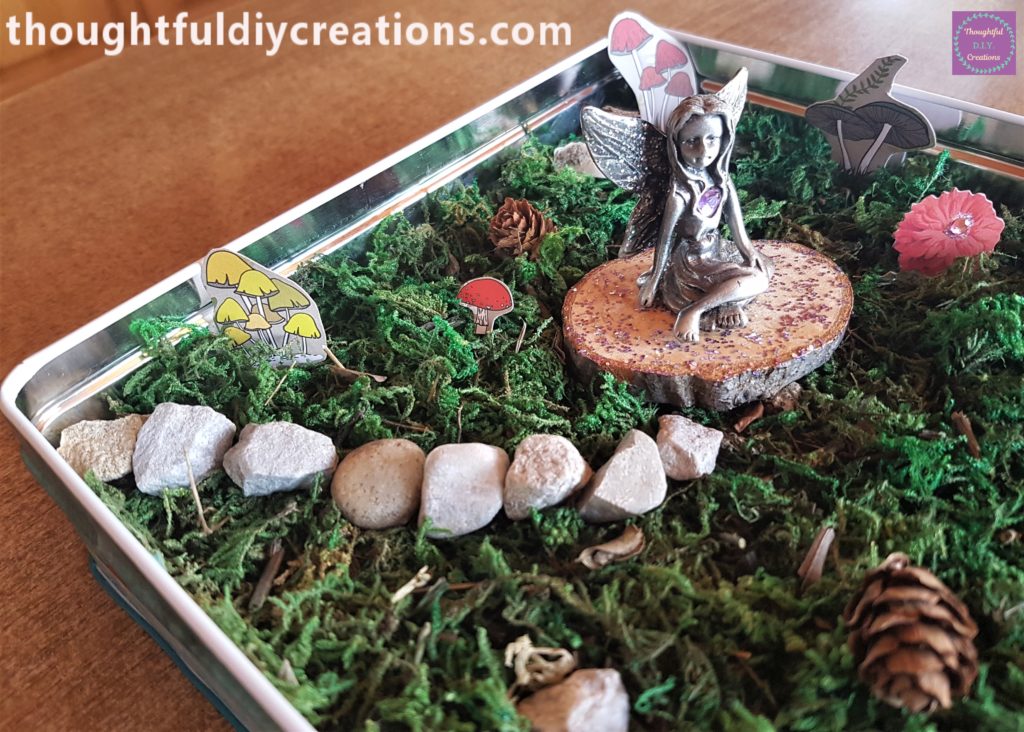
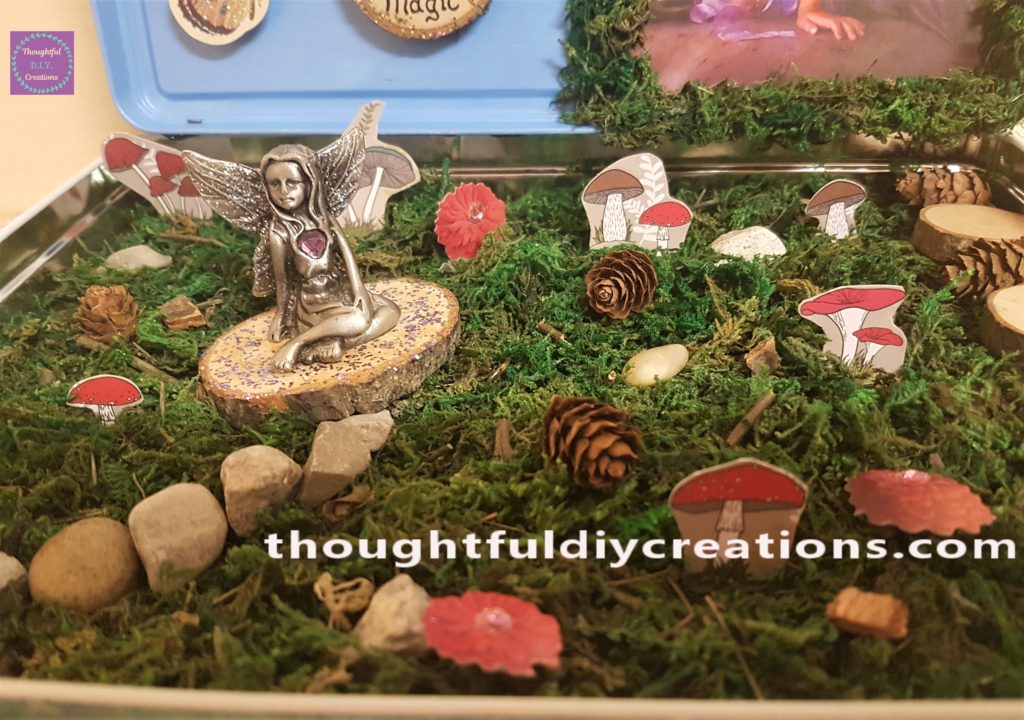
I added the Fairy to her Seat in the Fairy Garden. It is a Fairy Figurine that I have had for years. Miniature Fairy Figurines.
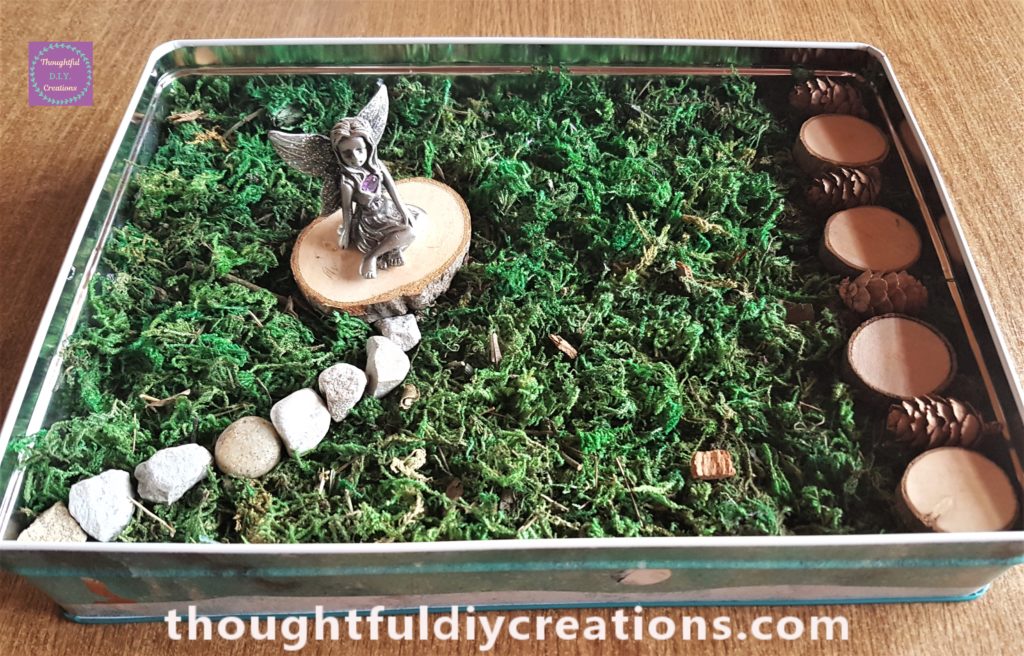
I added a few more pine cones and stones randomly to the Fairy Garden. Mini Pine Cones.
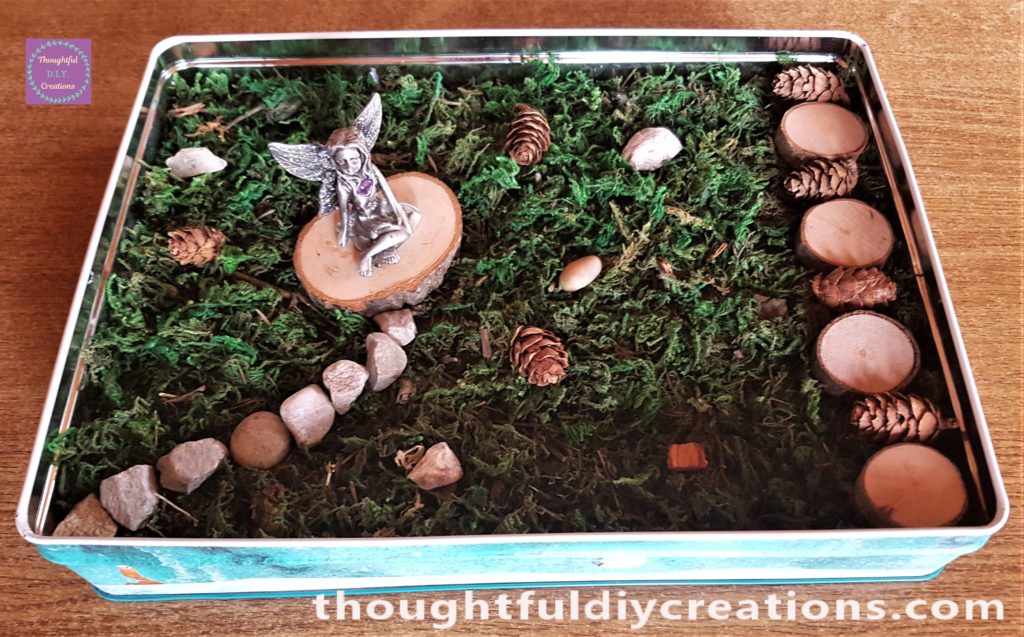
This is a side angle of how it’s coming on so far.
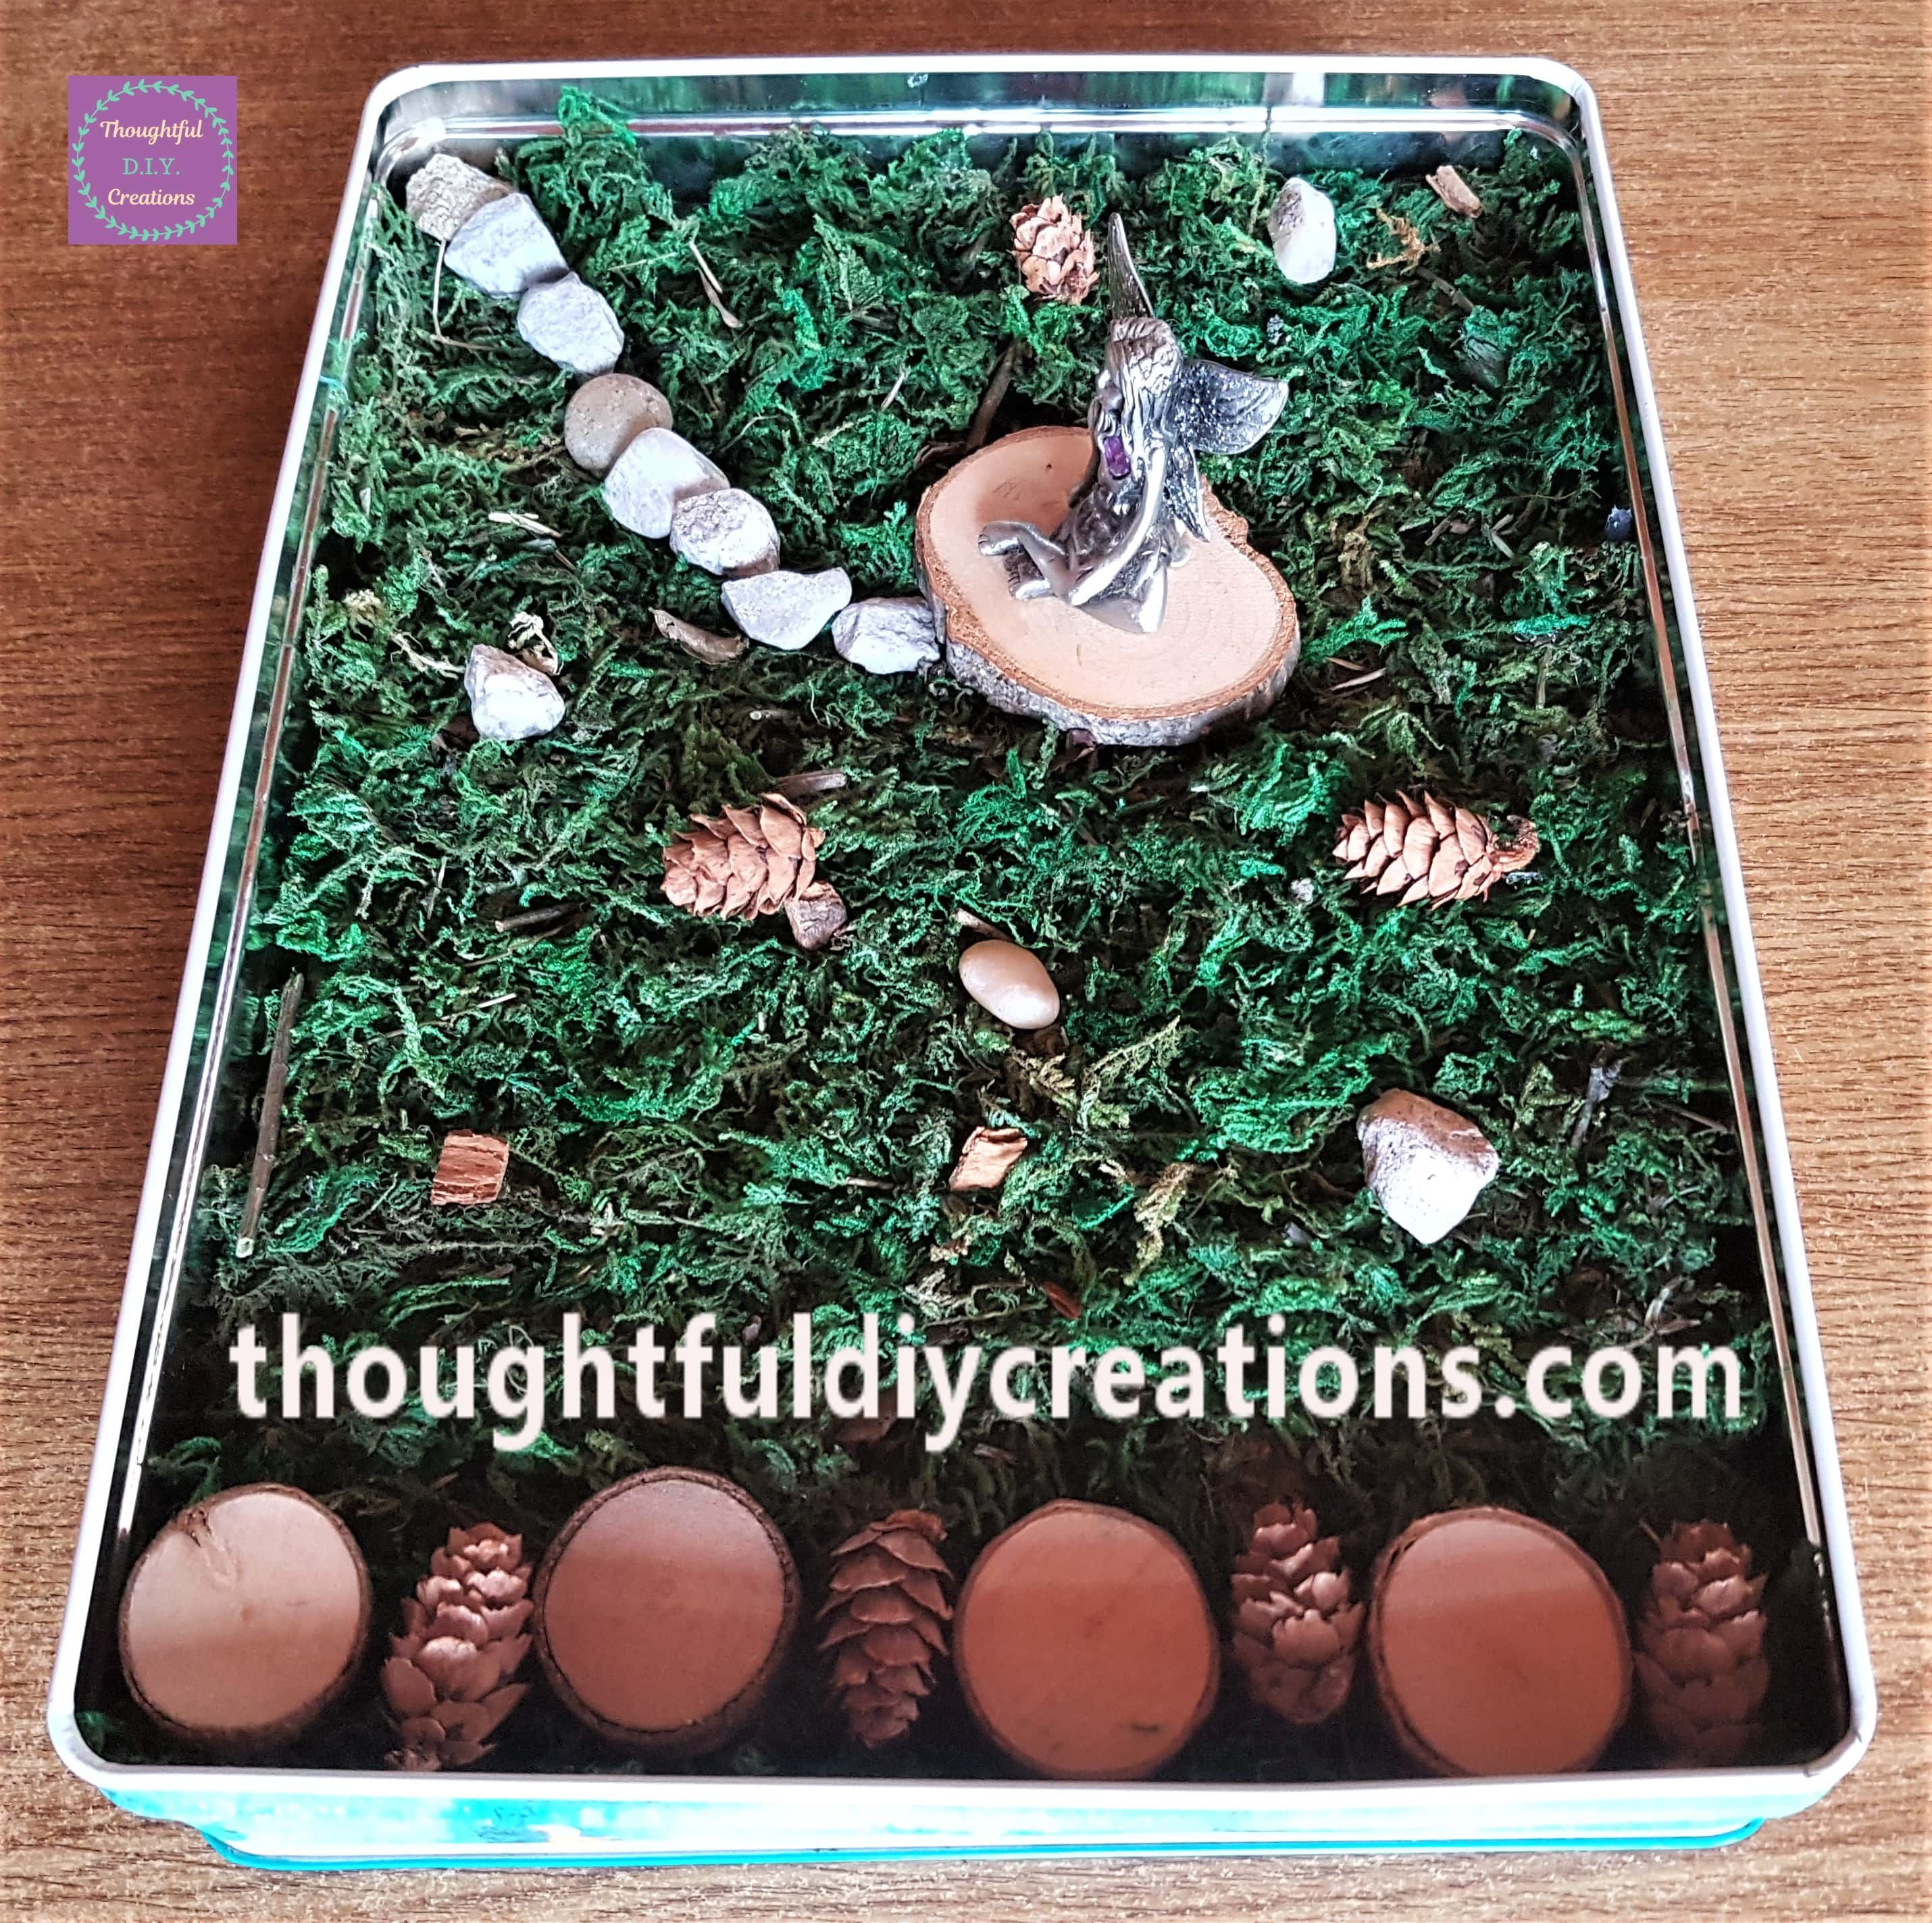
Mushrooms for the Fairy Garden
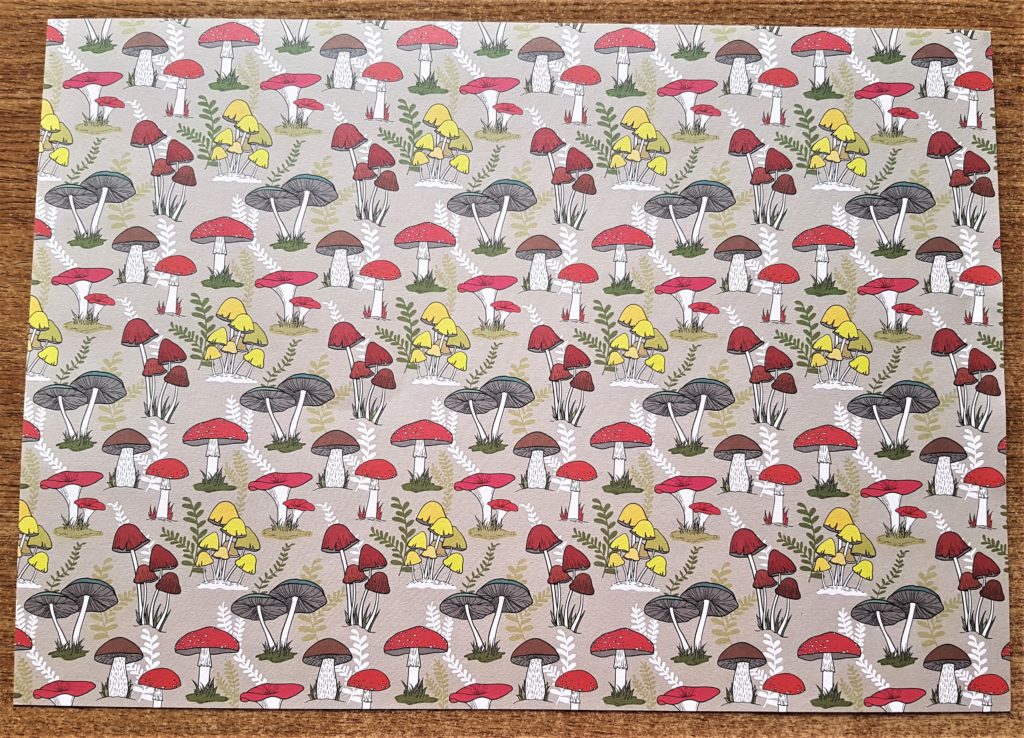
I had a Mushroom Sheet of Cardstock in my collection. I thought it would be the perfect addition to the Fairy Garden. Mushroom Collection Stickers.
I fussy cut around 8 mushroom images using a small sharp scissors.
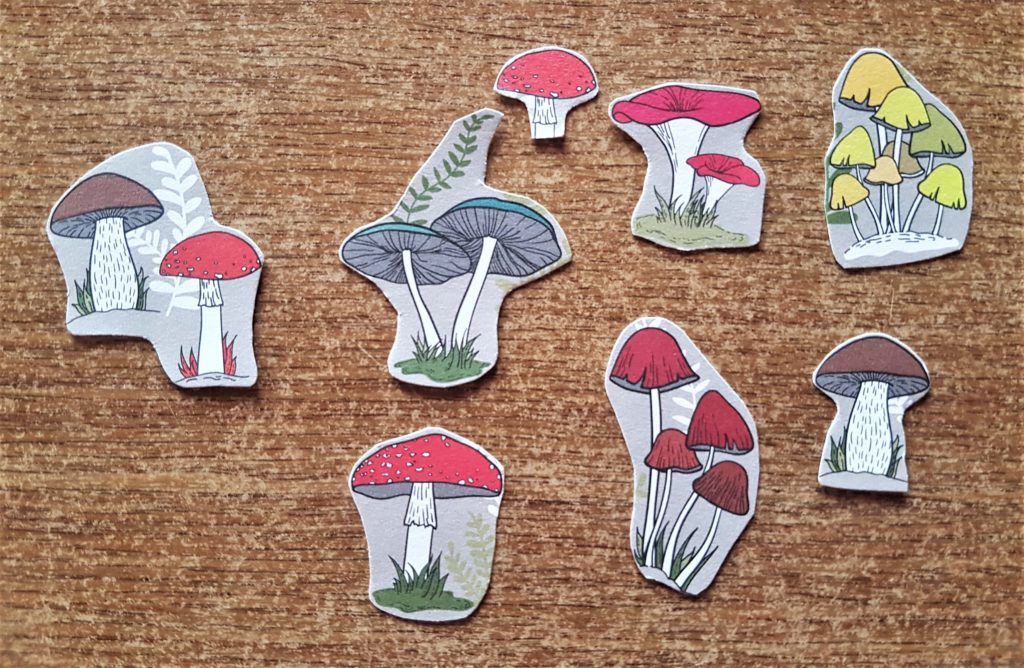
I placed the mushrooms down into the moss. I spaced them around the Fairy Garden. Mushroom Collection Stickers.
Here is a closer view of the mushrooms in the garden.
Decorating the Fairy Seat
I thought the Fairy Seat would would stand out more if it was sparkly. I had silver and purple glitter in my supplies. They match the colour of the fairy. Glitter Shakers Set.
I poured a small amount of each colour glitter into a small glass container. I added some PVA Glue and mixed the 2 glitters and glue together with a small paintbrush. PVA Glue.
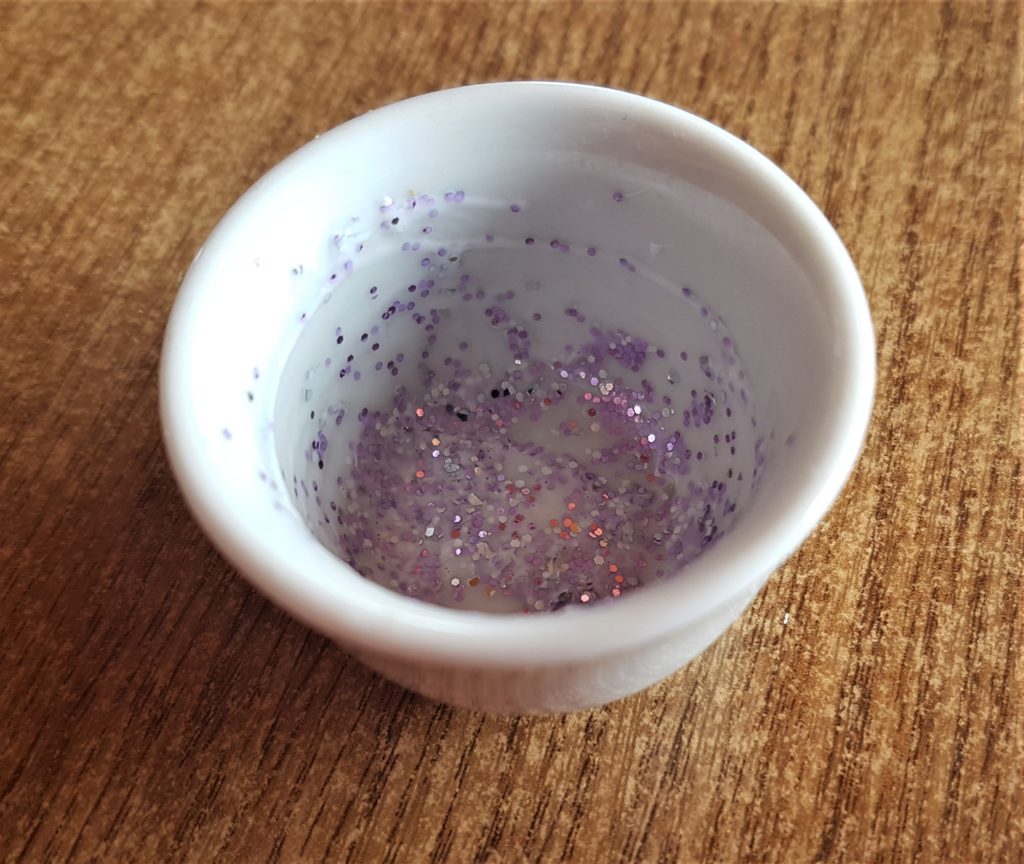
I added the glitter glue mixture all around the wood slice with a small paintbrush. Glitter Shakers Set.
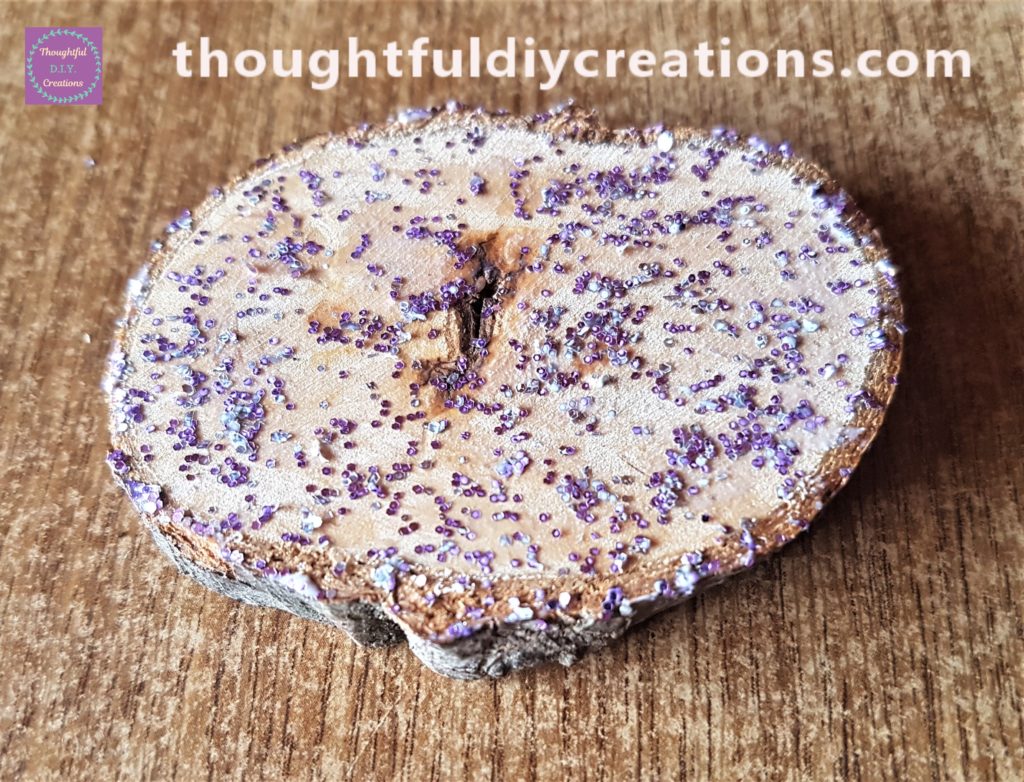
I let the glue and glitter dry, and then I placed the wood slice back into the Fairy Garden. I put the Fairy on top of the glitter wood slice. Miniature Fairy Figurines.
Finishing Touches to the Fairy Garden
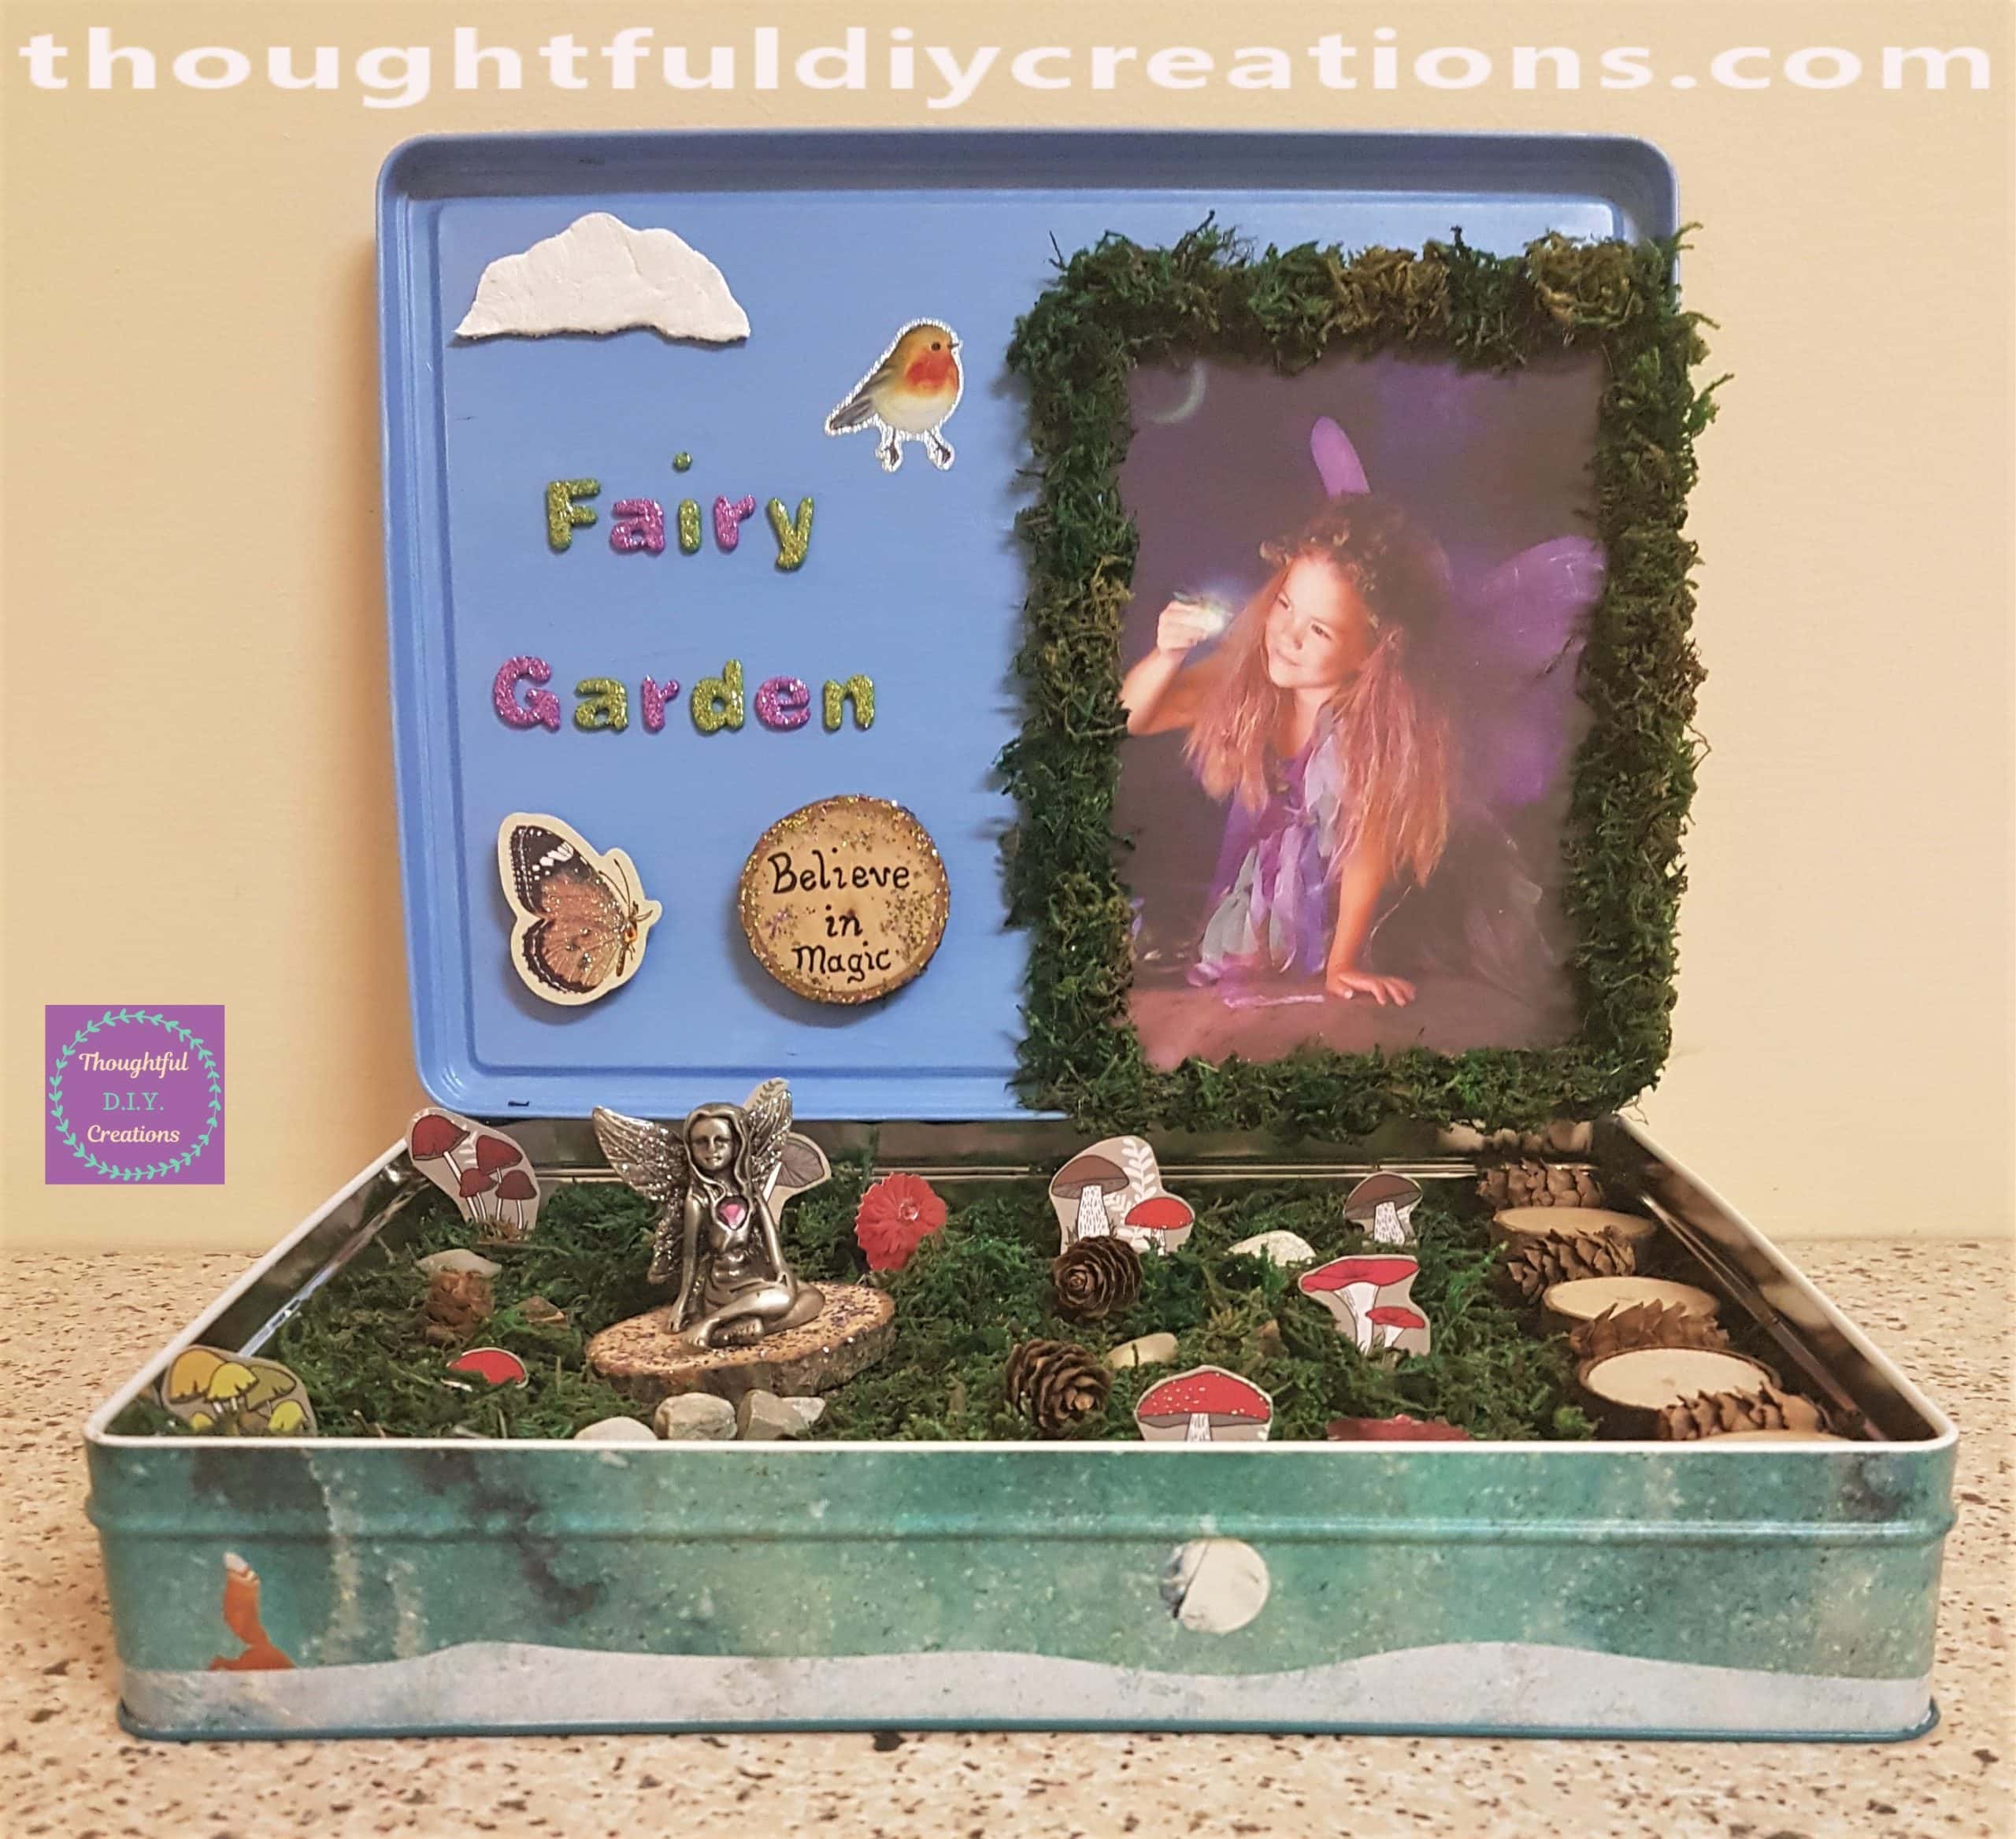
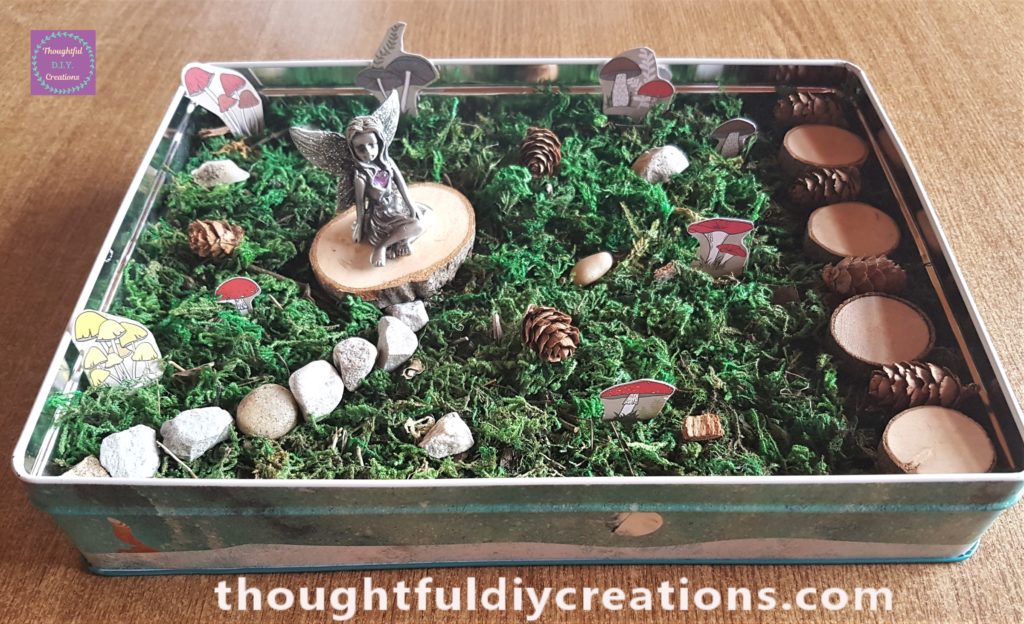
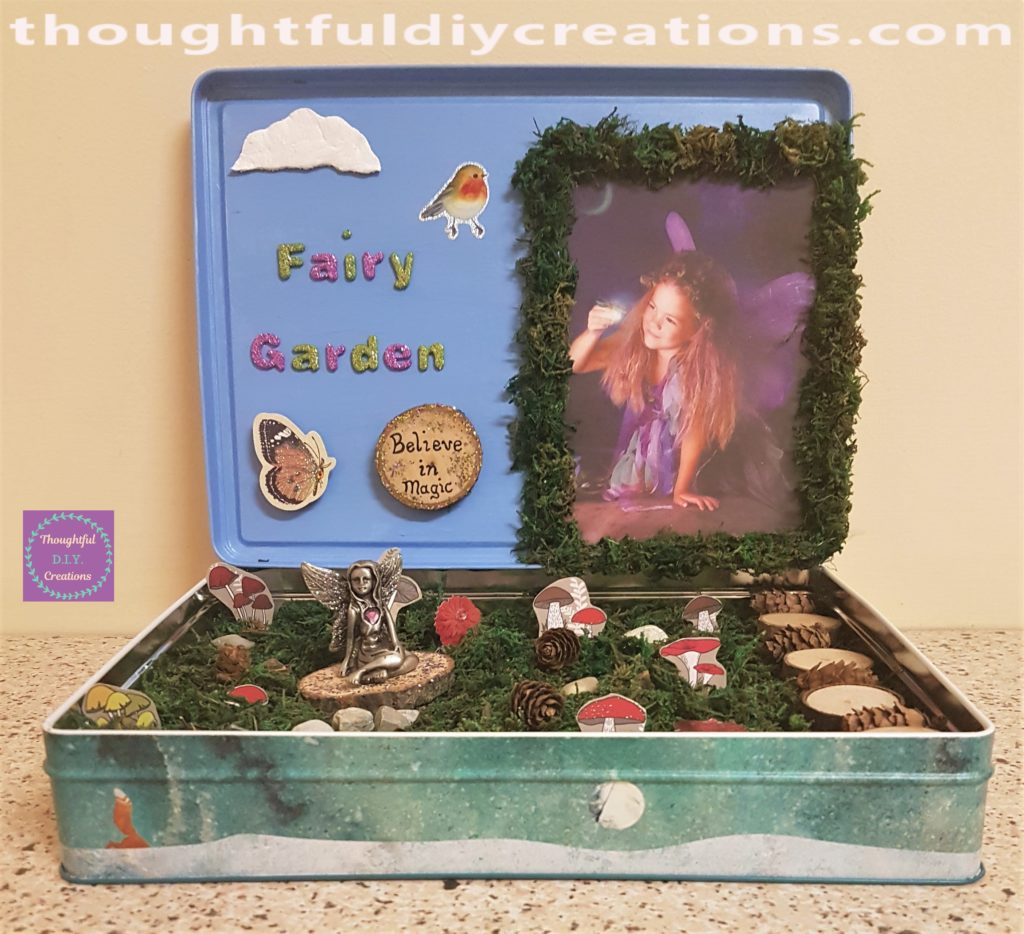
This is a full view of the Fairy in her Garden.
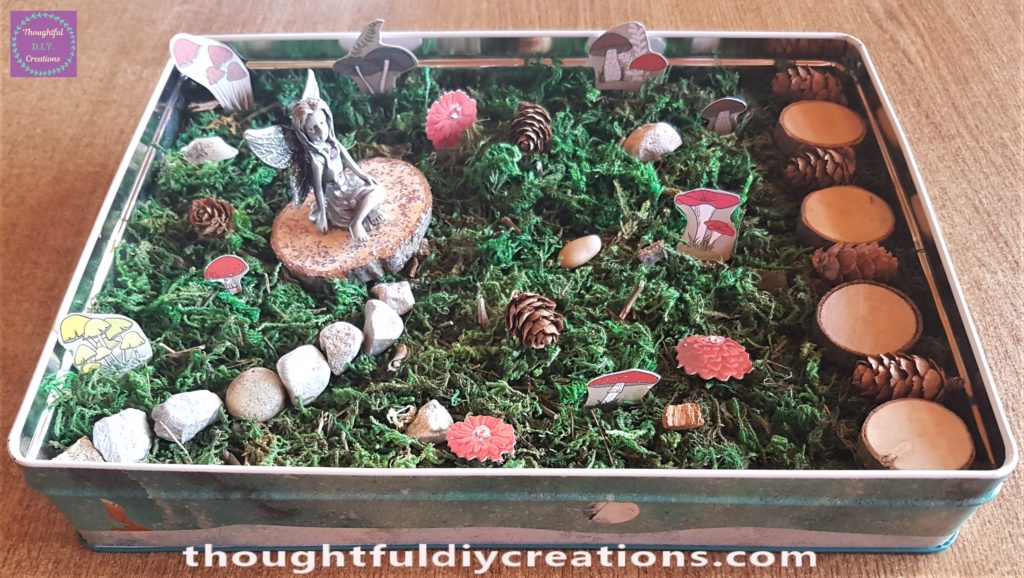
I added some Red Flower Stickers to the Fairy Garden that were in the same Pack as the Butterfly Sticker. This added a pop of colour to the garden. Watercolor Flowers Stickers.
This completed the second part of the Fairy Garden.
Here are the 2 Parts of the Fairy Garden side-by-side.
I added a Robin Sticker to the Sky on the Fairy Garden Lid. I put a generous amount of Hot Glue all along the base of the lid and attached it to the back edge of the biscuit tin. I then added more hot glue at the back joining the 2 pieces together. I leaned it against the wall for the night to help it attach. Hot Glue Gun.
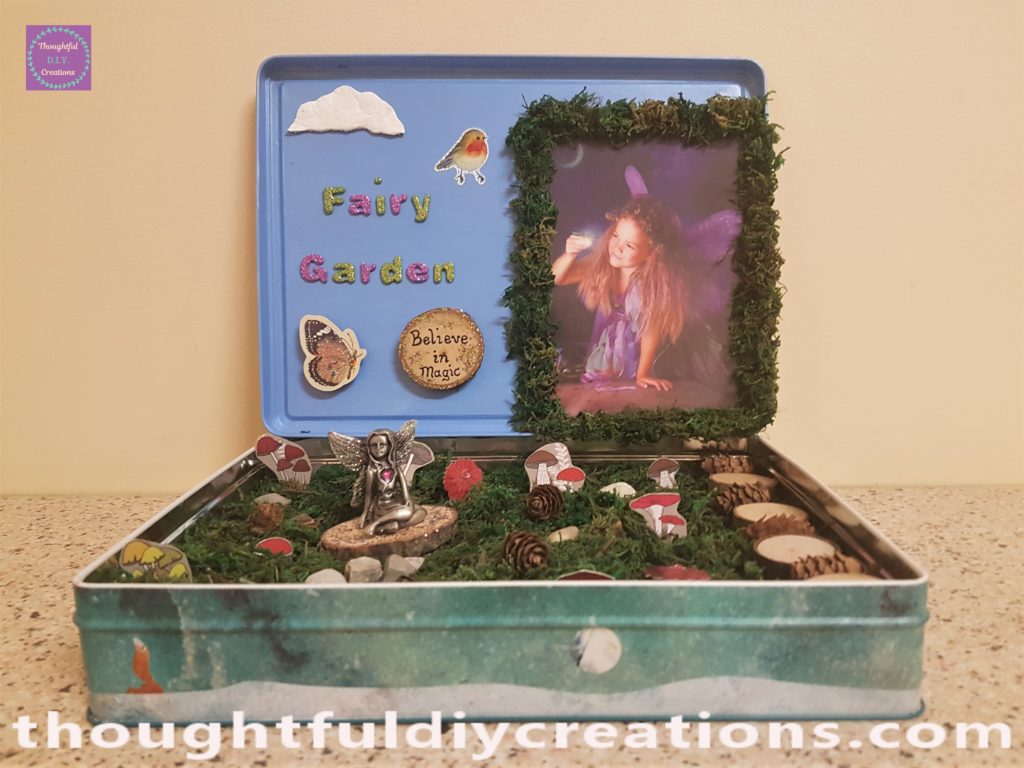
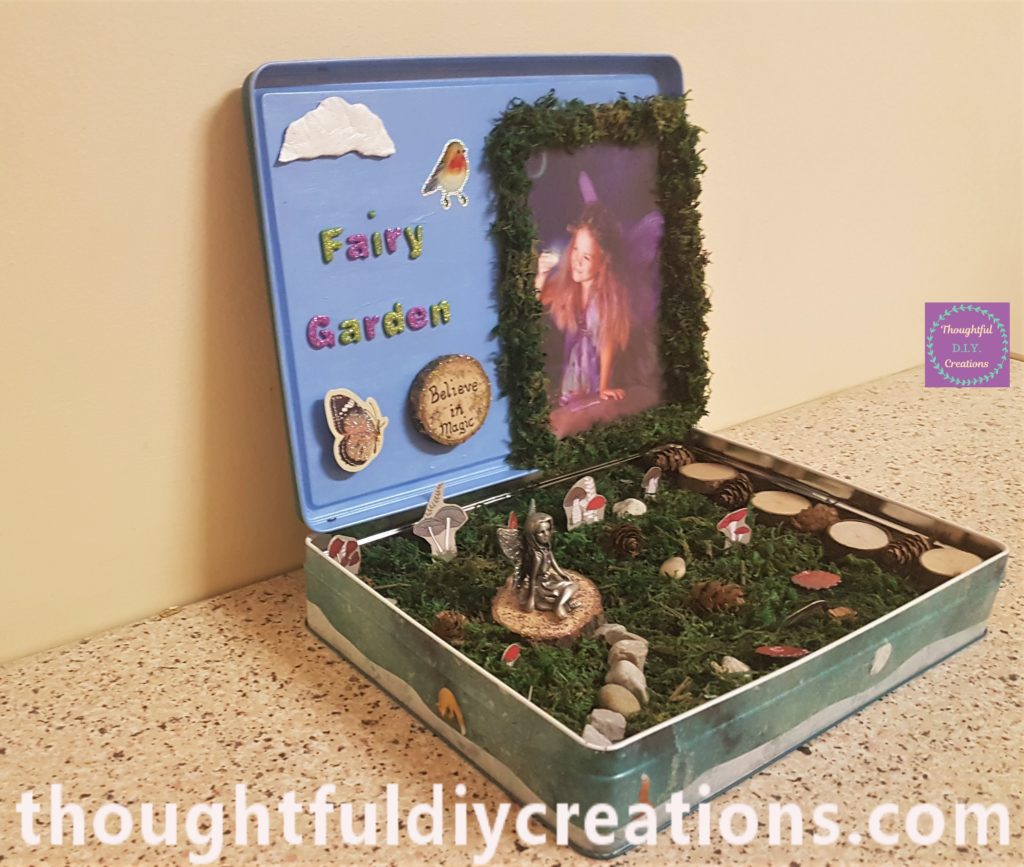
This Completed my D.I.Y. Fairy Garden.
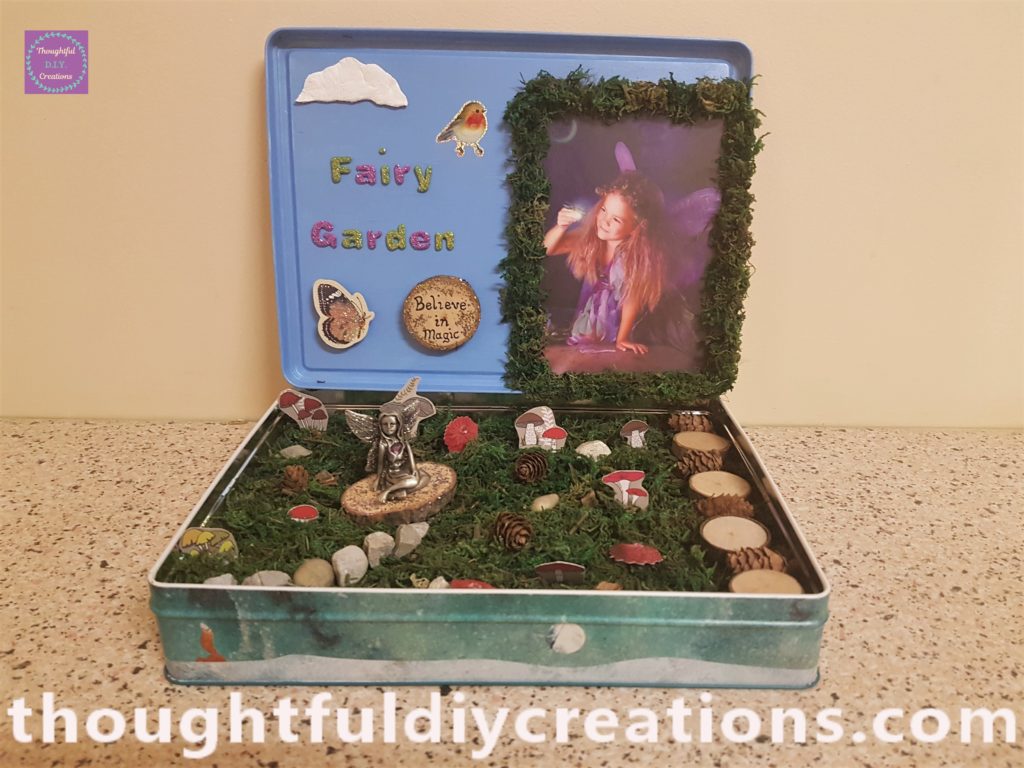
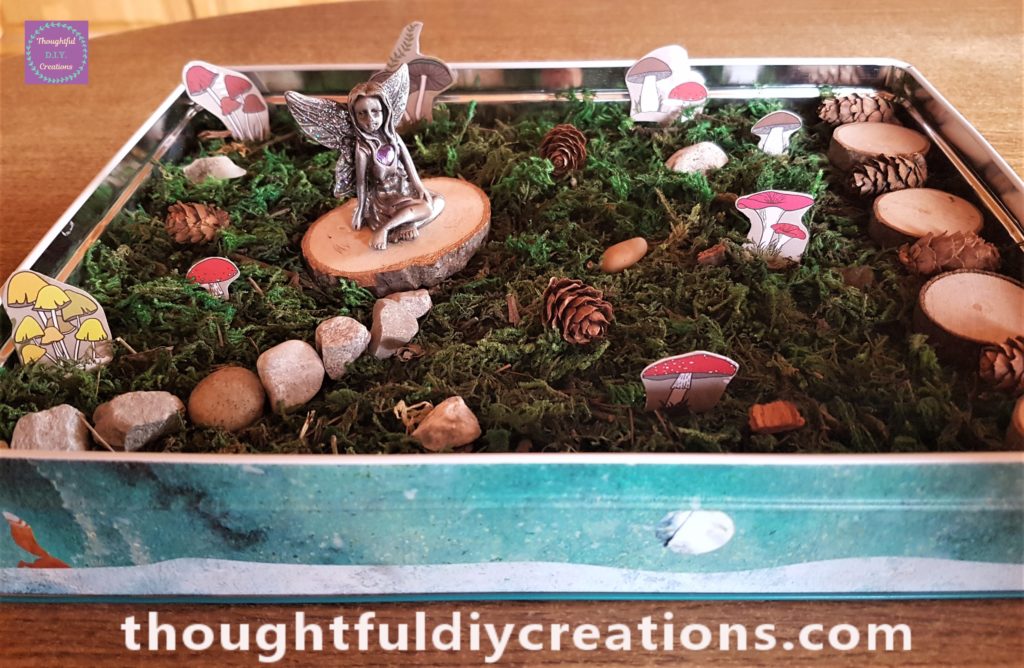
This is the Finished Craft from a side angle.
A closer image of the completed Fairy Garden.
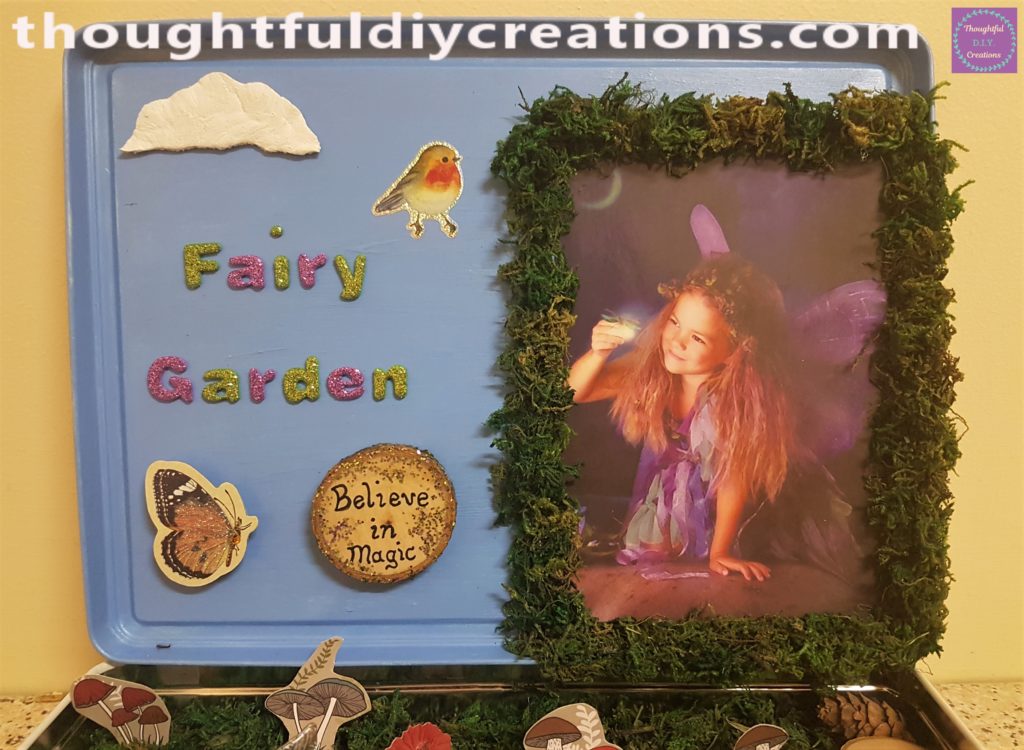
A closer view of the Fairy Garden lid.

The Fairy relaxing in her Garden. Miniature Fairy Figurines.
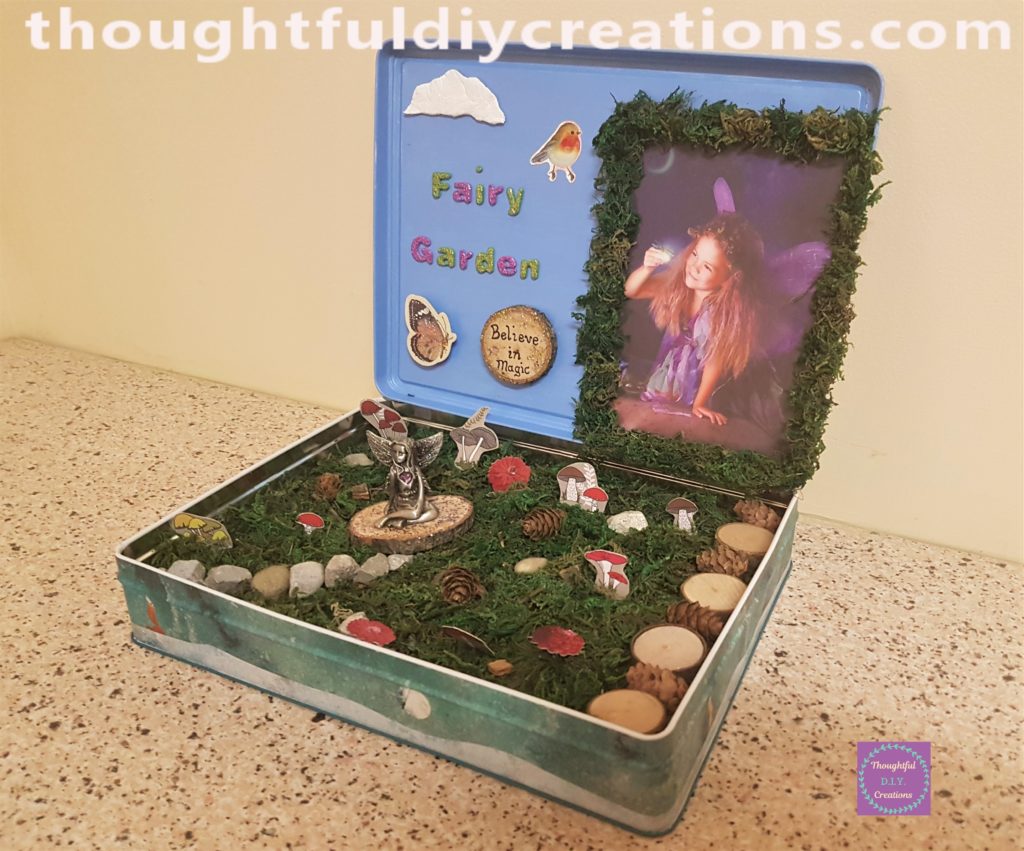
The final image of the Fairy Garden.
Conclusion
I loved how the Fairy Garden came together. I like how I got to re-purpose a biscuit tin into a piece of Home Decor. I love that I got to make a little home for my Fairy, she had been displayed on a shelf previously but I think she prefers her new surroundings. ? ?
I hope you got some ideas or inspiration from my Fairy Garden. I didn’t want to add too much to mine as I liked how it appeared as natural surroundings like a forest. I would like to make one on a bigger scale in the future and make little furniture and add to it over time. It’s amazing what you can make out of bottle caps, twine /cord, etc.
You could make your Fairy Garden an Outdoor one which has real flowers, stones, soil and moss. It’s endless what you can make out of twigs, bark, shells, and stones to complement the natural fairy garden.
You could also make a purely decorative Fairy Garden and make furniture out of lollipop sticks, make paths out of shop bought pebbles and wood slices, or acorns. You could add little foam or paper flowers. Children could make furniture or flowers / butterflies out of their craft supplies like pipe cleaners and pom poms. It can be as big or small as you want it to be.
A flower pot could be used as your Fairy Garden home, or a Jar if your tight on space or as a beginner project. I hope it inspires you to have a good look around your home and garden to see what you can find that can be used for your fairy garden or accessories.
Have you made a Fairy Garden before? I love how magical and whimsical they are, they appeal to all ages. It is such a versatile craft, all it needs is a little imagination. Another Fairy Craft you might enjoy Fairy Scrapbook Layout.
It would be a great craft to complete with children. You can gather your supplies in your garden together or go for a walk and see what you find. They will be so proud of what they found and then making it into a craft will give them a great sense of accomplishment. You can write down any ideas of what you would like to add to your garden and see how you can go about making them.
If you have any questions on this craft don’t hesitate to ask.
Thank you so much for taking the time to read my Blog.
Always Grateful,
T.D.C.
xoxox