Mixed Media Art from Recycled Materials
Hello my Creative Friends,
I hope you are all well. In Today’s Tutorial I will show you how I made a Mixed Media Art Piece from Recycled Materials. I hope it encourages you to make Art with what you have in your home. My aim is to inspire people to get creative with limited supplies making Arts and Crafts accessible for everyone regardless of their budget.
Folder for the Mixed Media Base
I had an old Ringbinder Folder, the silver clasps in the inside wouldn’t close properly anymore so I cut the front of the folder off with a strong scissors and put it in my craft supplies. I discarded the rest of the folder, the back wasn’t in as good condition as the front.
This is the front of the Folder after being cut.

I thought the folder would be the perfect base for my Mixed Media piece as it’s very much like a Canvas Board. It’s strong, sturdy and a nice size. It is also using something I had in my supplies making it a budget choice.
Preparing to Prime the Folder
I put some ‘Baking Parchment Paper’ on the table. I placed the folder on the Parchment Paper. I got my Acrylic Gesso and a flat Paintbrush and was now ready to prime the Folder. Paint Brushes.

Priming the Folder
I applied the first layer of Gesso to the Folder. This primes the surface, gets rid of the Blue colour and prepares the folder for different mediums like Paint, Watercolours, Glitter etc. Gesso Primer.
I waited for the Gesso to dry and then removed the folder from the Parchment Paper to take the Photograph so it would look more clear. The Parchment Paper protected the work surface and when I was finished all the layers of Gesso I discarded it making the clean up time quicker.

I applied the second layer of Gesso about 20 minutes later. It doesn’t take long to dry but if you are in a hurry you can speed up the process using a heat tool or hair dryer.

I added the third and final layer of Gesso after another 20 minutes. I find it best to do thin layers as it looks neater and dries quicker. Gesso Primer.

Making Texture for the Background
I tore a large section of Tin Foil.

I scrunched it up in a ball.

I opened it back up and the tin foil now had lovely texture all over it.

I tore the tin foil into 2 pieces.

I used the smaller Tin foil piece for this Mixed Media project and put the other one into my craft supplies to use in the future. I put some of ‘Anita’s Tacky PVA Glue’ onto the Folder and also onto the back of the Tin foil. You could also use Gel Medium to attach the pieces together. Anita’s Tacky Glue.

I put the Tin Foil onto the Folder and pressed it into the Glue.

This is the Side view of the Tin Foil attached to the Folder.

I got a Tumble Dryer Sheet from my craft stash. I used it a couple of times to finish drying my clothes, I like the texture and didn’t want to throw them all out so kept a few for my art and crafts.

I cut the Tumble Dryer Sheet in half by cutting it from the bottom left corner to the top right corner giving it a triangle shape.

I attached one of the tumble dryer pieces to the bottom right hand corner of the Folder using ‘Anita’s Tacky PVA Glue’. Anita’s Tacky Glue.

Adding Accessories to the Folder
I got a couple of buttons from my collection. They had either fallen off a jacket or I cut them off something I no longer wore and kept them for Crafting.

I glued the bigger button onto the right hand side of the Folder and glued the smaller button to the bottom left hand corner of the Folder. Paint Brushes.

Fabric for the Mixed Media Craft
I had the top sections cut off from two Tops I had, the green top had a hole in the bottom section, and the Pink top had gone yellow on the bottom silk section. I loved the detail in both items so had kept them in my fabric supplies.

I cut out the mid-section from the green top and a larger section from the pink lace top.

I adhered the pink lace fabric to the bottom half of the Folder and then adhered the green fabric over the pink lace on the bottom left hand side of the Folder. I again used the Tacky PVA Glue. Anita’s Tacky Glue.

Here is a close-up image of the Fabric.

Broken Jewellery being Re-Purposed
I got some pieces of jewellery to use for this Mixed Media Craft. The flower was from an old Purse I had, the red bead fell off an Earring and the Chain had broken off a bigger Chain.

I glued the Flower and Bead to the bottom of the Folder. Paint Brushes.

I glued the Chain to the top right hand side of the Folder.

I had a Ribbon in my supplies. I think it came with some packaging, a Gift Box or a Pyjamas Set, I can’t remember what exactly.

I cut a section of the ribbon to use for the Mixed Media piece.

My Mam’s Friend gave me a Bag of Jewellery she no longer wanted for me to use for my Arts and Crafts. I decided to use this Pink Ring from her collection.

I don’t need the bottom part of the ring for this project. I cut the clear elastic holding the ring and the 4 pieces came off with it.

This is the front of the ring laying flat beside the cut off pieces.

I glued the ribbon to the top left side of the Mixed Media Piece with the PVA Glue. I attached the ring to the bottom right hand side of the Mixed Media Piece using ‘Heavy Gel Medium’, as it’s a heavier piece and I don’t want it to fall off. Heavy Gel Matte.

Adding Interest with Beads
I got a few bags of sequins and beads to use for this Mixed Media Craft. They had come as extras with dresses or tops I had bought.

I put some of ‘Anita’s Tacky PVA Glue’ on different parts of the Mixed Media Piece with a small paintbrush and sprinkled the sequins and beads on top of the glue. Anita’s Tacky Glue.

A closer look at the sequins and beads added to the Folder.

More Accessories added to the Folder
This Black Beaded Chain was from the Bag of Jewellery my Mam’s Friend gave me.

I cut the string in the Chain and let some beads come off to use for my Craft.

I folded the second part of the Triangle shaped Tumble dryer sheet from earlier in half and cut it to make 2 pieces.

I glued the Tumble Dryer Triangles to the Folder as well as 3 beads from the Necklace using ‘Anita’s Tacky PVA Glue’.

I glued 7 more beads to the bottom half of the Mixed Media project.

This is a full side angle view of the Craft so far.

Priming the Mixed Media Accessories
When everything glued down was dry I applied Gesso over everything on the Mixed Media Folder using a Paintbrush. Gesso Primer.

About 20 minutes later I added another layer of Gesso to each item. Paint Brushes.

Adding more Elements to the Composition
I had a lace in my supplies.

I cut a section of the lace to use for this Mixed Media project. I applied a few layers of Gesso to it.

I cut the Gessoed lace in two.

I glued the two lace pieces to the top right hand side of the Folder using PVA Glue. Anita’s Tacky Glue.

I had butterfly wings which had broken off a ring I had.

I applied a few layers of Gesso to the Butterfly wings using a small paintbrush. Gesso Primer.

I attached a wing each side of the ring on the bottom of the Folder with ‘Heavy Gel Medium’. Heavy Gel Matte.

This is a full view of the Craft so far.

I had a Gift Box with Raffia in my supplies.

I got a small section of raffia and glued it to the top of the Mixed Media Piece with PVA Glue.

I added a few layers of Gesso to the raffia. Gesso Primer.

Painting the Mixed Media Piece
I had a Colour Tester Paint Sample ‘Twilight Purple’ by Fleetwood in my Paint collection. Acrylic Paint Violet.

I got a small paintbrush and dipped it into the Paint and applied various blobs of Paint randomly on the Mixed Media Folder. Acrylic Paint Violet.

I got an empty Toner bottle I had kept and filled it with water.

I sprayed the water onto the areas where I added Paint and held the Folder up to let the Paint and water flow and spread giving the Mixed Media piece a watercolour effect. I had Kitchen Paper on my Table to clean the water and paint that ran down the Folder.

I used my Hairdryer on a low setting with the nozzle on to speed up the drying process.


I had some Teal Paint left that I mixed up with different colour Acrylic Paints. I used this Paint for the ‘LIVE, LOVE, LAUGH CANVAS’ and the ‘D.I.Y. HORSE SILHOUETTE JAR’ Crafts. I love the colour and I’m getting good use out of it. Acrylic Dark turquoise.

I dipped a small paintbrush into the teal paint and made small marks in different places on the folder. Acrylic Dark turquoise.

I again sprayed water over the paint and let it spread all over the folder. I also used my hairdryer to help it dry quicker.


Adding Glitter to the Craft
I got my Purple Glitter and Green Glitter Nail Varnish.

I poured a little of each colour nail varnish into old lids of bottles. I got 2 small paintbrushes and added both the purple and green glitter varnishes on different areas on the Mixed Media Folder. This is a budget way of adding colour and glitter to a project. Paint Brushes.
If you don’t wear your nail varnish anymore you can use the brush from the lid of the nail varnish bottle and keep them in your craft supplies, but if you still wear them you can use the same approach as I did to make it hygienic as well as being able to use them for your crafts.

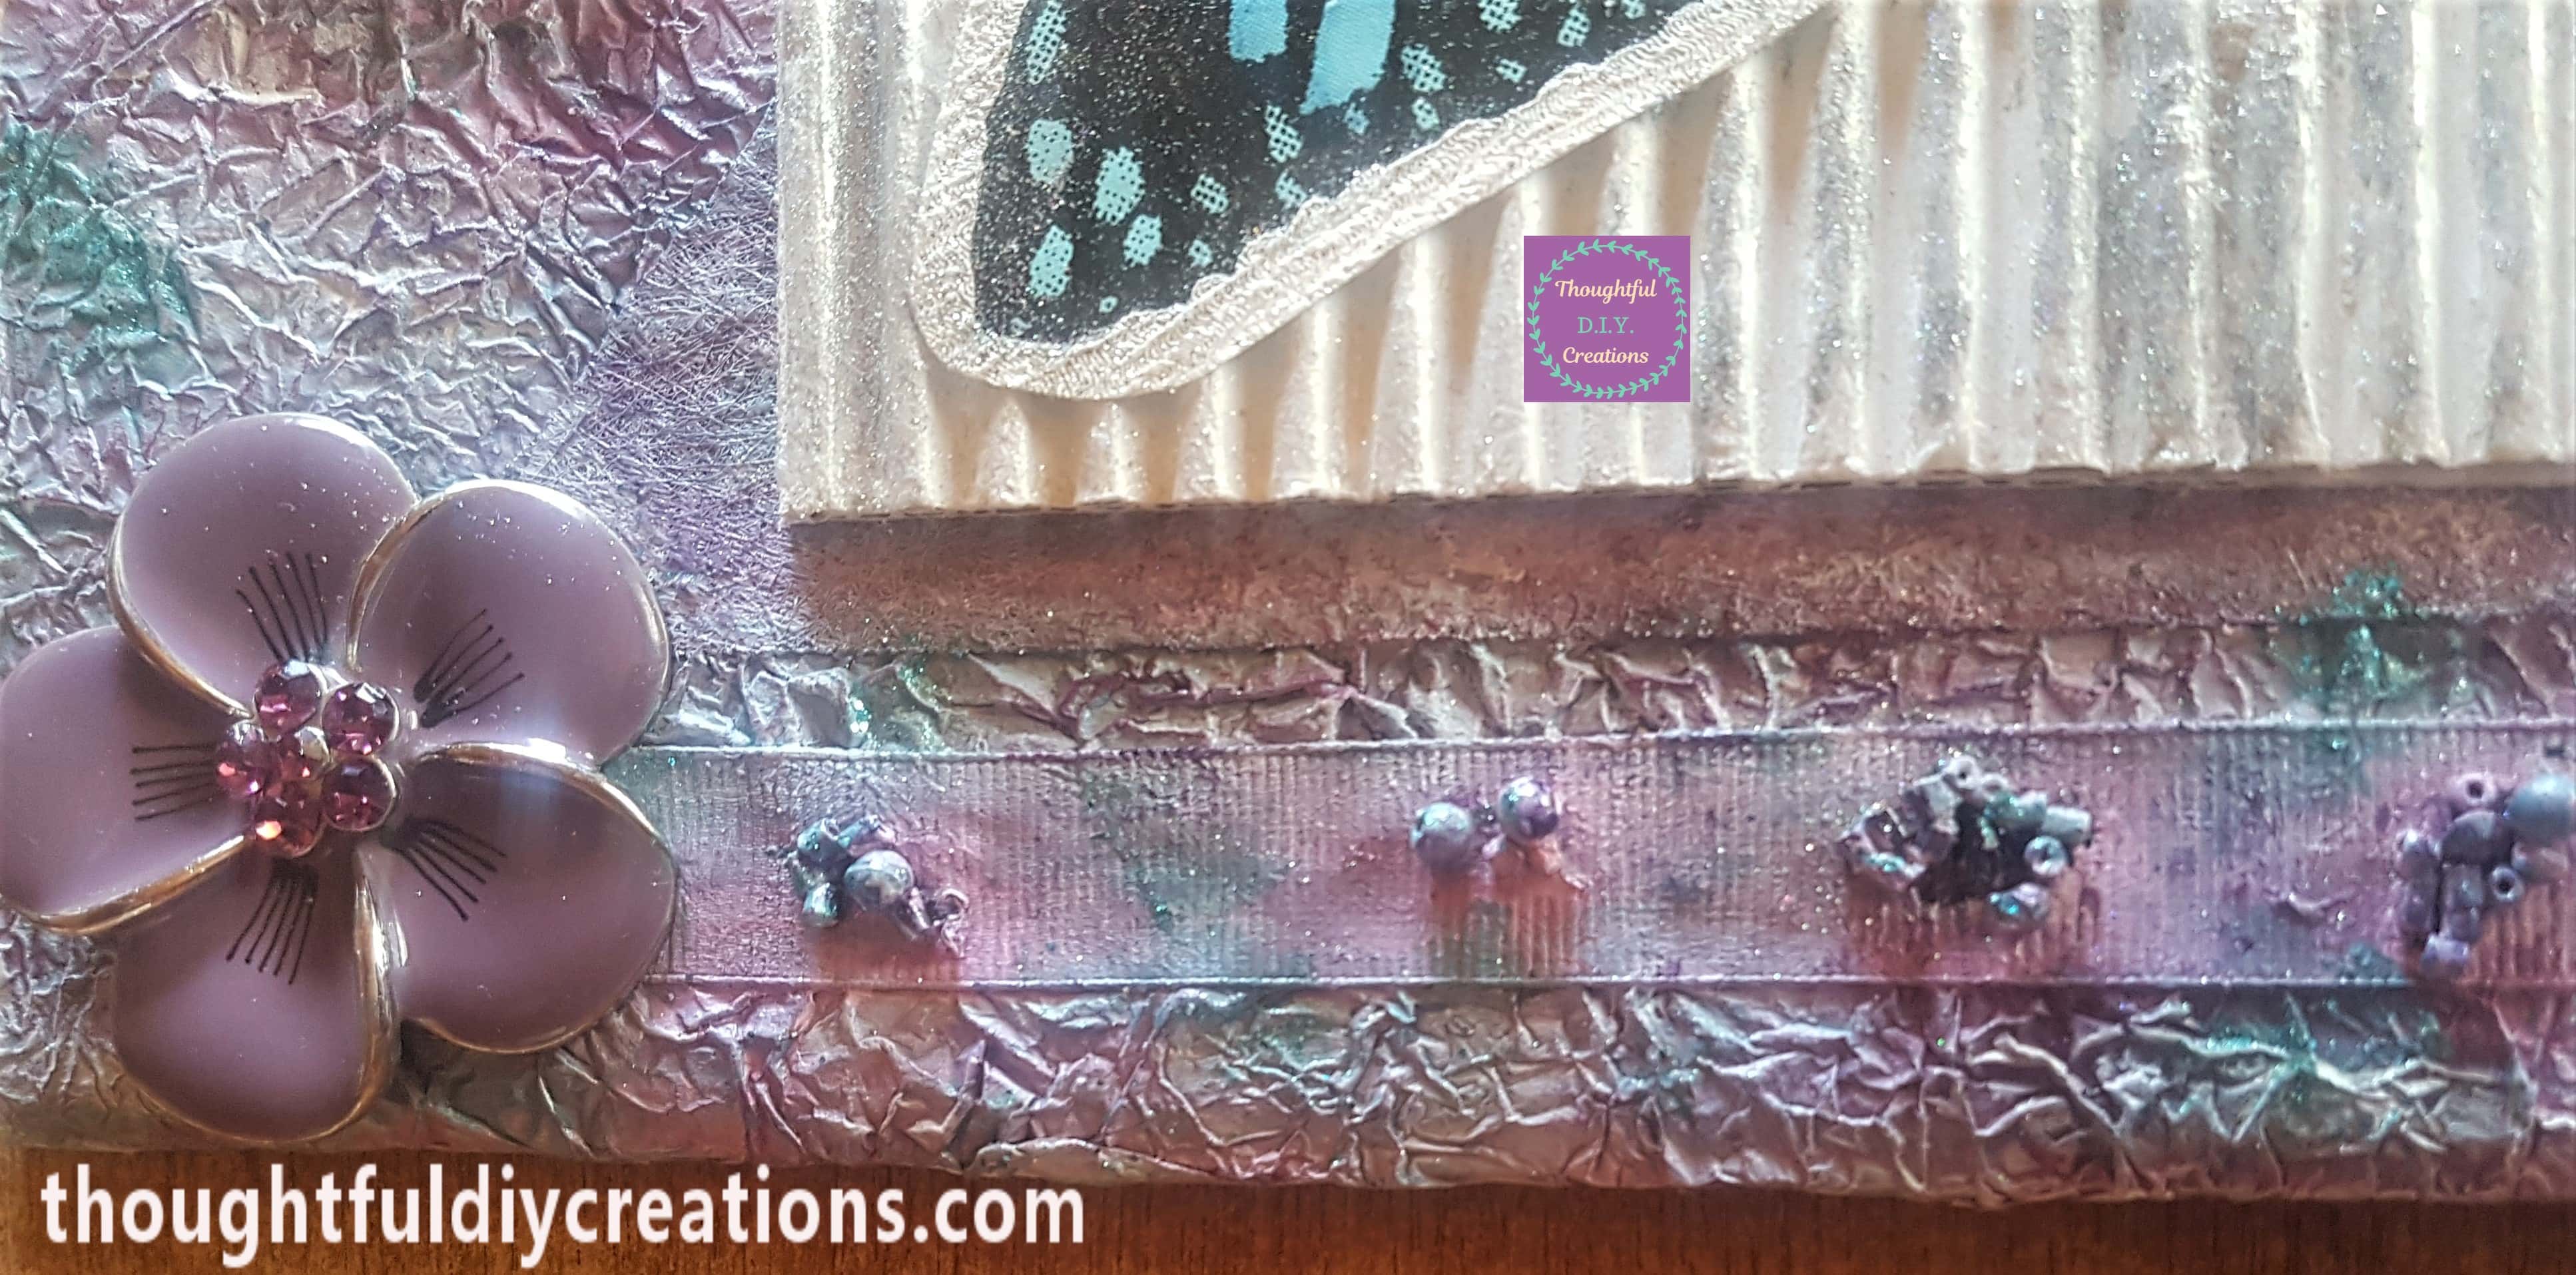
A close up image of the bottom left hand corner with glitter nail varnishes added.

This is a side angle of the top of the craft.

Adding Highlights to the Art Piece
I added some White Acrylic Paint to different parts of the piece, I rubbed it into the various textures with my finger, adding some highlights to the overall look. WN Galleria White.

The top half of the craft so far.

The bottom part of the folder.

I outlined the border of the green sequin top with the ‘Twilight Purple’ Paint, I added it with a paintbrush, I didn’t water it down. I wanted to add a contrast to the lighter shades on the Folder. I also added the purple paint to other areas of the piece with my finger. Acrylic Paint Violet.

Making the Base for the Focal Point
I cut off some Cardboard that was part of some packaging.

I began to peel away the top layer of the cardboard.

I peeled away more of the cardboard.

I continued with this process until the top layer was peeled off and the corrugated cardboard was revealed.

I added a few layers of Gesso to the corrugated cardboard leaving about 15 minutes between each layer.

I cut another section of cardboard the same size as the Gessoed one, I didn’t peel the top layer off it but I added gesso to the edges of it. Paint Brushes.

I spread ‘Anita’s Tacky PVA Glue’ all around the back of the second cardboard piece and attached it to the Mixed Media Folder. This piece of cardboard was added to the craft for added height and interest. Anita’s Tacky Glue.

I put Tacky PVA Glue on the back of the corrugated cardboard and attached it on top of the first cardboard piece.

A closer view of the cardboard layers.

Attaching the Butterfly to the Mixed Media Folder
I had a Butterfly Patterned Wallpaper Sample. I cut around this Teal and Purple Butterfly to use for the Focal Point on this Craft.

I put PVA Glue all over the back of the Butterfly and attached it to the corrugated cardboard.

I took out some of my Glitter Powder Eyeshadows.

I put Tacky PVA Glue on the corrugated cardboard with a small paintbrush, then sprinkled some white glitter eyeshadow over the glue on the cardboard.

More Jewellery added to the Piece
I have a bag of either broken or items of jewellery I don’t wear anymore. I got this Purple Flower which was from a Necklace, the necklace part was purple rope, it had become worn and was beginning to fray so I threw that part out and kept the Flower pendant.

I attached it to the top left hand side of the Folder using ‘Heavy Gel Medium’. Heavy Gel Matte.

This Silver accessory is from an Earring, I liked the shape so had kept it.

This Purple diamond piece had fallen off a Ring.

I attached the Silver Earring to the right hand side of the Mixed Media Piece with PVA Glue, I attached the Purple Ring in the inside of the Earring using Heavy Gel Medium. Heavy Gel Matte.

This is a full side angle view of the Folder with the Accessories added.

Making and Attaching the Sentiment
This ‘Dream BIG’ Sheet came with the Shadow Box Frames I have bought. I liked the Font and kept it for my Crafts.

I cut out the words ‘Dream’ and ‘BIG’.

I bought a Blind years ago and had to get it made smaller to fit a Door. This is the excess fabric from the Blind.

I cut out 2 pieces of fabric from the Blind to frame the words ‘Dream BIG’.

I attached the words to the fabic with PVA Glue.

I cut out 2 pieces of cardboard to give height for the words on the Folder.

I attached the cardboard to the back of the fabric with PVA Glue and attached them to the Folder with ‘Heavy Gel Medium’.

Finishing Touches to the Mixed Media Art
I have a beaded bracelet which I no longer wear anymore.

I cut the string off the bracelet and glued all the small teal beads to the top right hand side of the Mixed Media Folder with PVA Glue. Anita’s Tacky Glue.

I put PVA Glue on the corrugated cardboard and sprinkled the Silver Glitter Eyeshadow over it.

I added more of the green and purple nail varnishes in different areas.

I added glue and white glitter eyeshadow to various parts of the Folder.

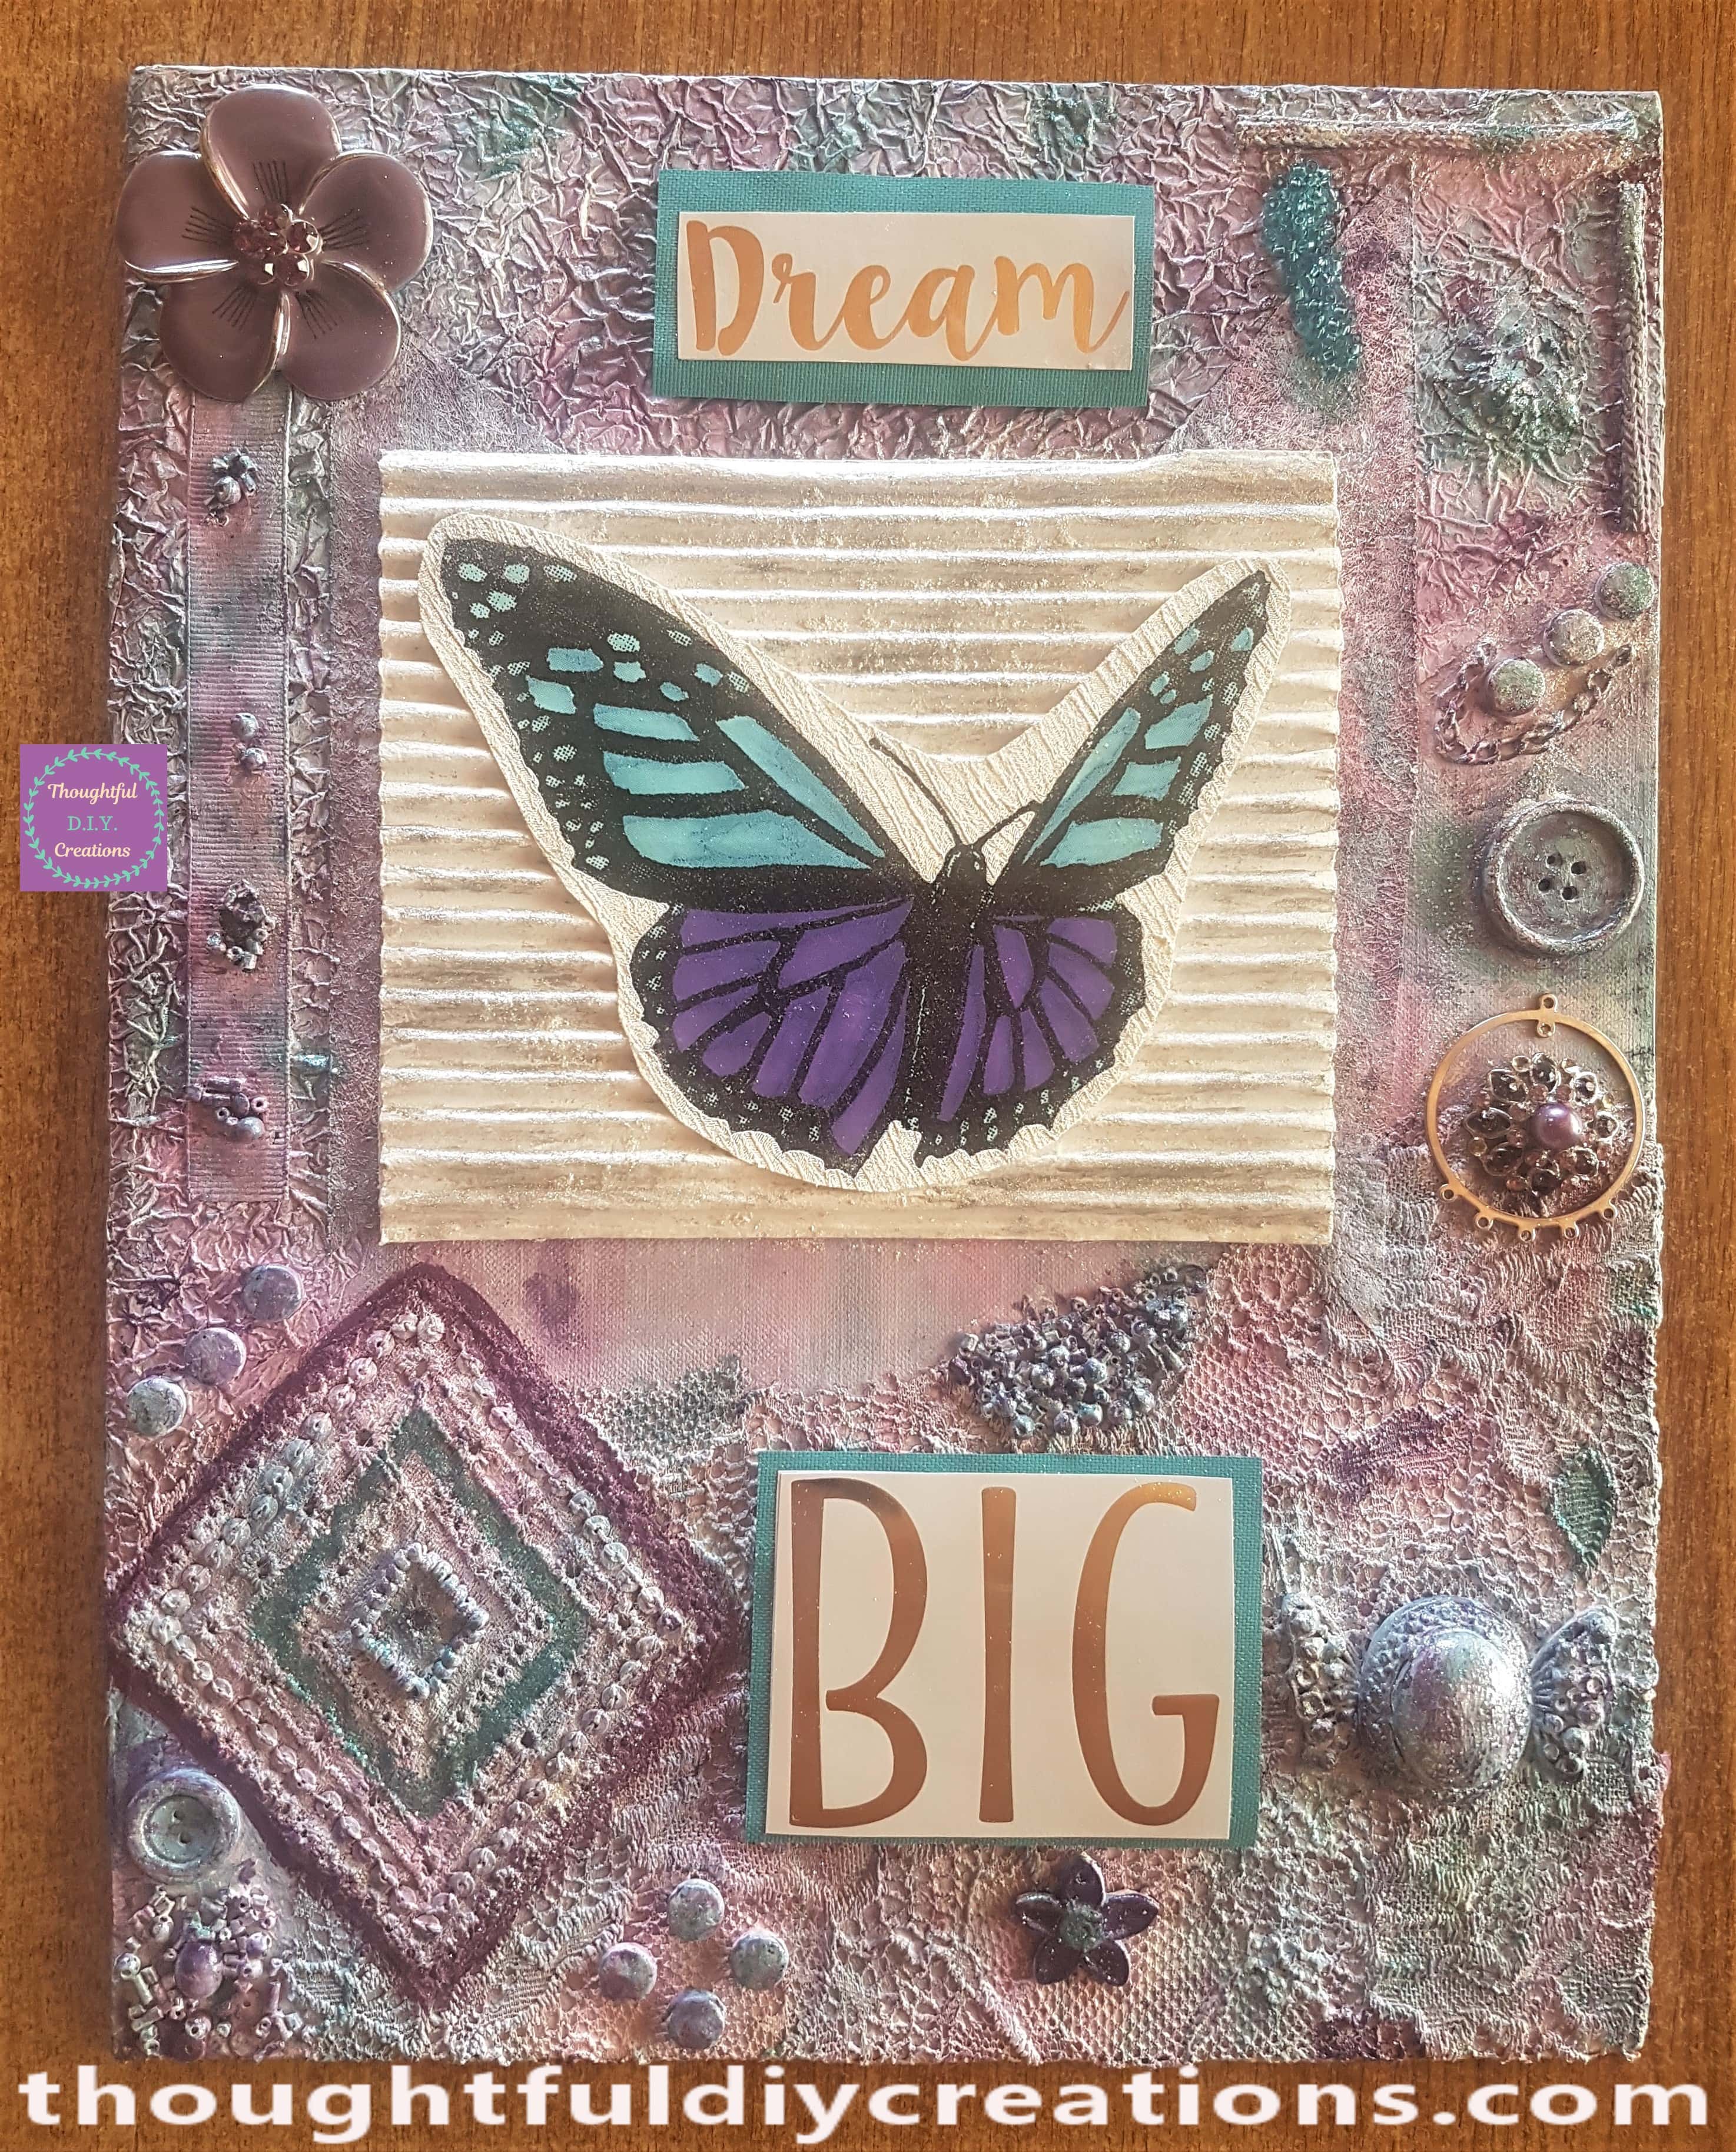
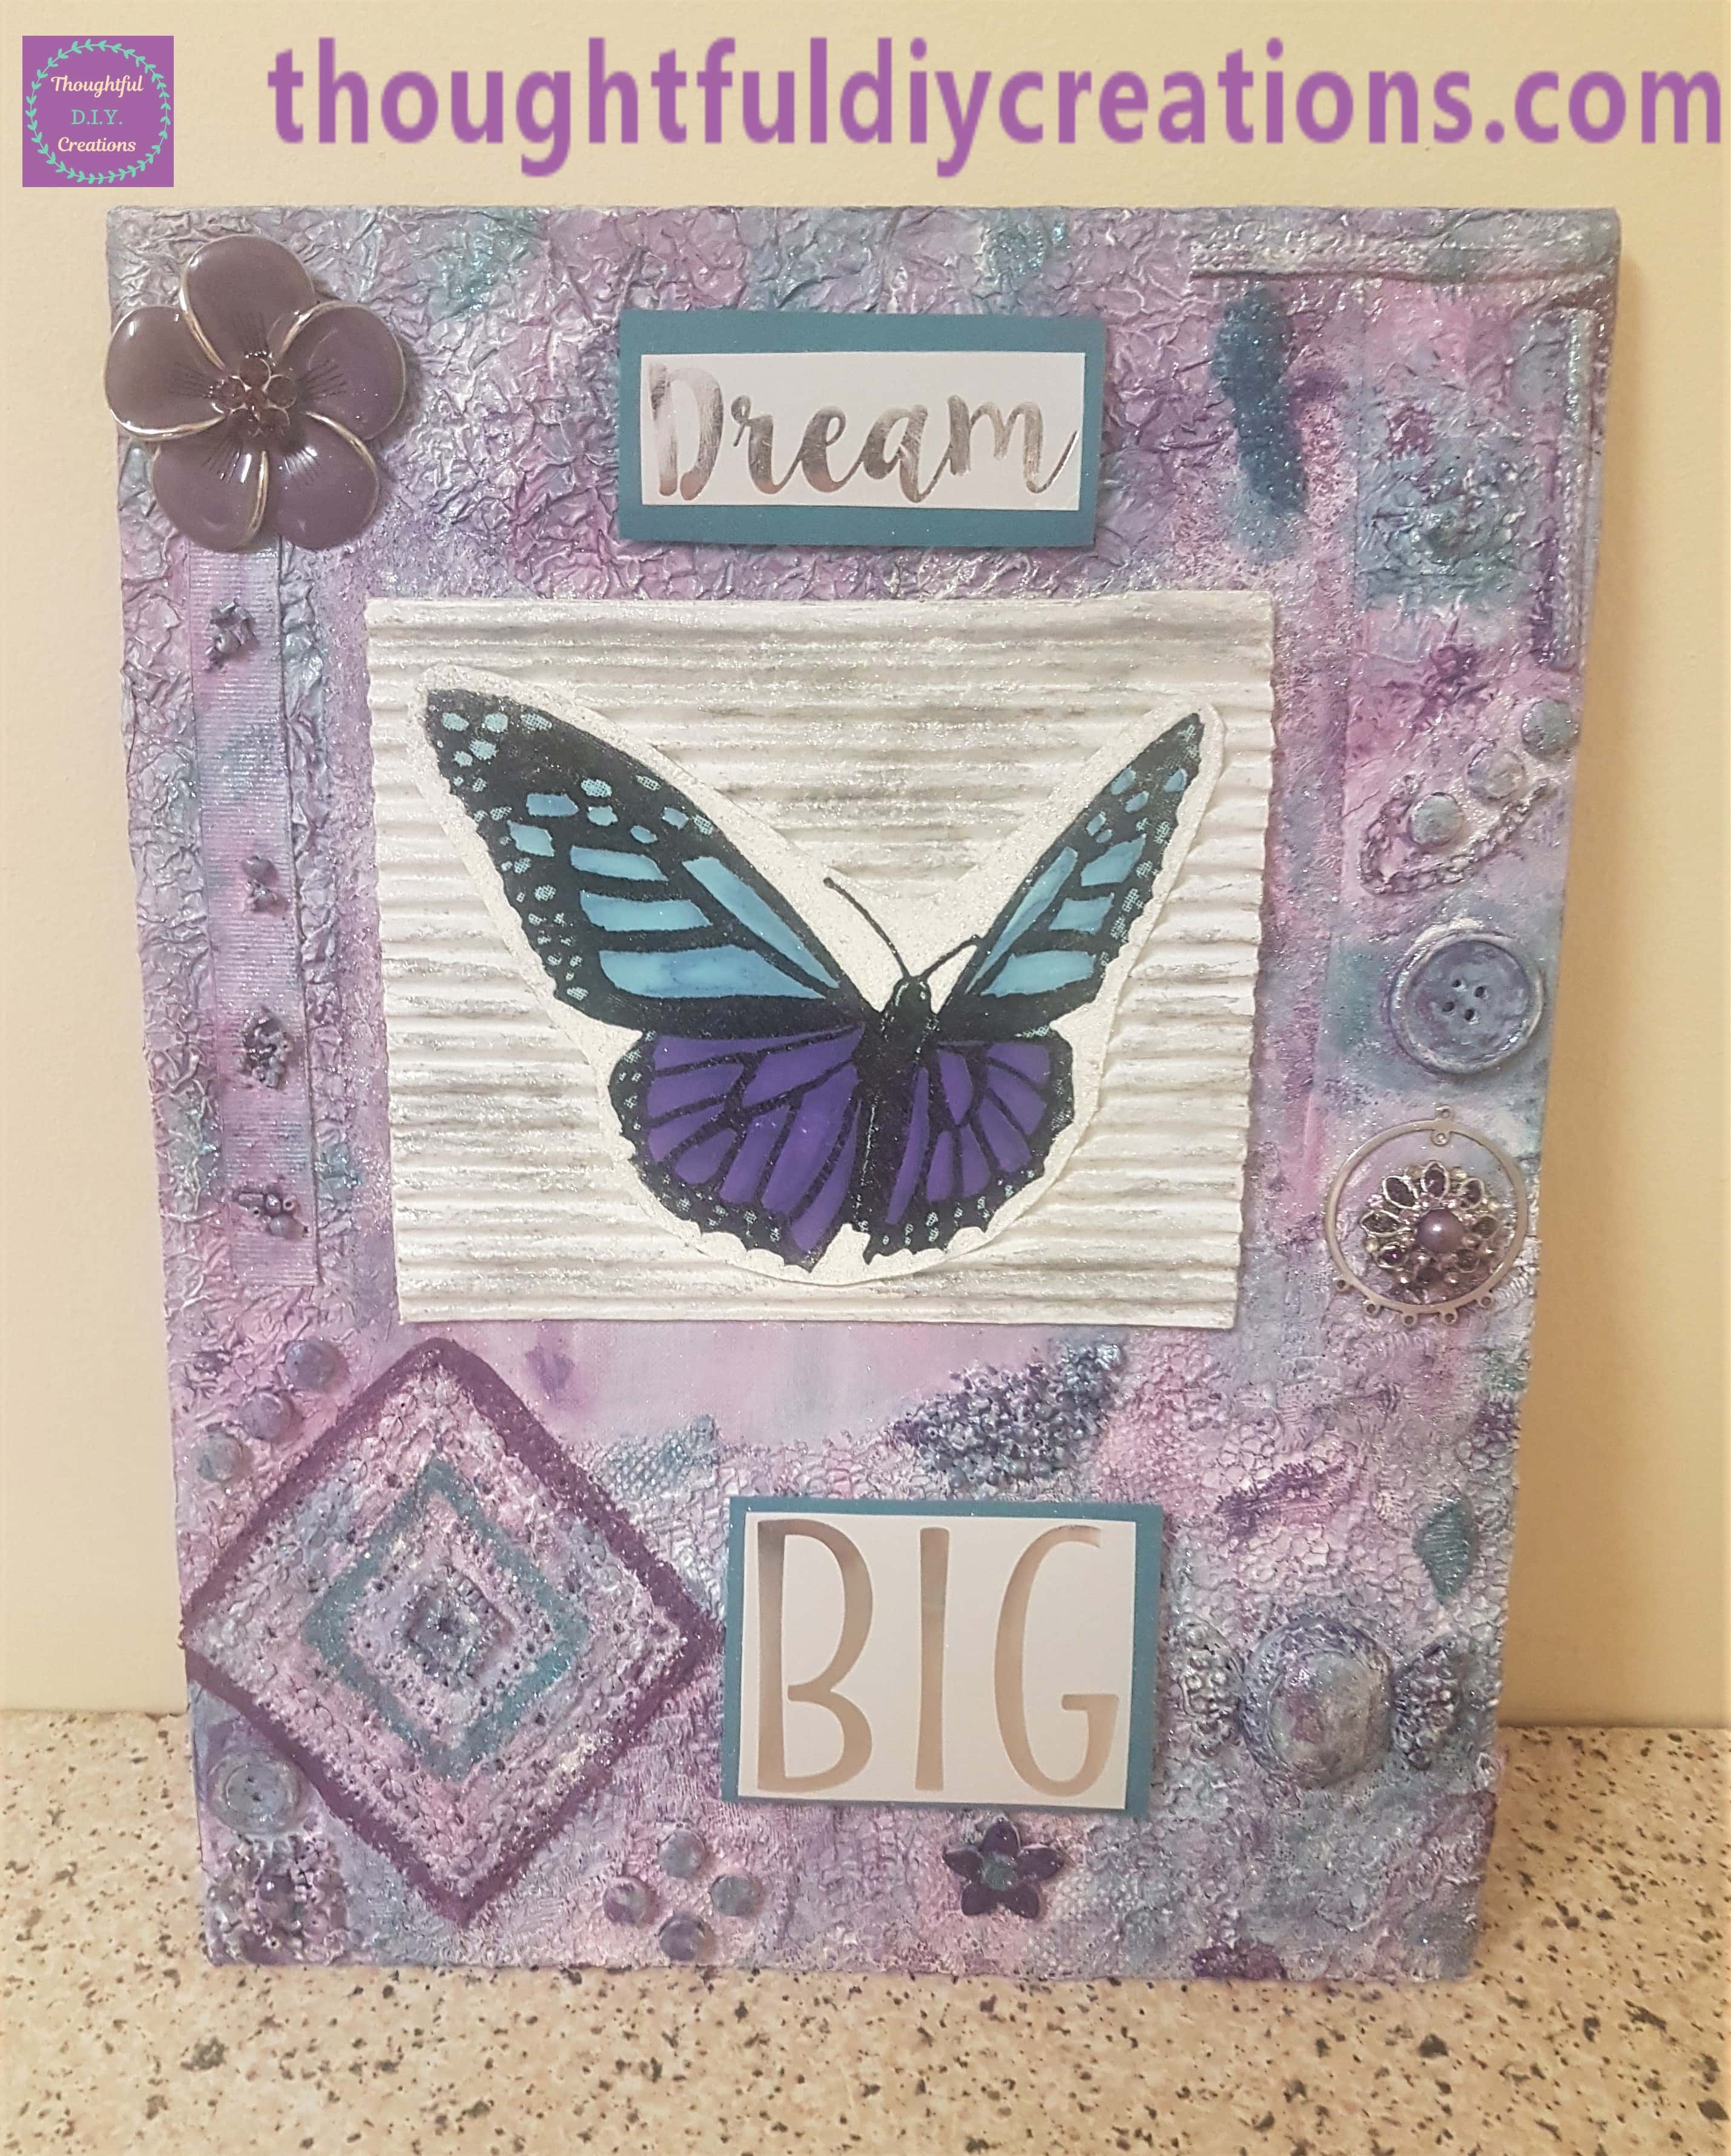
This Completed the Mixed Media Art from Recycled Materials Craft.

Below are some close- up and full view images of the Completed Craft.


Conclusion
I was delighted with how my Mixed Media Art Piece turned out. I have always loved Mixed Media Crafts but always put off making one as I didn’t have all the lovely Mixed Media supplies I have seen other people use in their crafts. I decided to try and make a full project with recycled materials and I’m so happy with the outcome.
I hope it inspires you to get creating with what you already have because if you keep putting it off for different reasons you will probably never start. I always thought I’d love to make different things but I’ll wait until I have enough supplies to make it but not having all the fancy materials can actually make you more creative with what you do have.
I think the Folder was a great alternative to a ‘Canvas Board’, the Tin Foil was a good replacement for ‘Crackle Paste’. The jewellery beads were used instead of ‘Art Stones’. The Cardboard is a Budget option to ‘Foam Pads’ for building layers. The Jewellery was re-purposed and used instead of store bought ‘Embellishments’. The eyeshadow and Nail Varnishes are a cheaper alternative to ‘Craft Glitters’. The Frame Sentiment was more frugal than ‘Sticker’ or ‘Paper Sentiments’ which can be bought.
I hope you gained some knowledge on how to use different Household Materials in your Arts and Crafts. There are so many other household products to use, if this is something you would like me to make more of, just fill out the Comment Box below this Blog Post and let me know if you found this Tutorial helpful. If there is something else you would like me to use or make in my Crafts feel free to let me know. Happy Crafting Everyone.
Thank you so much for taking the time to read my Blog Post.
Always Grateful,
T.D.C.
xoxox